# OllaMan
> Install, organize, and chat with Ollama AI models intuitively, simply, and elegantly. The ultimate Ollama GUI desktop application for managing local AI models on macOS, Windows, and Linux.
---
# Welcome to OllaMan
URL: https://ollaman.com/docs
> Your Professional Ollama Model Management Assistant
## What is OllaMan?
OllaMan is a modern **Ollama model management desktop application** that makes managing and using local AI models easy through an intuitive graphical interface. Enjoy powerful AI capabilities without writing any code.
**Name Origin**: OllaMan comes from the combination of "Ollama" + "Manager", representing a comprehensive management tool designed specifically for Ollama.
} title="Zero-Code Operation">
Fully graphical interface, easy for anyone to get started, no technical background required
} title="Efficient Management">
One-stop management for all models, real-time system monitoring, smart download manager
} title="Multi-Server Support">
Connect multiple Ollama servers for better team collaboration
} title="Local First">
All data stored locally, protecting your privacy and conversation content
---
## Core Features
### Dashboard
Real-time system status overview:
- Installed models statistics
- Running models monitoring
- Memory and disk usage
- Model expiration countdown
### Smart Chat
Natural conversations with AI models:
- Streaming responses with real-time generation
- Markdown support with code highlighting
- Adjust model parameters (Temperature, Top P, Top K)
- Automatic chat history saving
- Thinking process visualization
### Model Management
Easily manage your model library:
- Browse online model library (1000+ models)
- One-click download any version
- View locally installed models
- Delete unwanted models to free space
- Multi-task parallel downloads
### Multi-Server Management
Flexible server connectivity:
- Add remote servers
- Real-time health monitoring
- Multiple auth schemes (Basic / Bearer / custom headers)
- Quick server switching
---
## Quick Start
### Install Ollama
Visit [ollama.com](https://ollama.com/download) to download and install Ollama
### Verify Installation
Open your browser and visit `http://localhost:11434`, confirm "Ollama is running" is displayed
### Launch OllaMan
Open the OllaMan app, it will automatically connect to the local Ollama service
### Start Using
Select a model and start your first AI conversation!
Check out our [Quick Start Guide](/docs/quick-start) to master OllaMan in 5 minutes.
---
## Use Cases
Quickly test and compare different models, adjust parameters to optimize output quality
Use AI assistants for writing, translation, content ideation, and copywriting optimization
Use specialized models like CodeLlama for code generation and technical Q&A
Share remote Ollama servers, multiple users accessing the same model resources
Explore the latest open-source AI models for learning and research
Fully local operation, all conversation data saved locally to protect privacy
---
## System Requirements
### Runtime Environment
- **Operating System**: macOS 10.15+, Windows 10+, Linux (mainstream distributions)
- **Required Service**: Ollama service must be running
- **Network**: Internet connection required for browsing and downloading models
### Hardware Recommendations
- **Memory**: 8GB+ recommended (depends on model size)
- **Disk Space**: Depends on number of models (single model ranges from hundreds of MB to tens of GB)
- **GPU**: GPU acceleration supported (optional)
---
## Explore Documentation
---
## Get Help
- Join our community discussions
- Submit issues on GitHub
- Contact technical support team
- Read the full documentation
Start your AI journey now!
---
# Quick Start
URL: https://ollaman.com/docs/quick-start
> Zero-code setup, get started with OllaMan in 5 minutes
## Welcome to OllaMan
OllaMan is a professional Ollama model management desktop application that makes managing and using AI models easy through a friendly graphical interface, no coding required.
This guide will walk you through the complete process from installation to your first conversation.
---
## Step 1: Install Ollama
OllaMan requires Ollama as the backend service. Let's install it first.
### Download and Install
Visit [ollama.com/download](https://ollama.com/download) and install Ollama for your operating system.
### Verify Installation
After installation, Ollama will automatically run in the background. Let's verify:
1. Open your web browser
2. Navigate to `http://localhost:11434`
3. If the page displays **"Ollama is running"**, congratulations, installation successful!
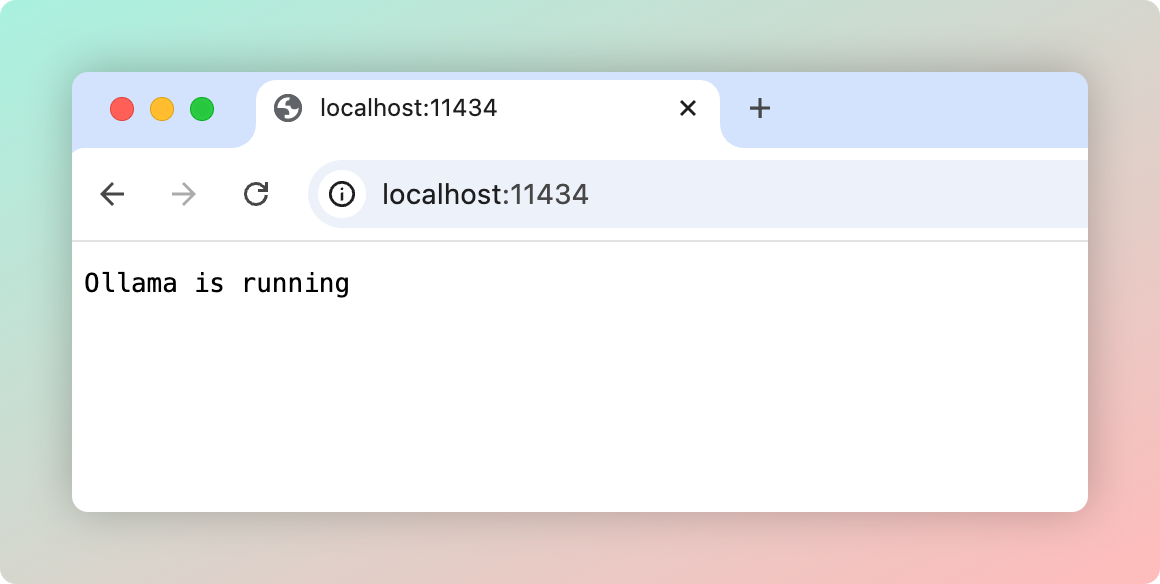
If your browser shows "Cannot connect", please check:
- System tray (Windows) or menu bar (macOS) for the Ollama icon
- Try restarting the Ollama application
- Windows users can check Ollama service status in "Services"
---
## Step 2: Configure Ollama
Before connecting OllaMan, we need to configure Ollama with necessary settings.
### Enable Network Access
If the Ollama server is deployed on a remote host, you need to configure it to allow external network access:
### Locate the Ollama Icon
- **Windows**: Find the Ollama icon in the system tray at the bottom-right corner
- **macOS**: Find the Ollama icon in the menu bar at the top-right corner
### Open Settings Menu
Right-click (or left-click) the Ollama icon and select **"Settings"**
### Enable Network Access
In the settings window, find and enable the **"Expose Ollama to the network"** option
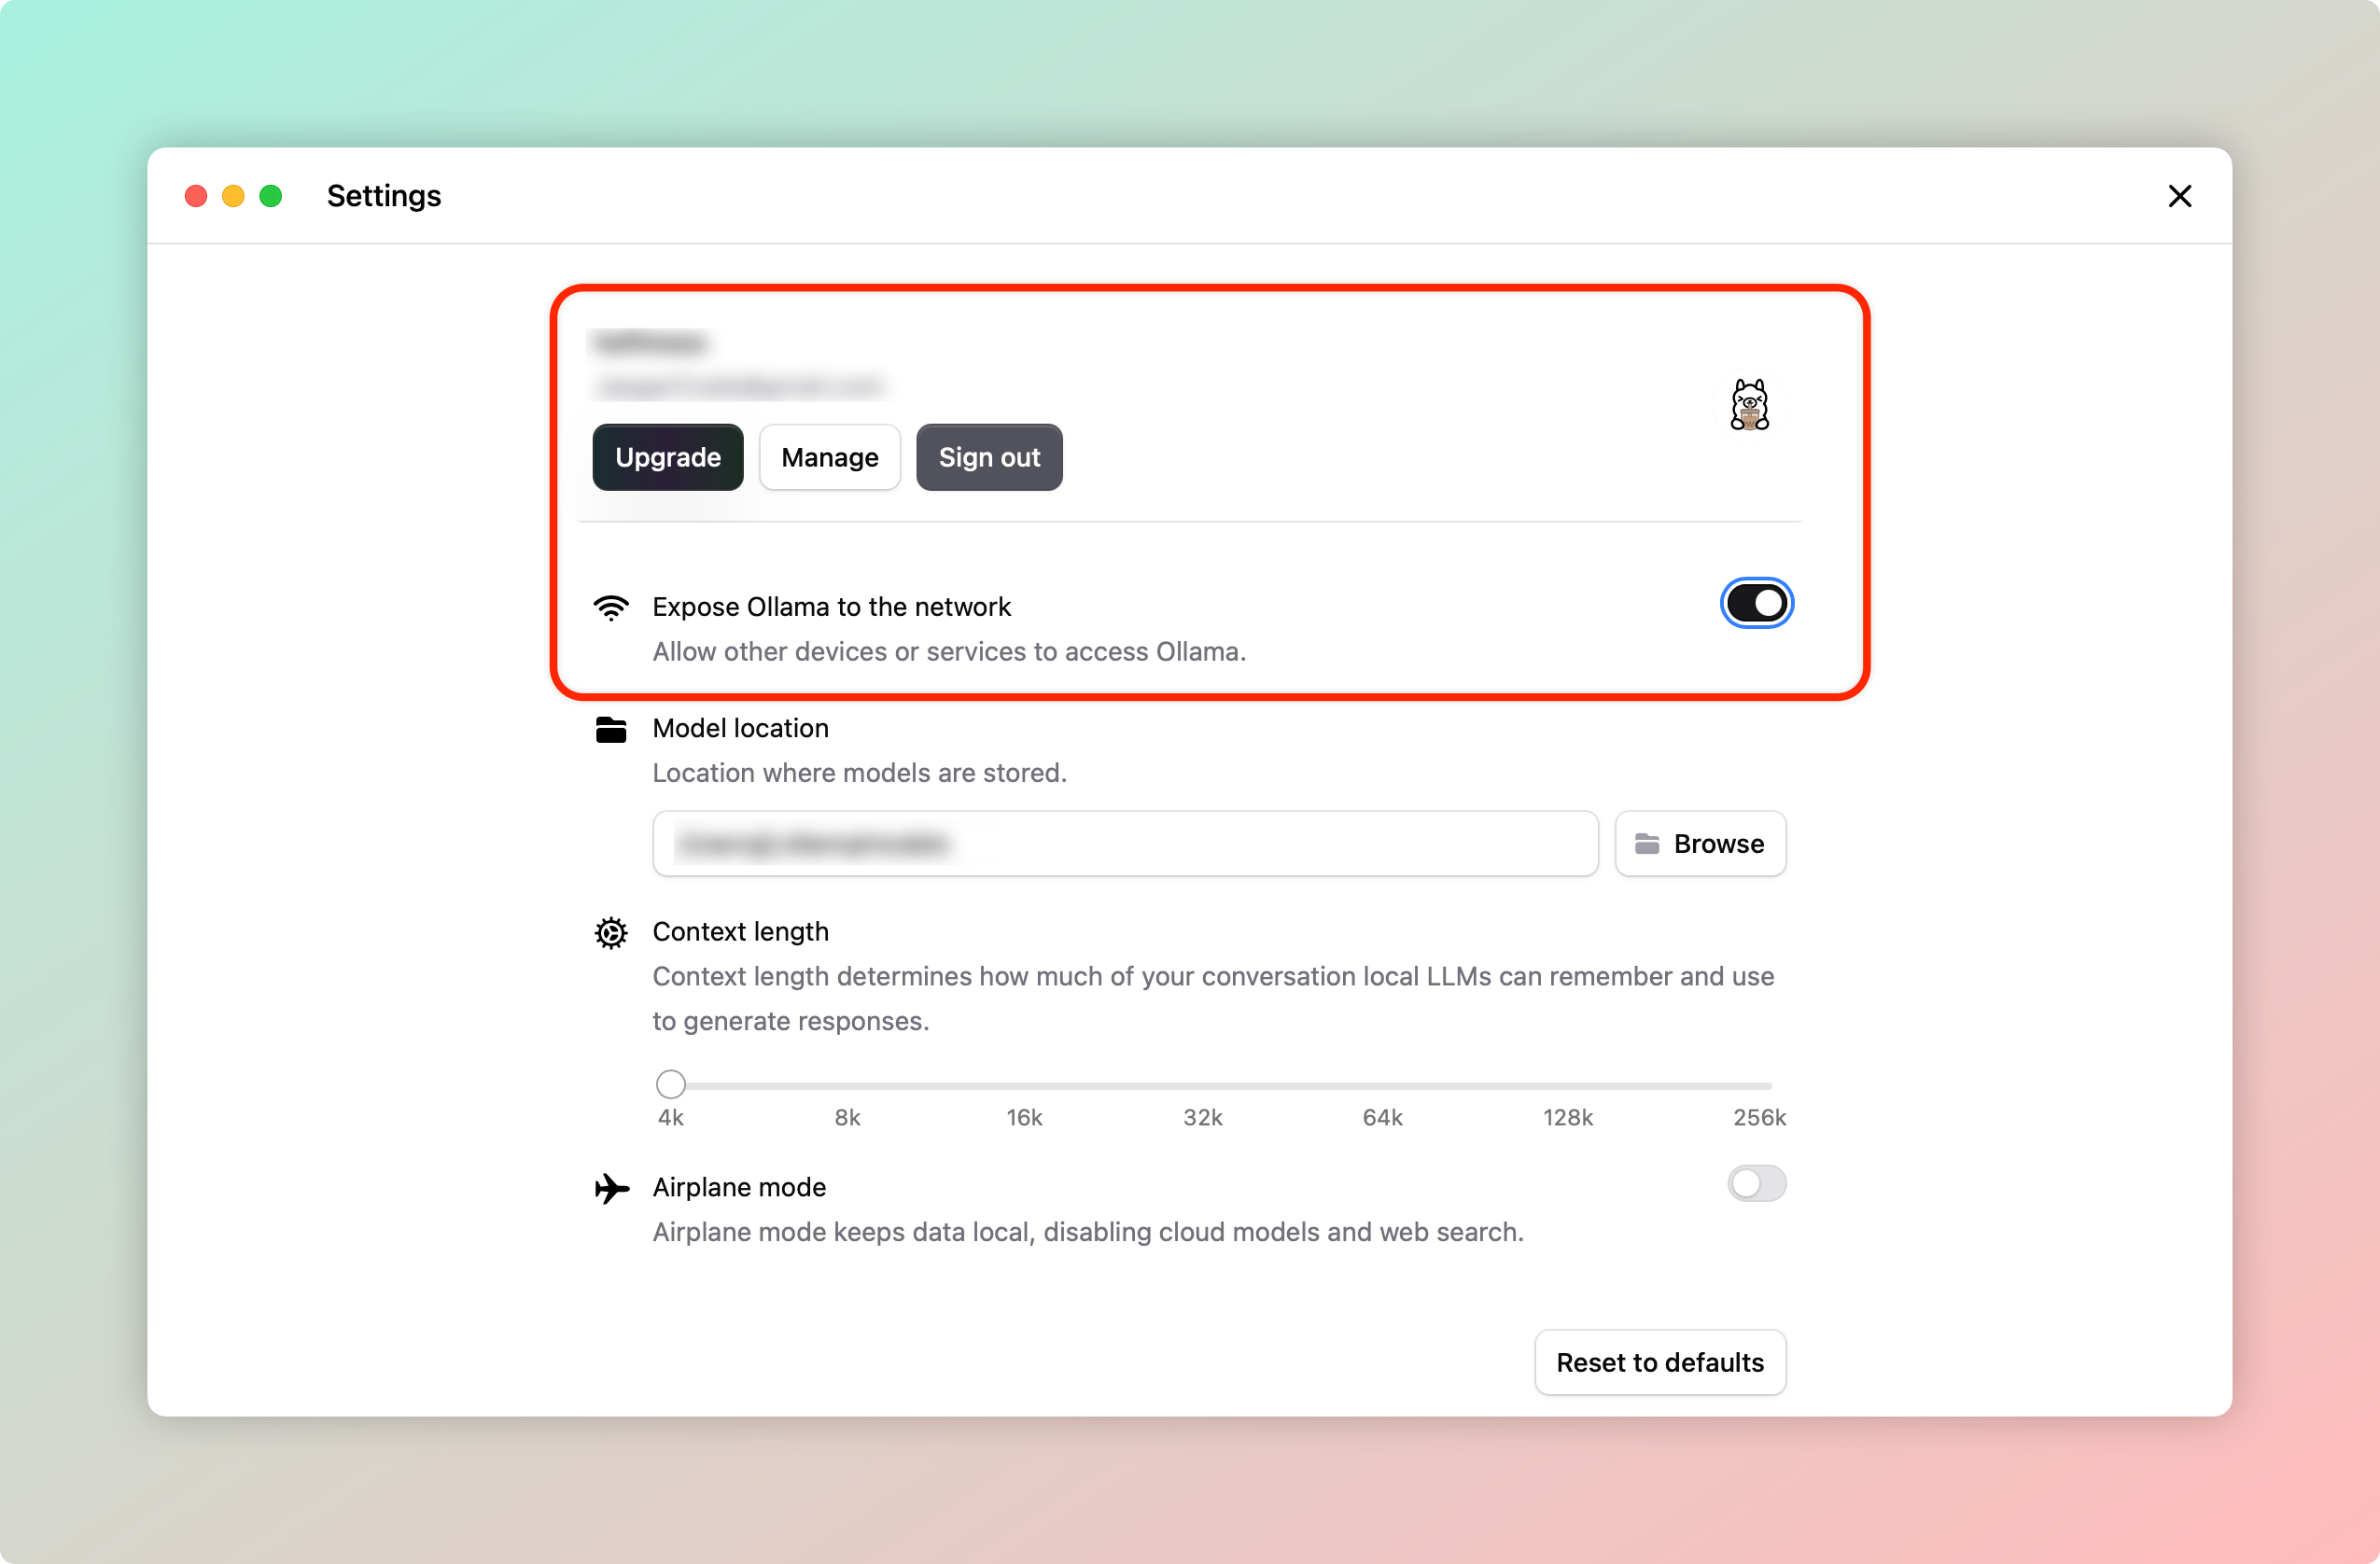
**Security Notice**: This option allows other devices on the same network to access your Ollama service.
- **Convenience**: Enables OllaMan and other management tools to connect
- **Security**: Only enable in trusted network environments
- **Recommendation**: Default settings are secure enough for local-only use
### Sign in to Ollama Account
If you want to use Ollama Cloud's online models, sign in to your account:
### Click Sign In
In the Ollama settings window, click the **"Sign in"** button
### Create or Sign In
- If you have an account, enter your email and password to sign in
- If you don't have an account, click **"Create Account"** to register
### Verify Sign-In Status
After successful sign-in, the settings window will display your account information
After signing in to your Ollama account, you can:
- Access online models on Ollama Cloud
- Sync your model list across multiple devices
- Favorite and manage your preferred models
---
## Step 3: Connect OllaMan
Now, let's launch OllaMan and connect to the Ollama service.
### Launch OllaMan
Double-click the OllaMan application icon to start the program.
### Configure Server Connection
On first launch, OllaMan will automatically attempt to connect to the local Ollama service:
1. At the top of the sidebar, you'll see the server selector
2. The default server address is `http://localhost:11434`
3. If connected successfully, you'll see a green "Connected" status indicator
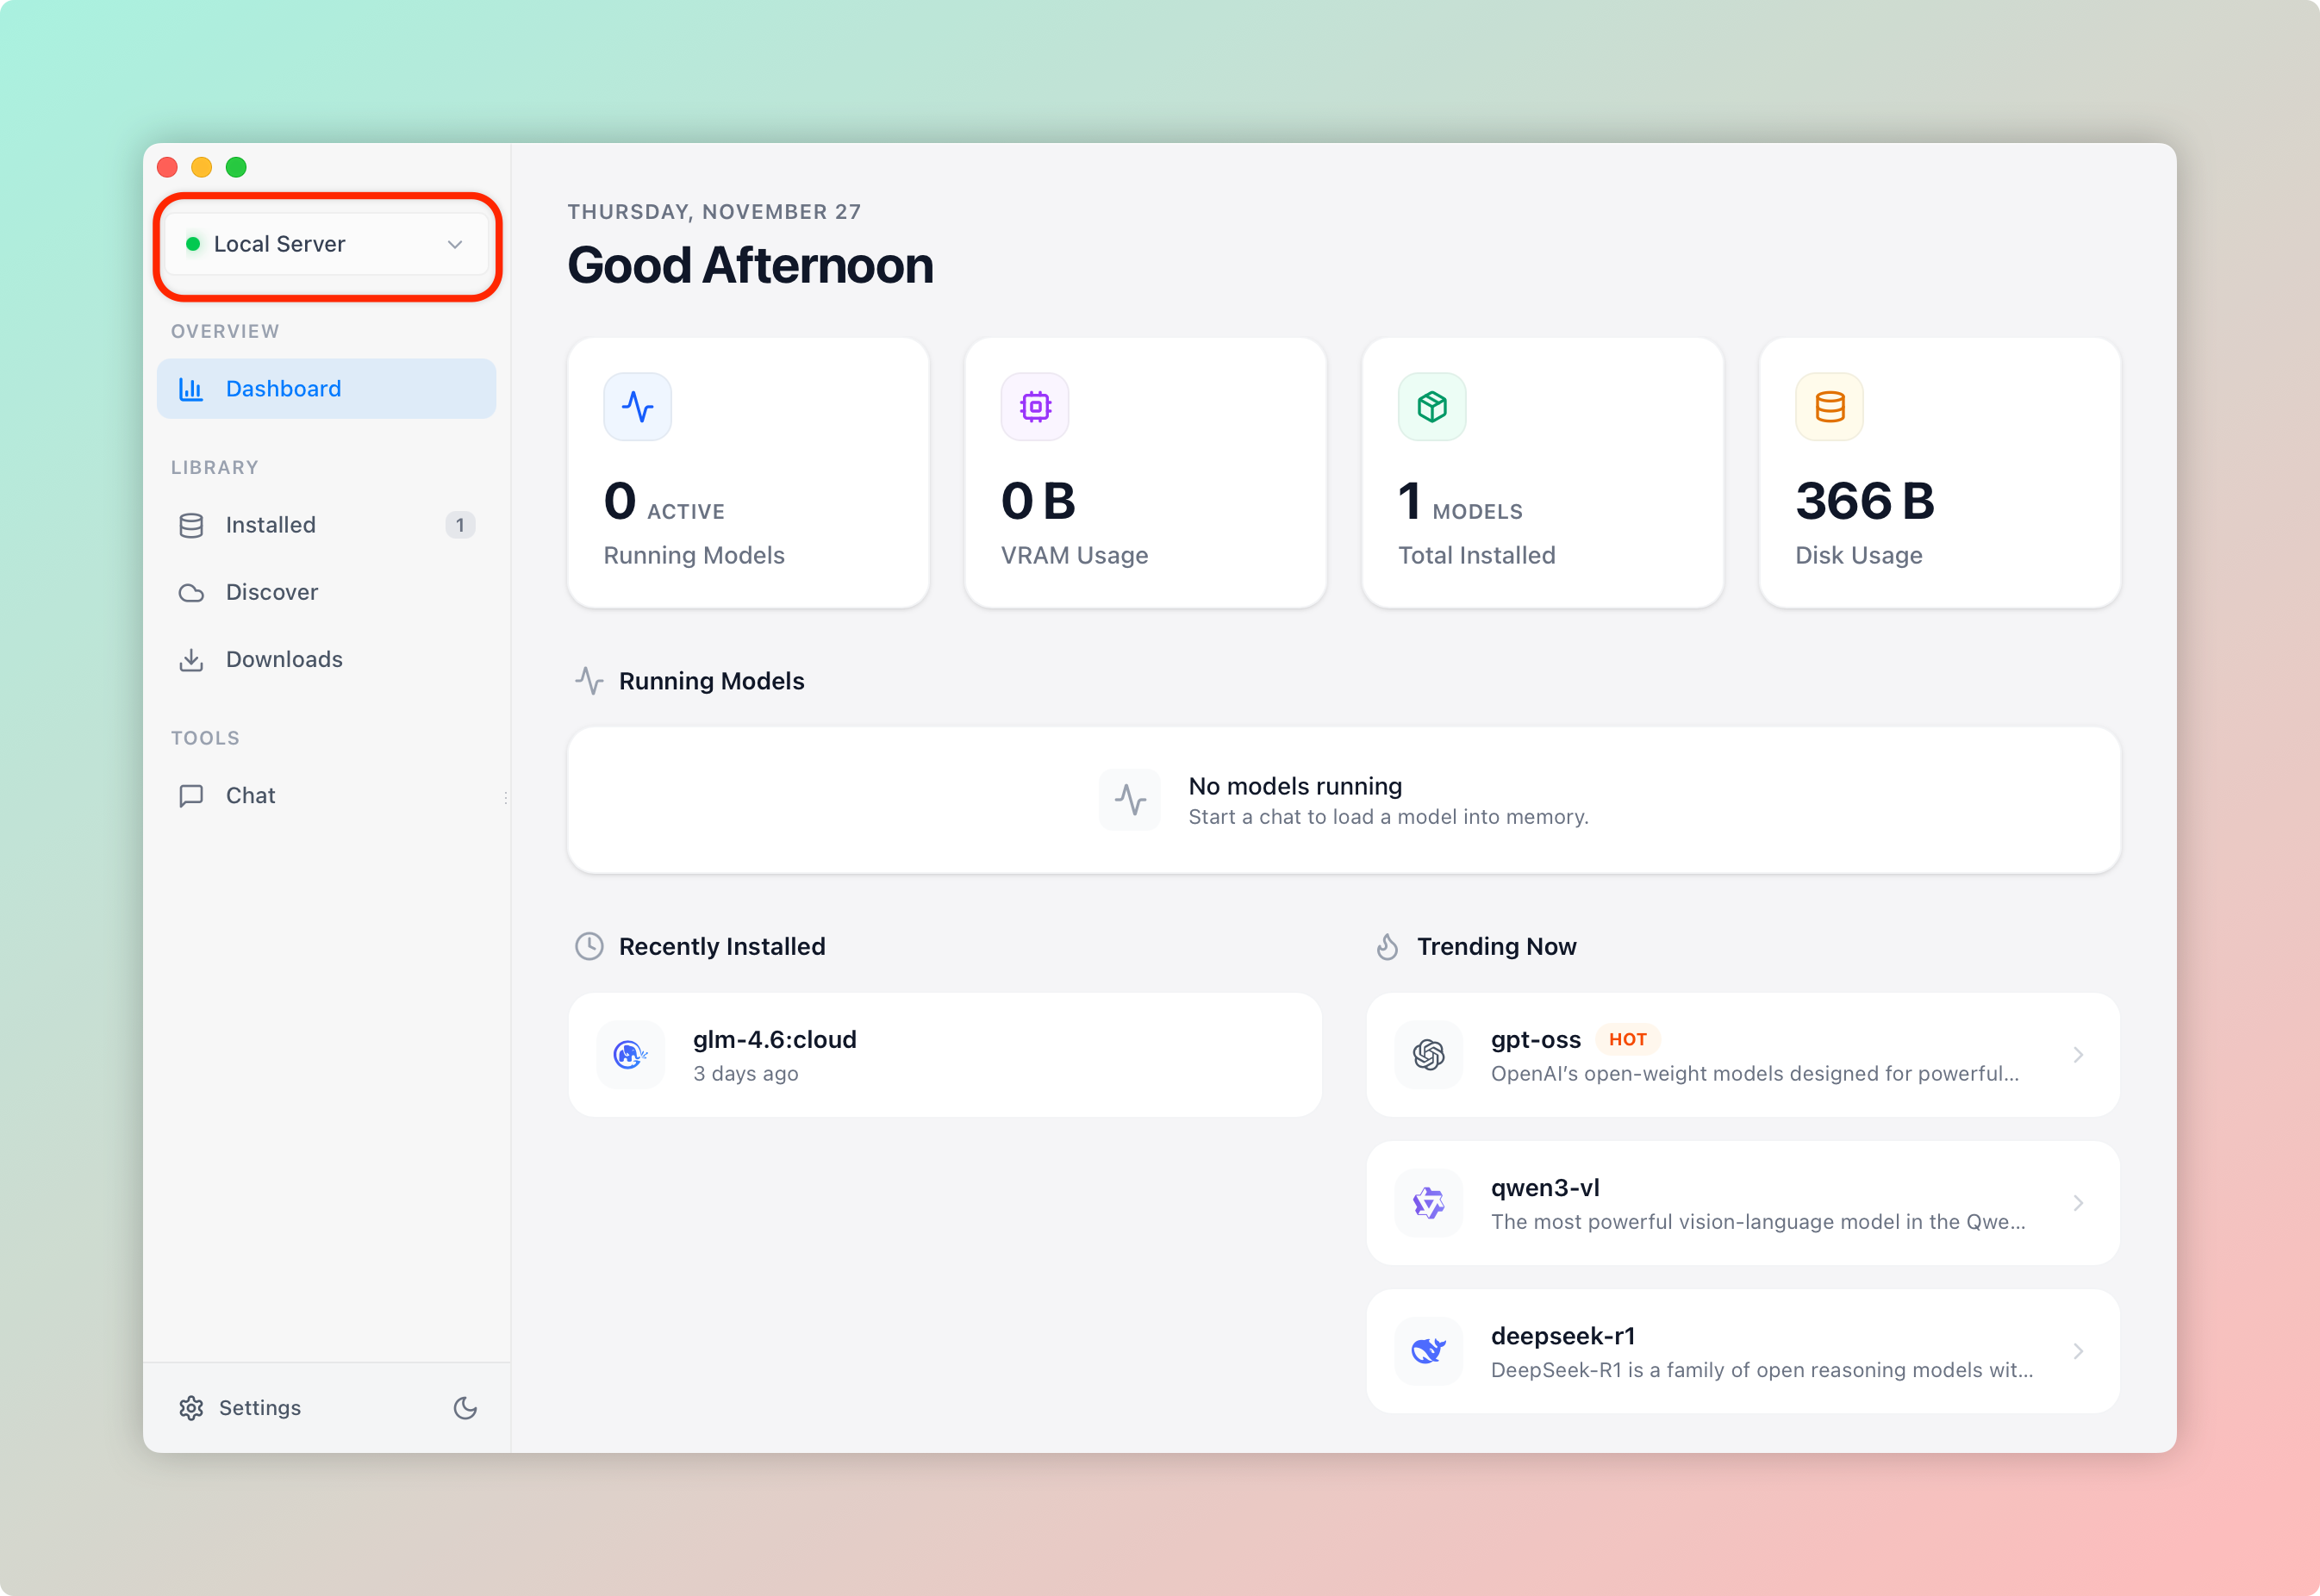
If it shows "Not Connected" status, please check:
- Confirm Ollama is running (verify by visiting http://localhost:11434)
- Confirm "Expose to network" option is enabled
- Try clicking "Test Connection" button to recheck
### Multi-Server Management
You can add multiple Ollama servers:
### Open Server Management
Click the server selector and choose **"Manage Servers"**
### Add New Server
1. Click the **"Add Server"** button
2. Enter server name (e.g., "Office Server")
3. Enter server URL (e.g., `http://192.168.1.100:11434`)
4. If required, pick an authentication scheme (Basic / Bearer / custom headers) and enter credentials
### Test and Save
Click **"Test Connection"** button, then click **"Save"** after successful connection
---
## Step 4: Manage Models
After successful connection, let's start managing your AI models.
### Browse Online Model Library
### Go to Online Models Page
Click **"Discover"** (Online Models) option in the sidebar
### Search for Models
Use the search box to find models you're interested in, such as:
- `llama3` - Meta's latest large language model
- `mistral` - High-performance open-source model
- `codellama` - Code generation specialist model
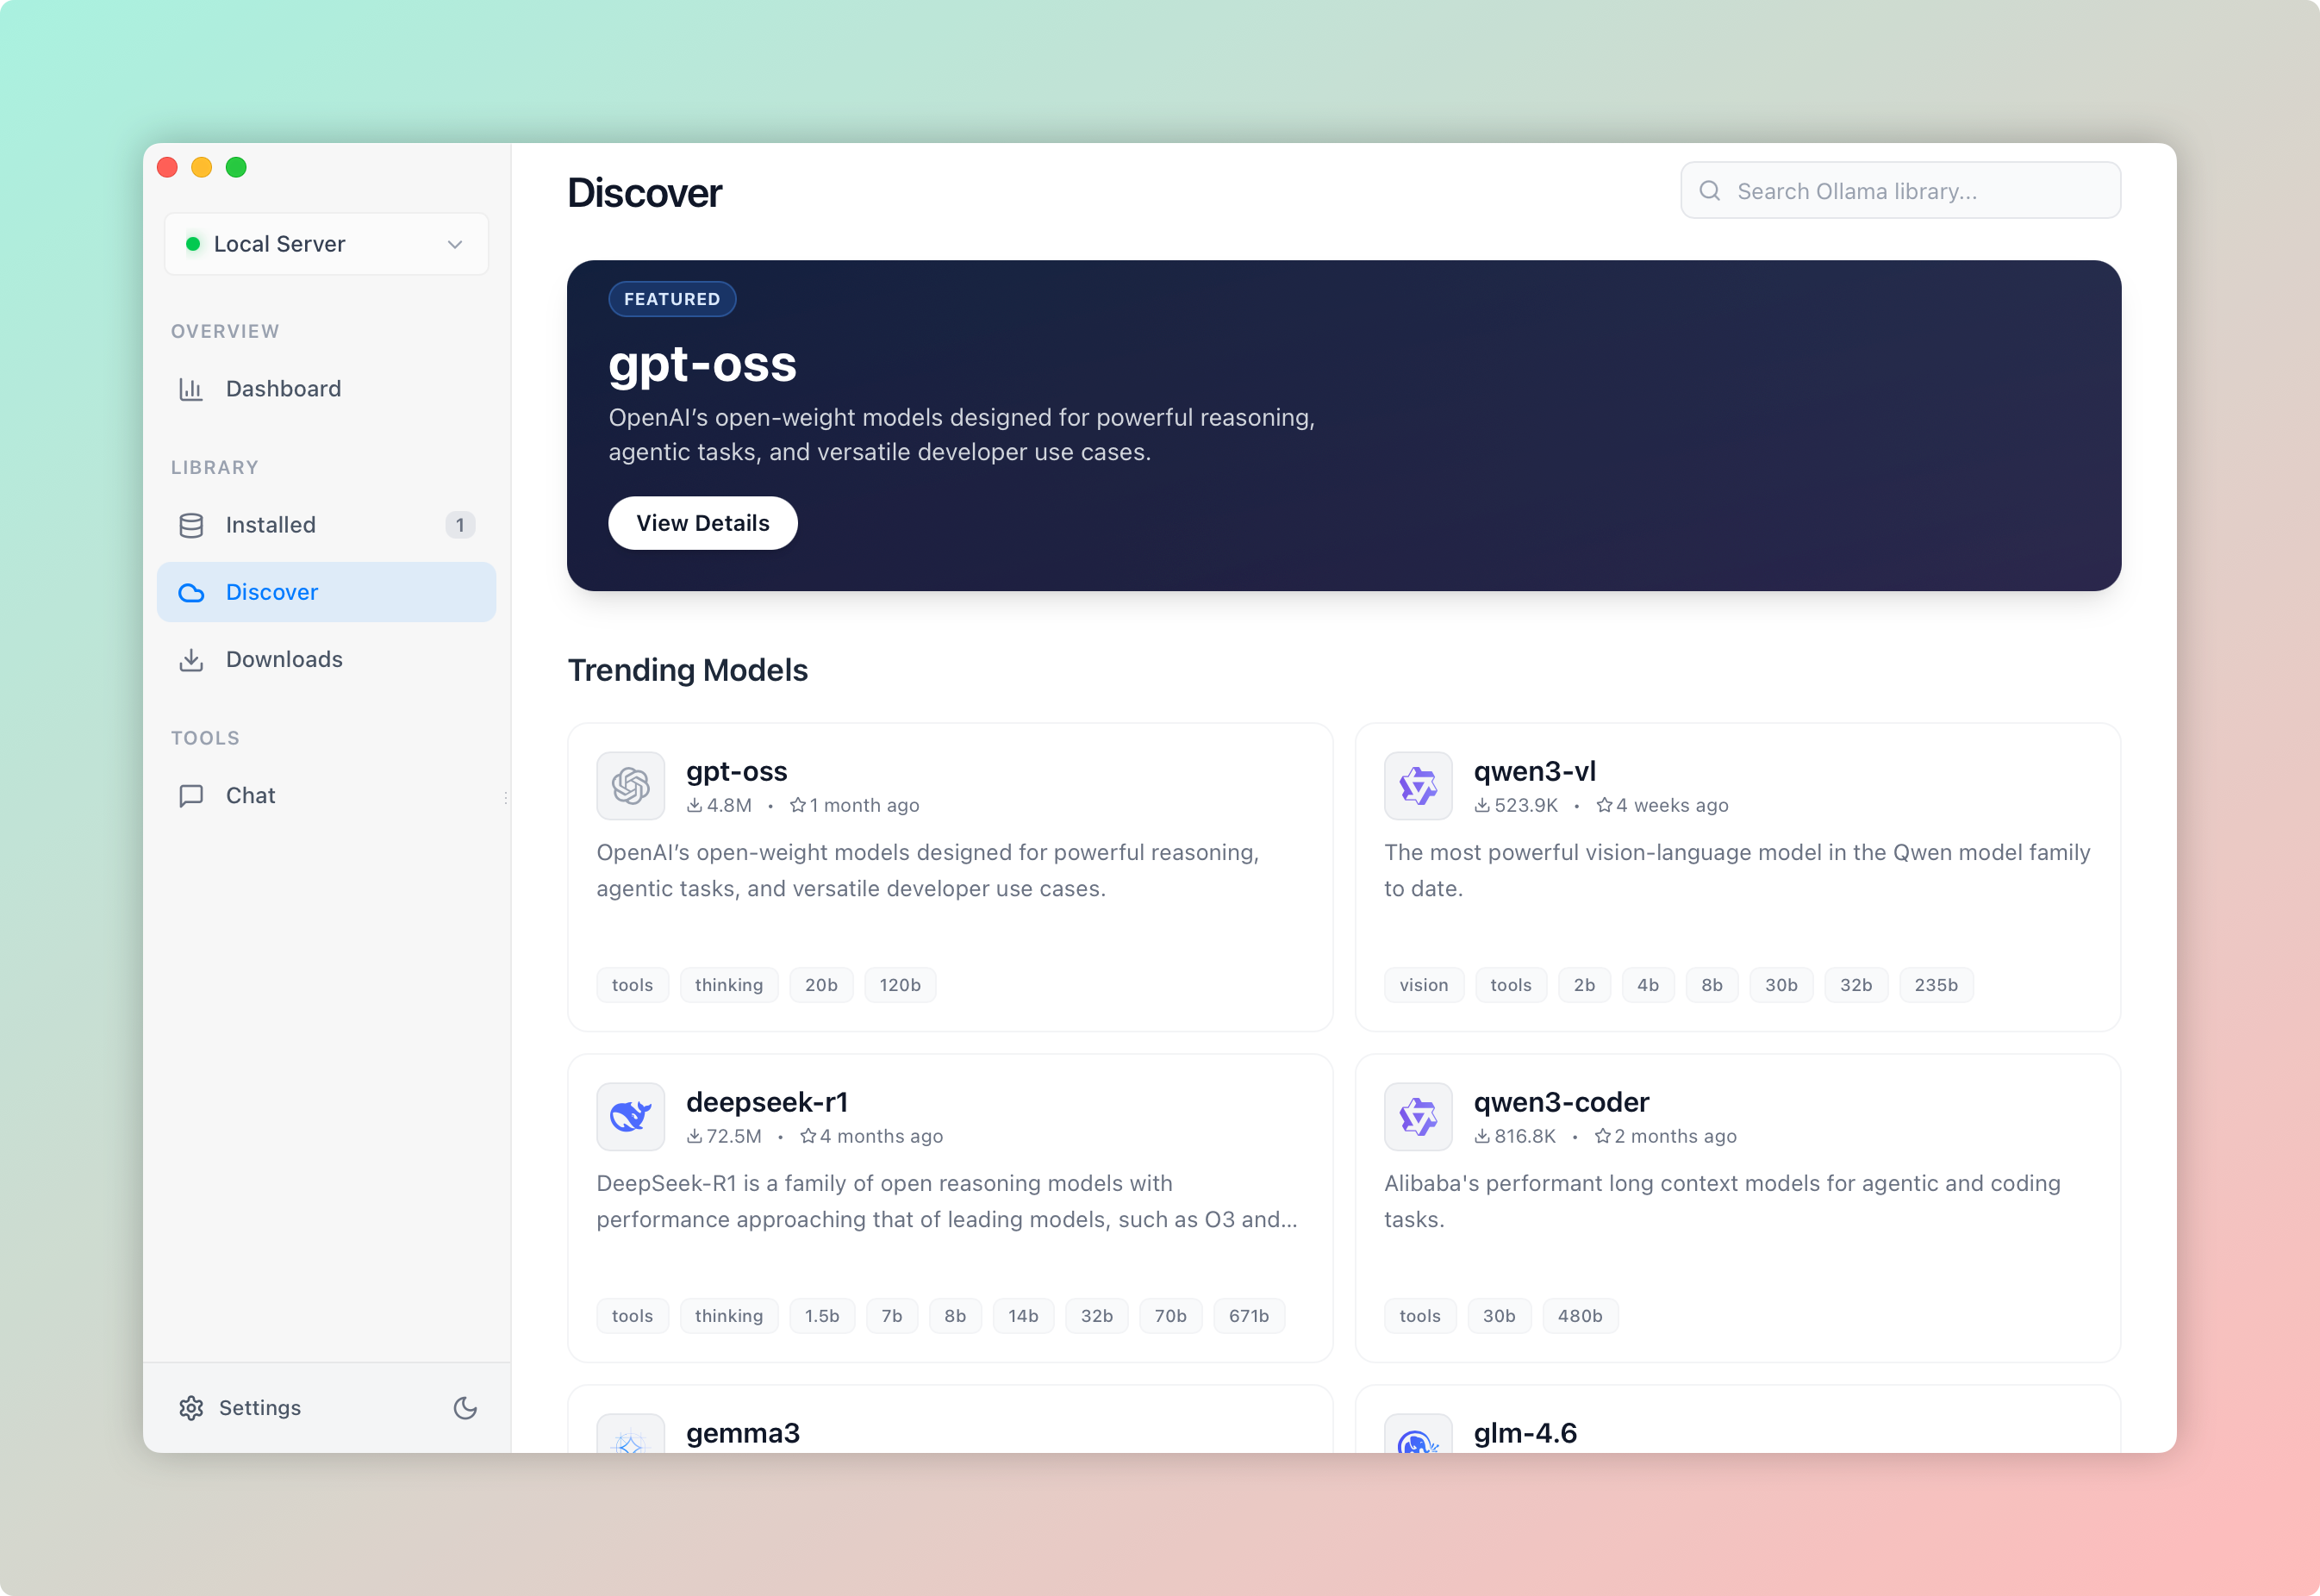
### View Model Details
Click any model card to see detailed information:
- Model description and capabilities
- Available versions and parameter sizes
- Download counts and update time
### Download Models
After finding the model you want, you can download it directly:
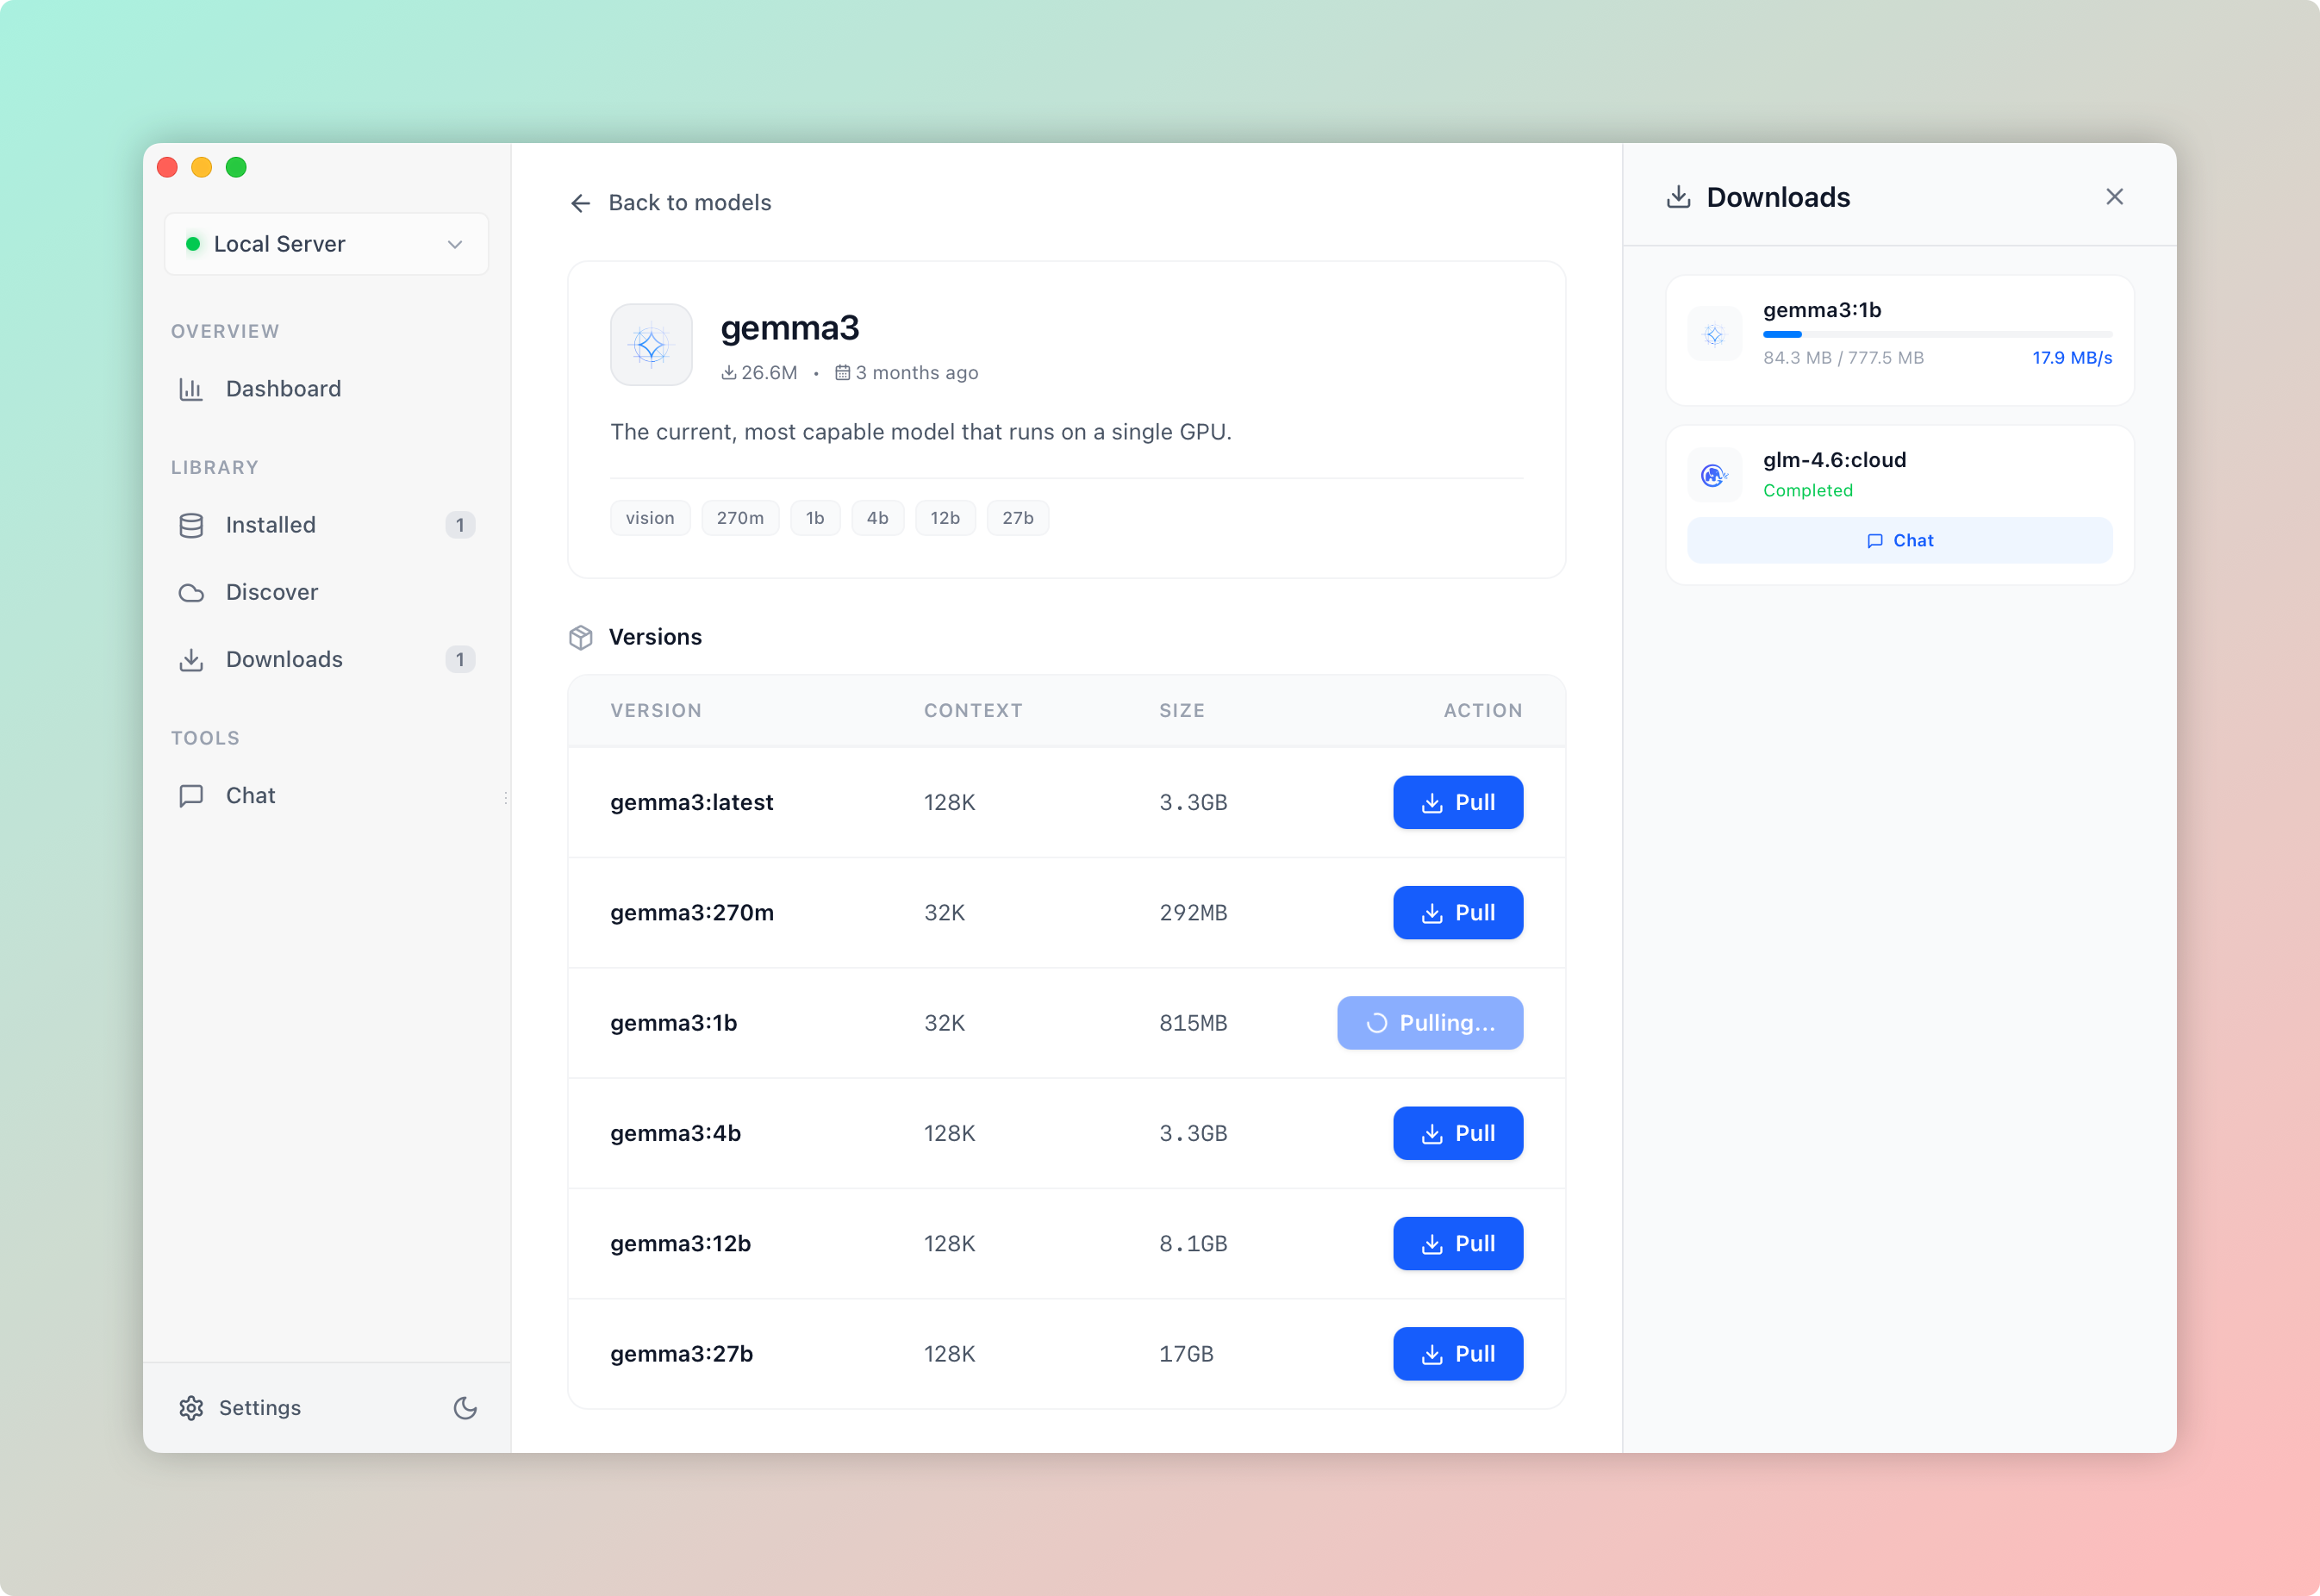
### Select Version
On the model details page, choose the version that suits you:
- Larger parameters mean stronger capabilities but more space and memory usage
- Recommend starting with smaller versions (e.g., 7B)
### Start Download
Click the **"Pull"** button next to the version
### Monitor Download Progress
The download manager will automatically appear on the right side, showing real-time:
- Download progress percentage
- Current speed
- Estimated remaining time
### View Local Models
### Go to Local Models Page
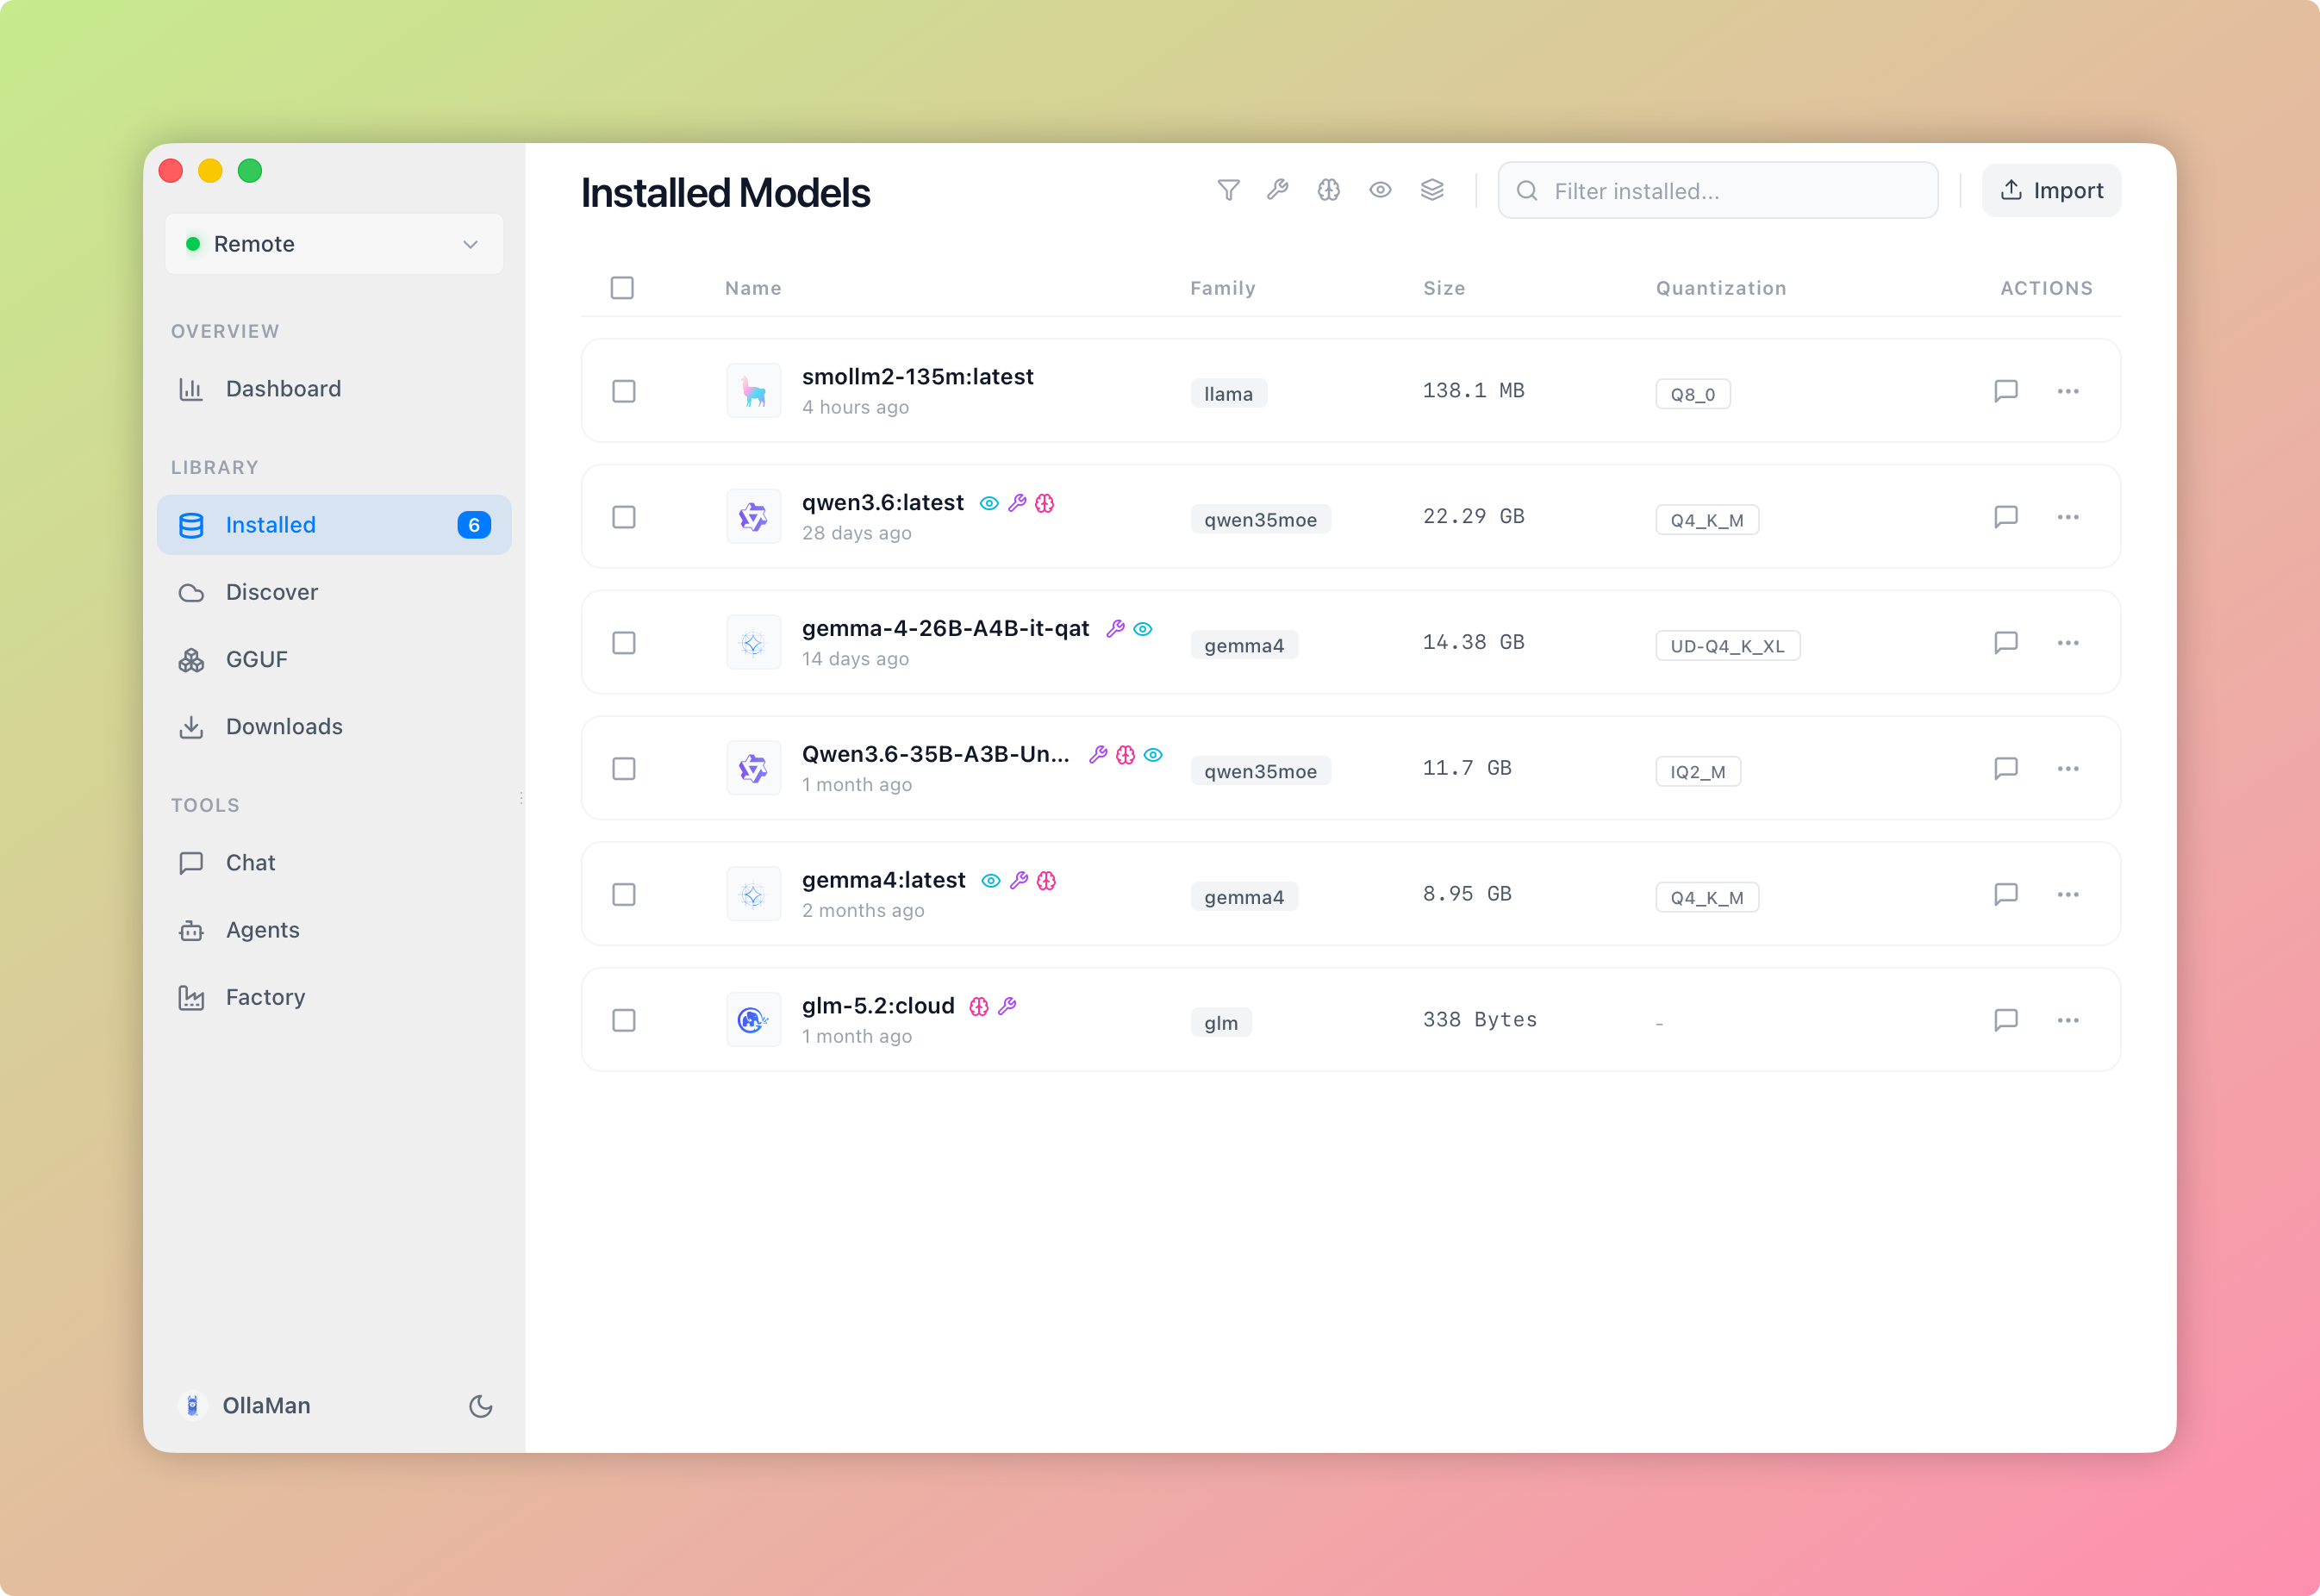
Click **"Installed"** (Local Models) option in the sidebar
### Browse Installed Models
You'll see all downloaded models, each card displays:
- Model name and tags
- Parameter size and quantization level
- Storage space and modification time
### Manage Models
Each model card has action buttons:
- **"Chat"**: Start conversation with the model
- **"Delete"**: Remove unwanted models to free up space
---
## Step 5: Start Chatting
Now, let's have your first conversation with an AI model!
### Select a Model
From the local models list, click the **"Chat"** button on any model
### Start Asking
### Type Your Message
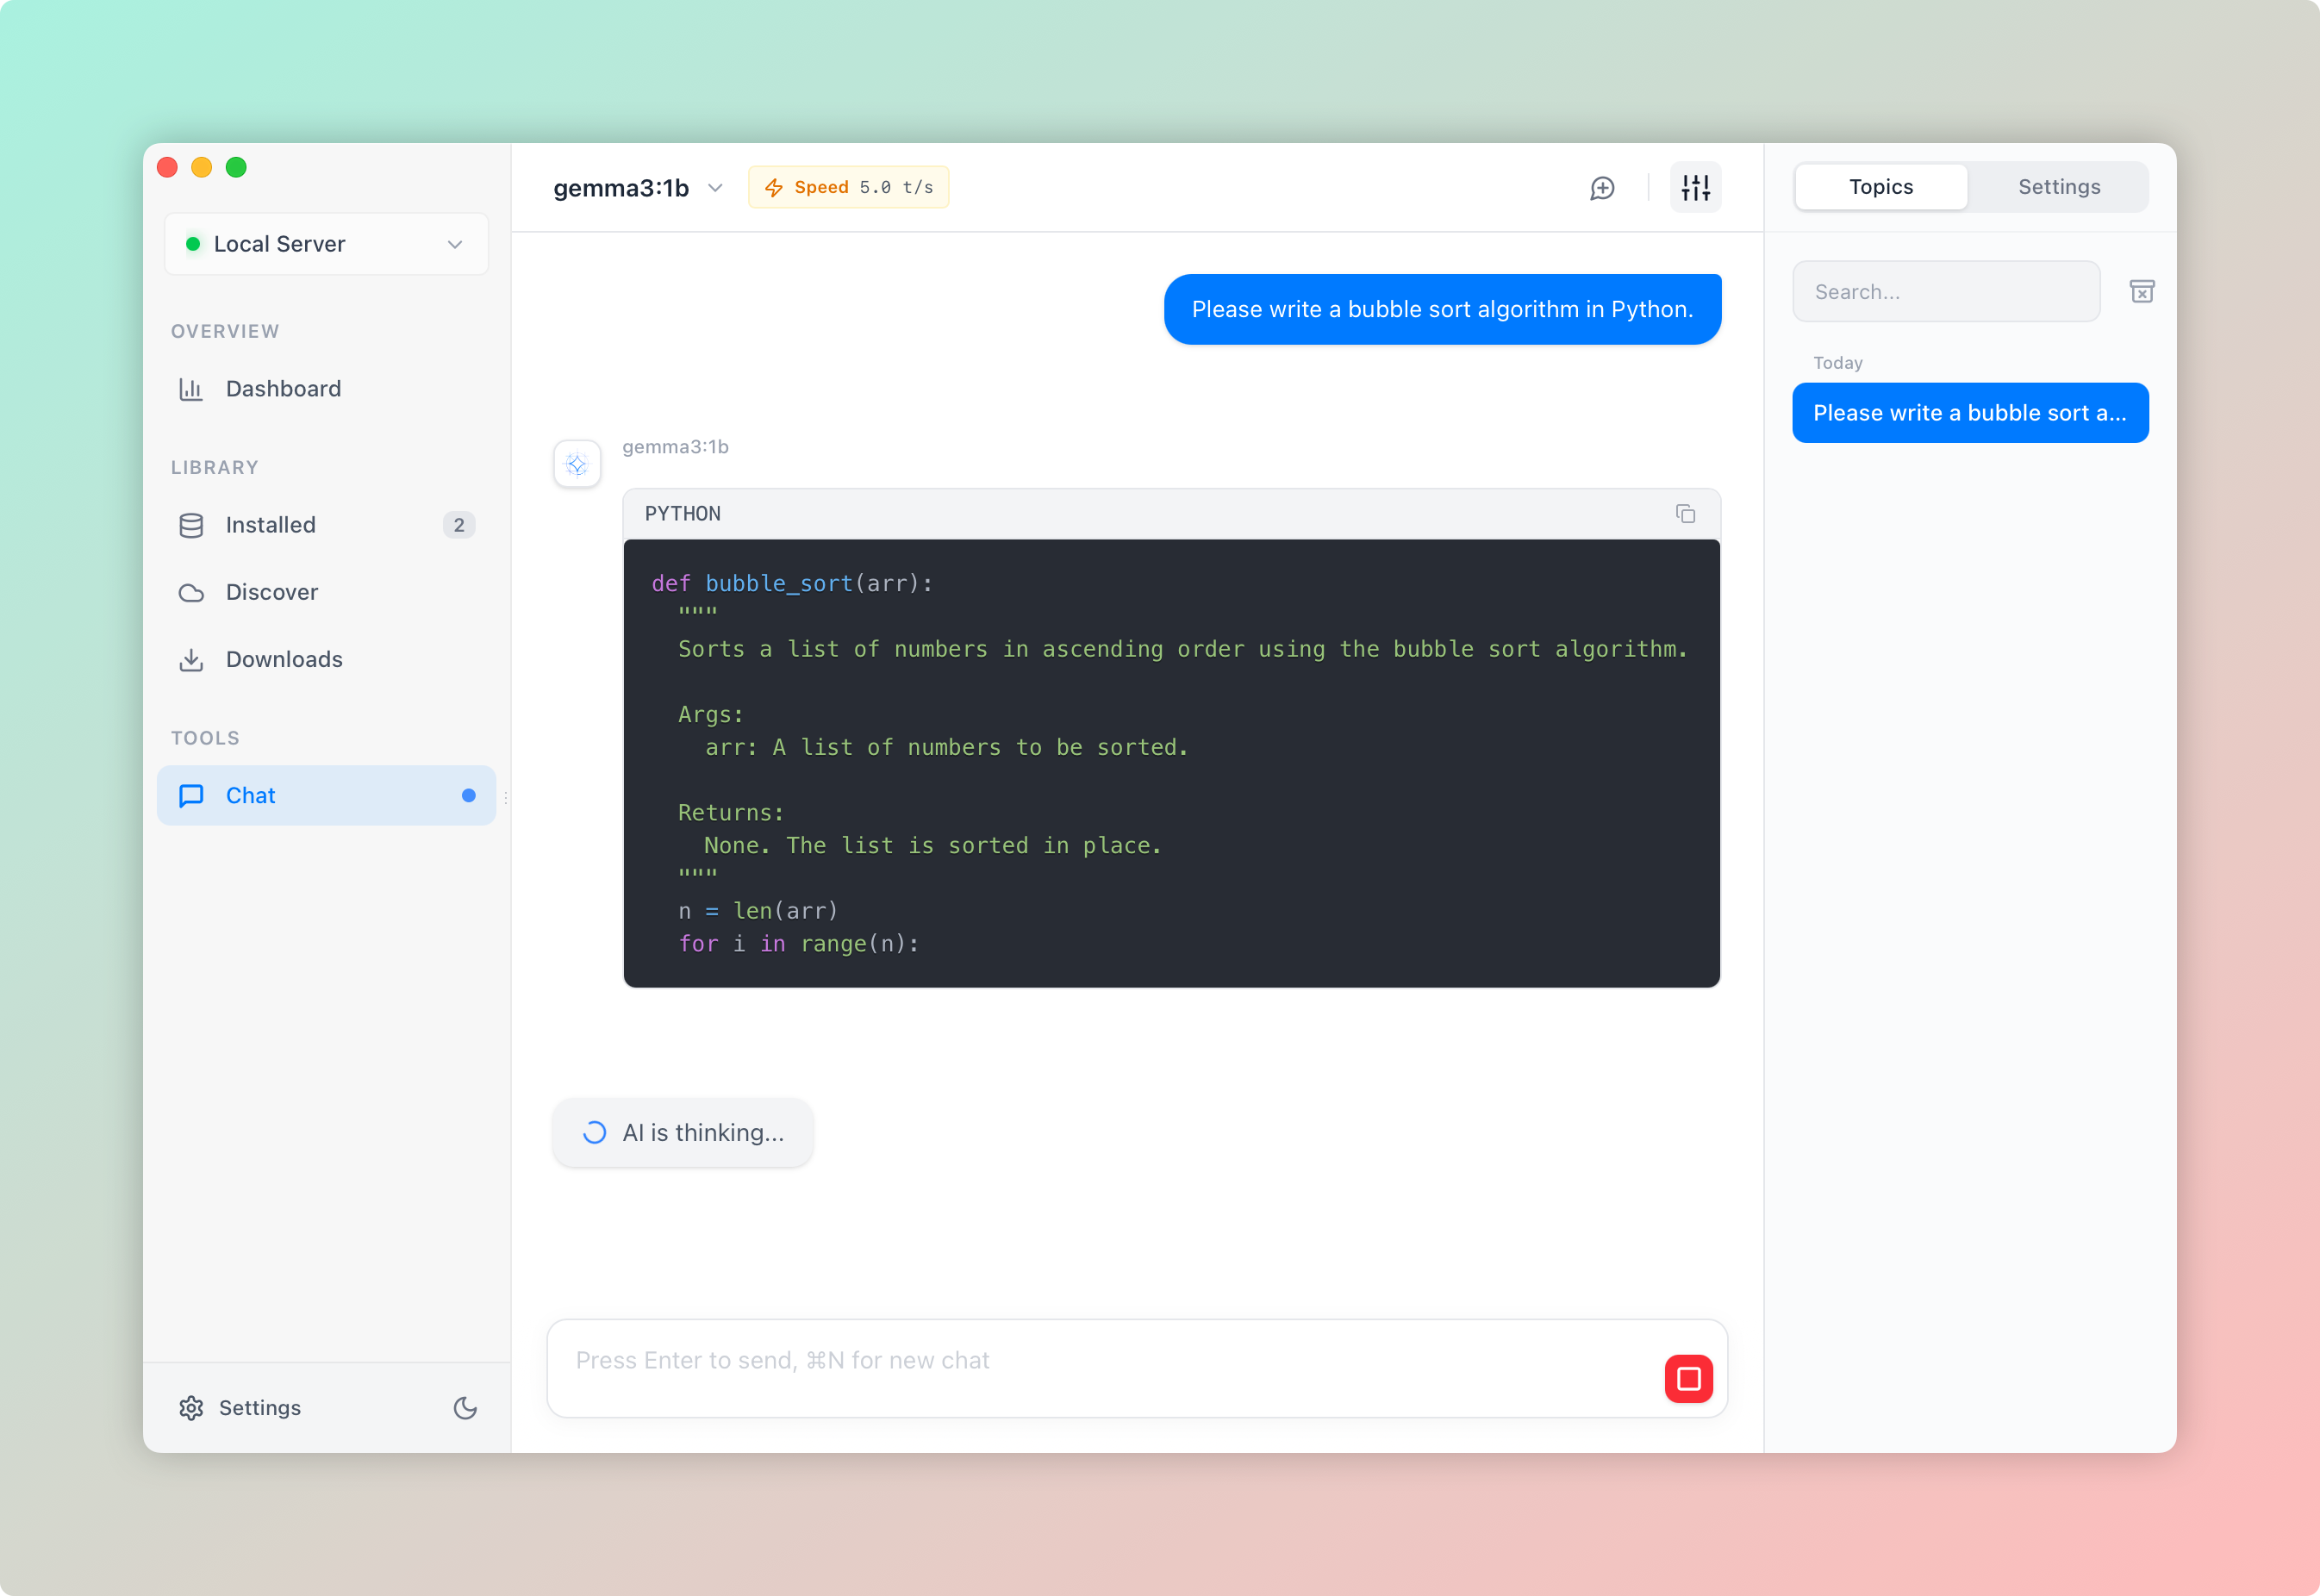
In the input box at the bottom of the page, type your question, for example:
- "Hello, please introduce yourself"
- "Write a bubble sort algorithm in Python"
- "Help me plan a weekend trip"
### Send Message
- Press **Enter** to send the message
- Press **Shift + Enter** for a new line
### View Response
The model will generate responses in real-time, you can see:
- Streaming text content
- Code highlighting and formatting
- Generation speed at the bottom (tokens/second)
### Advanced Chat Features
Click the settings icon at the top-right to adjust:
- **Temperature**: Controls response randomness
- Lower values (0.1-0.5): More accurate, conservative responses
- Higher values (0.8-1.5): More creative, diverse responses
- **Top P**: Controls vocabulary selection range (0.0-1.0)
- **Top K**: Limits number of candidate words
These parameters take effect immediately without restarting the conversation.
OllaMan automatically saves all conversations:
1. Click the **"History"** button to view past conversations
2. Click any history record to quickly load it
3. Each model's chat history is saved independently
4. You can delete individual conversations or clear all history
The chat composer supports attaching files so the model can see their content. There are two ways to add files:
- **Pick files**: click the attach/upload control in the composer and choose files from your computer
- **Drag and drop**: drag files from your file manager straight onto the composer — a drop overlay confirms the target, then the files are attached automatically
Supported attachment types:
- **Images** (`.jpg`, `.jpeg`, `.png`, `.webp`, `.gif`) — accepted only when the active model supports vision; up to **10 MB** per image
- **Text files** — up to **5 MB** per file; the contents are read and sent as text context
Files that exceed the size limit or aren't a supported type are skipped (with an alert for oversized files).
**Copy Response**: Click the copy button next to messages
**Copy Code**: Code blocks have separate copy buttons
**Stop Generation**: Click "Stop" button to interrupt AI response
**Regenerate**: Click "Regenerate" for unsatisfactory responses
**New Chat**: Press **⌘/Ctrl + N** shortcut
---
## Dashboard: Monitor System Status
Check system status anytime:
### Access Dashboard
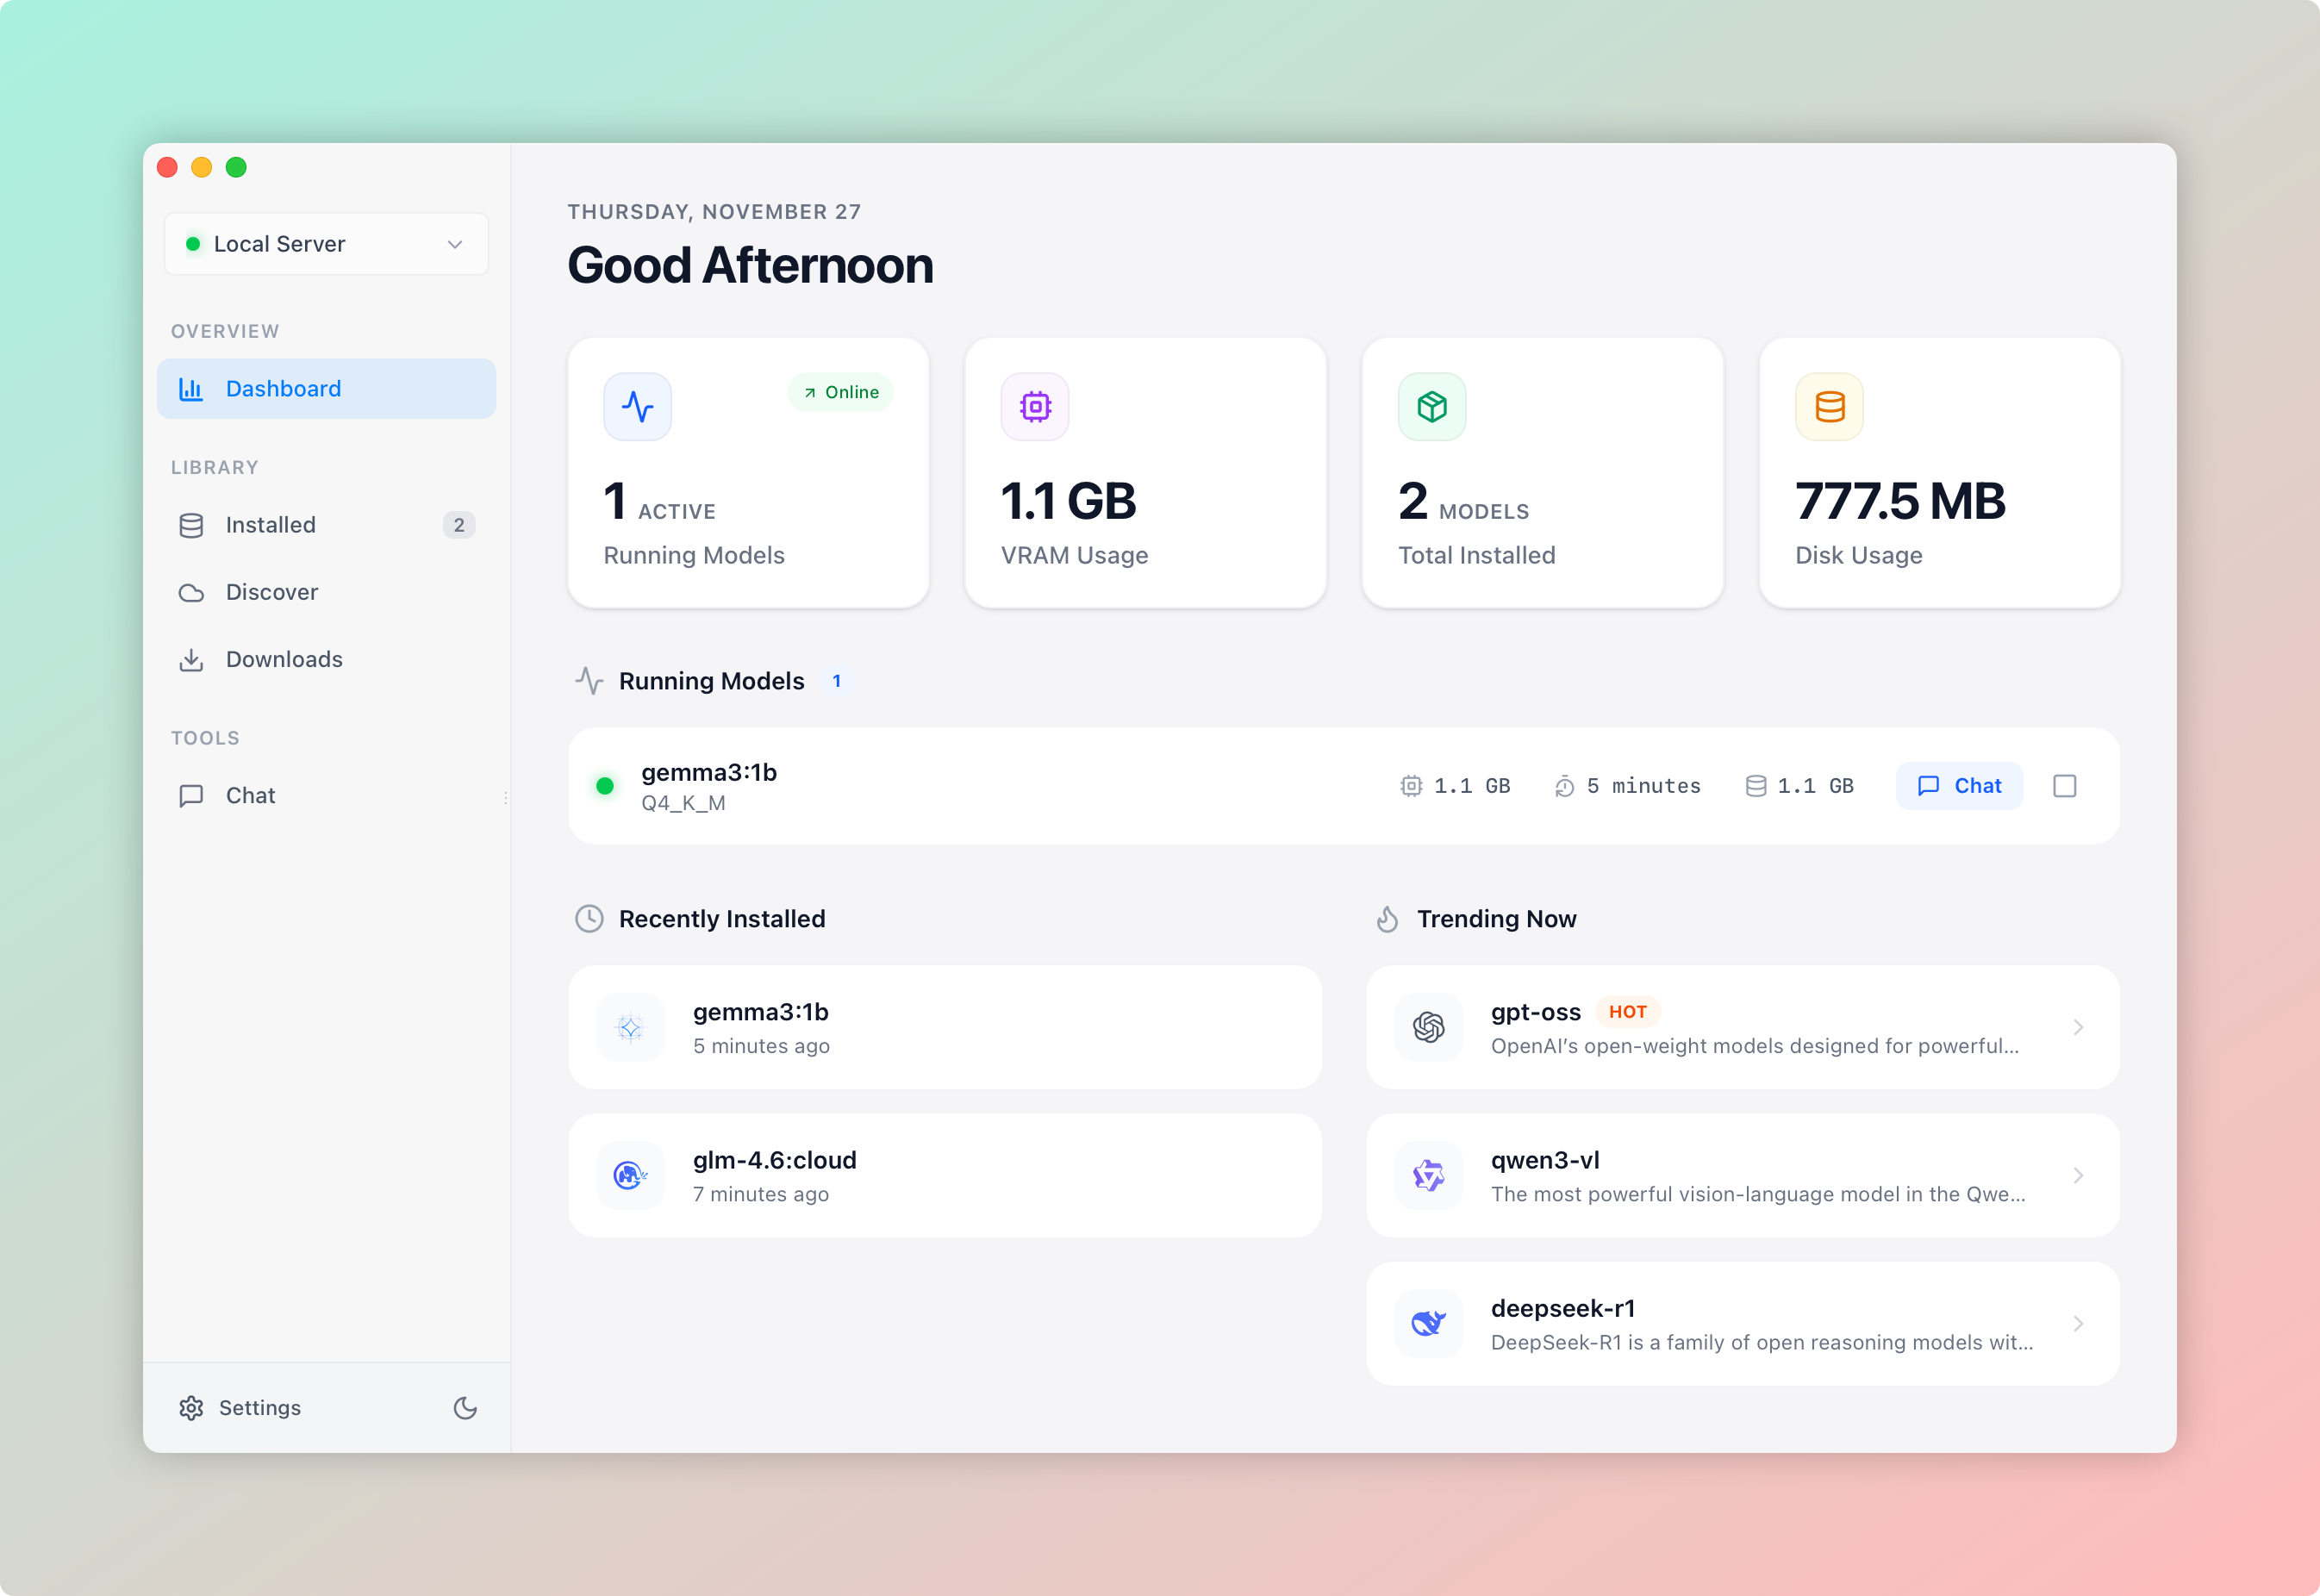
Click the **"Dashboard"** option in the sidebar
### View Key Metrics
The dashboard displays real-time:
- Total number of installed models
- Number of currently running models
- Memory usage (VRAM)
- Disk space usage
- Real-time display of active models
- Model expiration countdown
- One-click unload to free memory
---
## Next Steps
Congratulations on completing the OllaMan quick start! Now you can:
Learn about chat management, parameter tuning, shortcuts, and more advanced features
Discover AI models that best fit your needs
---
## Need Help?
- Visit full documentation for detailed features
- Join community discussions to share experiences
- Submit issues on GitHub for feedback
- Contact technical support for assistance
Enjoy using OllaMan!
---
# Features
URL: https://ollaman.com/docs/features
> Comprehensive guide to all OllaMan features
## Overview
OllaMan provides a comprehensive set of features to help you efficiently manage and use Ollama models. This section covers all major features with step-by-step guides.
} href="/docs/features/running-models" title="Running Models">
View and unload running models to free up memory
} href="/docs/features/delete-models" title="Delete Models">
Remove unwanted models to free up disk space
} href="/docs/features/install-online" title="Install Online Models">
Browse and install models from the online library
} href="/docs/features/manual-install" title="Manual Installation">
Install models using specific model names
} href="/docs/features/token-speed" title="Token Speed Test">
Measure and share model performance metrics
} href="/docs/features/multi-server" title="Multi-Server">
Connect and switch between multiple Ollama servers
} href="/docs/features/web-search" title="Web Search">
Let agents search the web and read pages
} href="/docs/features/context-usage" title="Context Length & Usage">
Set the context window and see how full it is
} href="/docs/features/model-updates" title="Update Models">
Find and apply new versions of local models
} href="/docs/features/session-export" title="Export Chats">
Save conversations as Markdown or JSON
---
## Quick Navigation
### Model Management
Learn how to download, install, and remove models:
- [Install Online Models](/docs/features/install-online) - Browse and download from the model library
- [Manual Installation](/docs/features/manual-install) - Install specific model versions
- [Delete Models](/docs/features/delete-models) - Free up disk space
- [Update Models](/docs/features/model-updates) - Keep local models up to date
### Performance & Monitoring
Monitor and optimize your models:
- [Running Models](/docs/features/running-models) - View active models and manage memory
- [Token Speed Test](/docs/features/token-speed) - Benchmark model performance
- [Context Length & Usage](/docs/features/context-usage) - Manage the context window
### Advanced Features
Expand your workflow capabilities:
- [Multi-Server Management](/docs/features/multi-server) - Connect to remote Ollama servers
- [Web Search](/docs/features/web-search) - Give agents up-to-date information
- [Export Chats](/docs/features/session-export) - Save conversations to files
---
## Getting Help
If you encounter any issues while using these features:
- Check the [Troubleshooting](/docs/troubleshooting) guide
- Review the [Quick Start](/docs/quick-start) guide
- Join our community for support
---
# View and Unload Running Models
URL: https://ollaman.com/docs/features/running-models
> Monitor active models and free up memory resources
## Overview
When you interact with models in OllaMan, they stay loaded in memory for faster responses in future conversations. The Dashboard allows you to monitor all running models and unload them when needed to free up memory.
---
## Viewing Running Models
### Open Dashboard
Click **Dashboard** in the sidebar to access the overview page.
### Locate Running Models Section
Scroll down to find the **"Running Models"** section. This area displays all models currently loaded in memory.
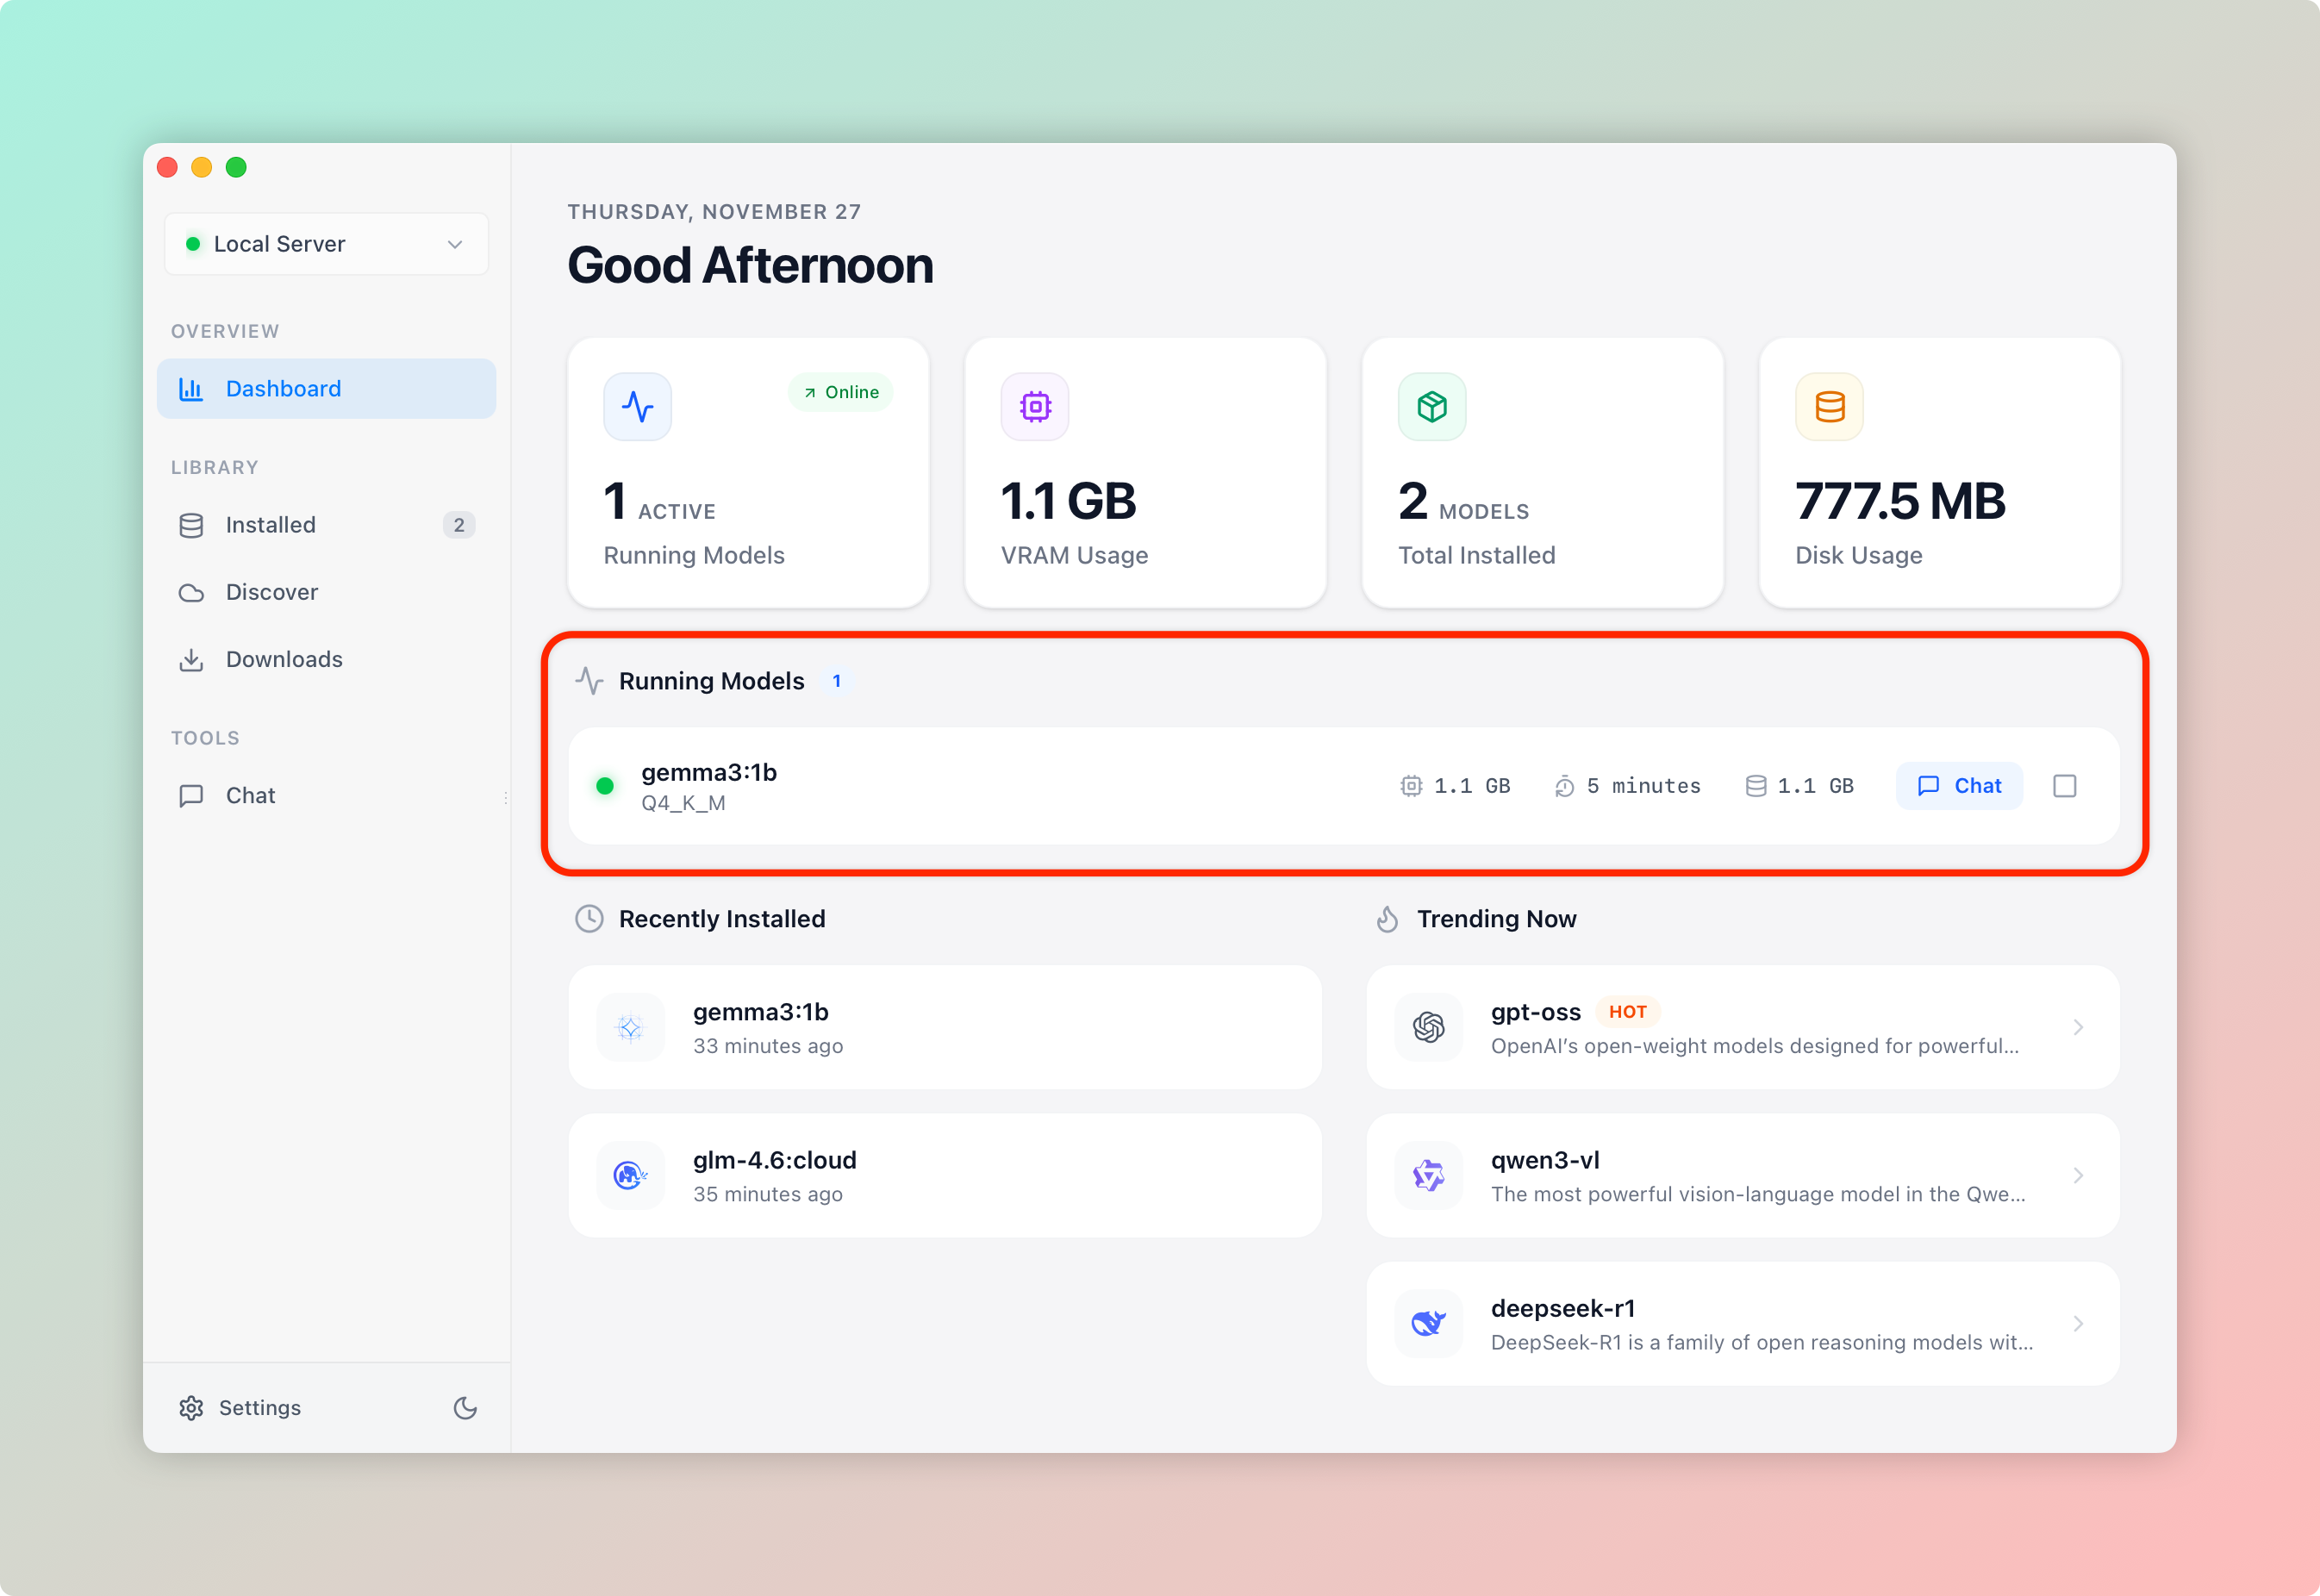
### View Model Information
For each running model, you can see:
- **Model Name**: The full name and tag (e.g., `llama3:8b`)
- **Quantization Level**: Compression method used (e.g., Q4_0, Q8_0)
- **Memory Usage**: Current GPU (VRAM) occupied by the model
- **Disk Usage**: Disk space occupied by the model
- **Expiration Time**: Countdown until auto-unload (if enabled)
---
## Unloading Models
When you need to free up memory for other tasks or models, you can manually unload running models.
### Identify Model to Unload
In the **"Running Models"** section, find the model you want to unload.
### Click Unload Button
On the right side of the model card, click the **"Unload"** button.
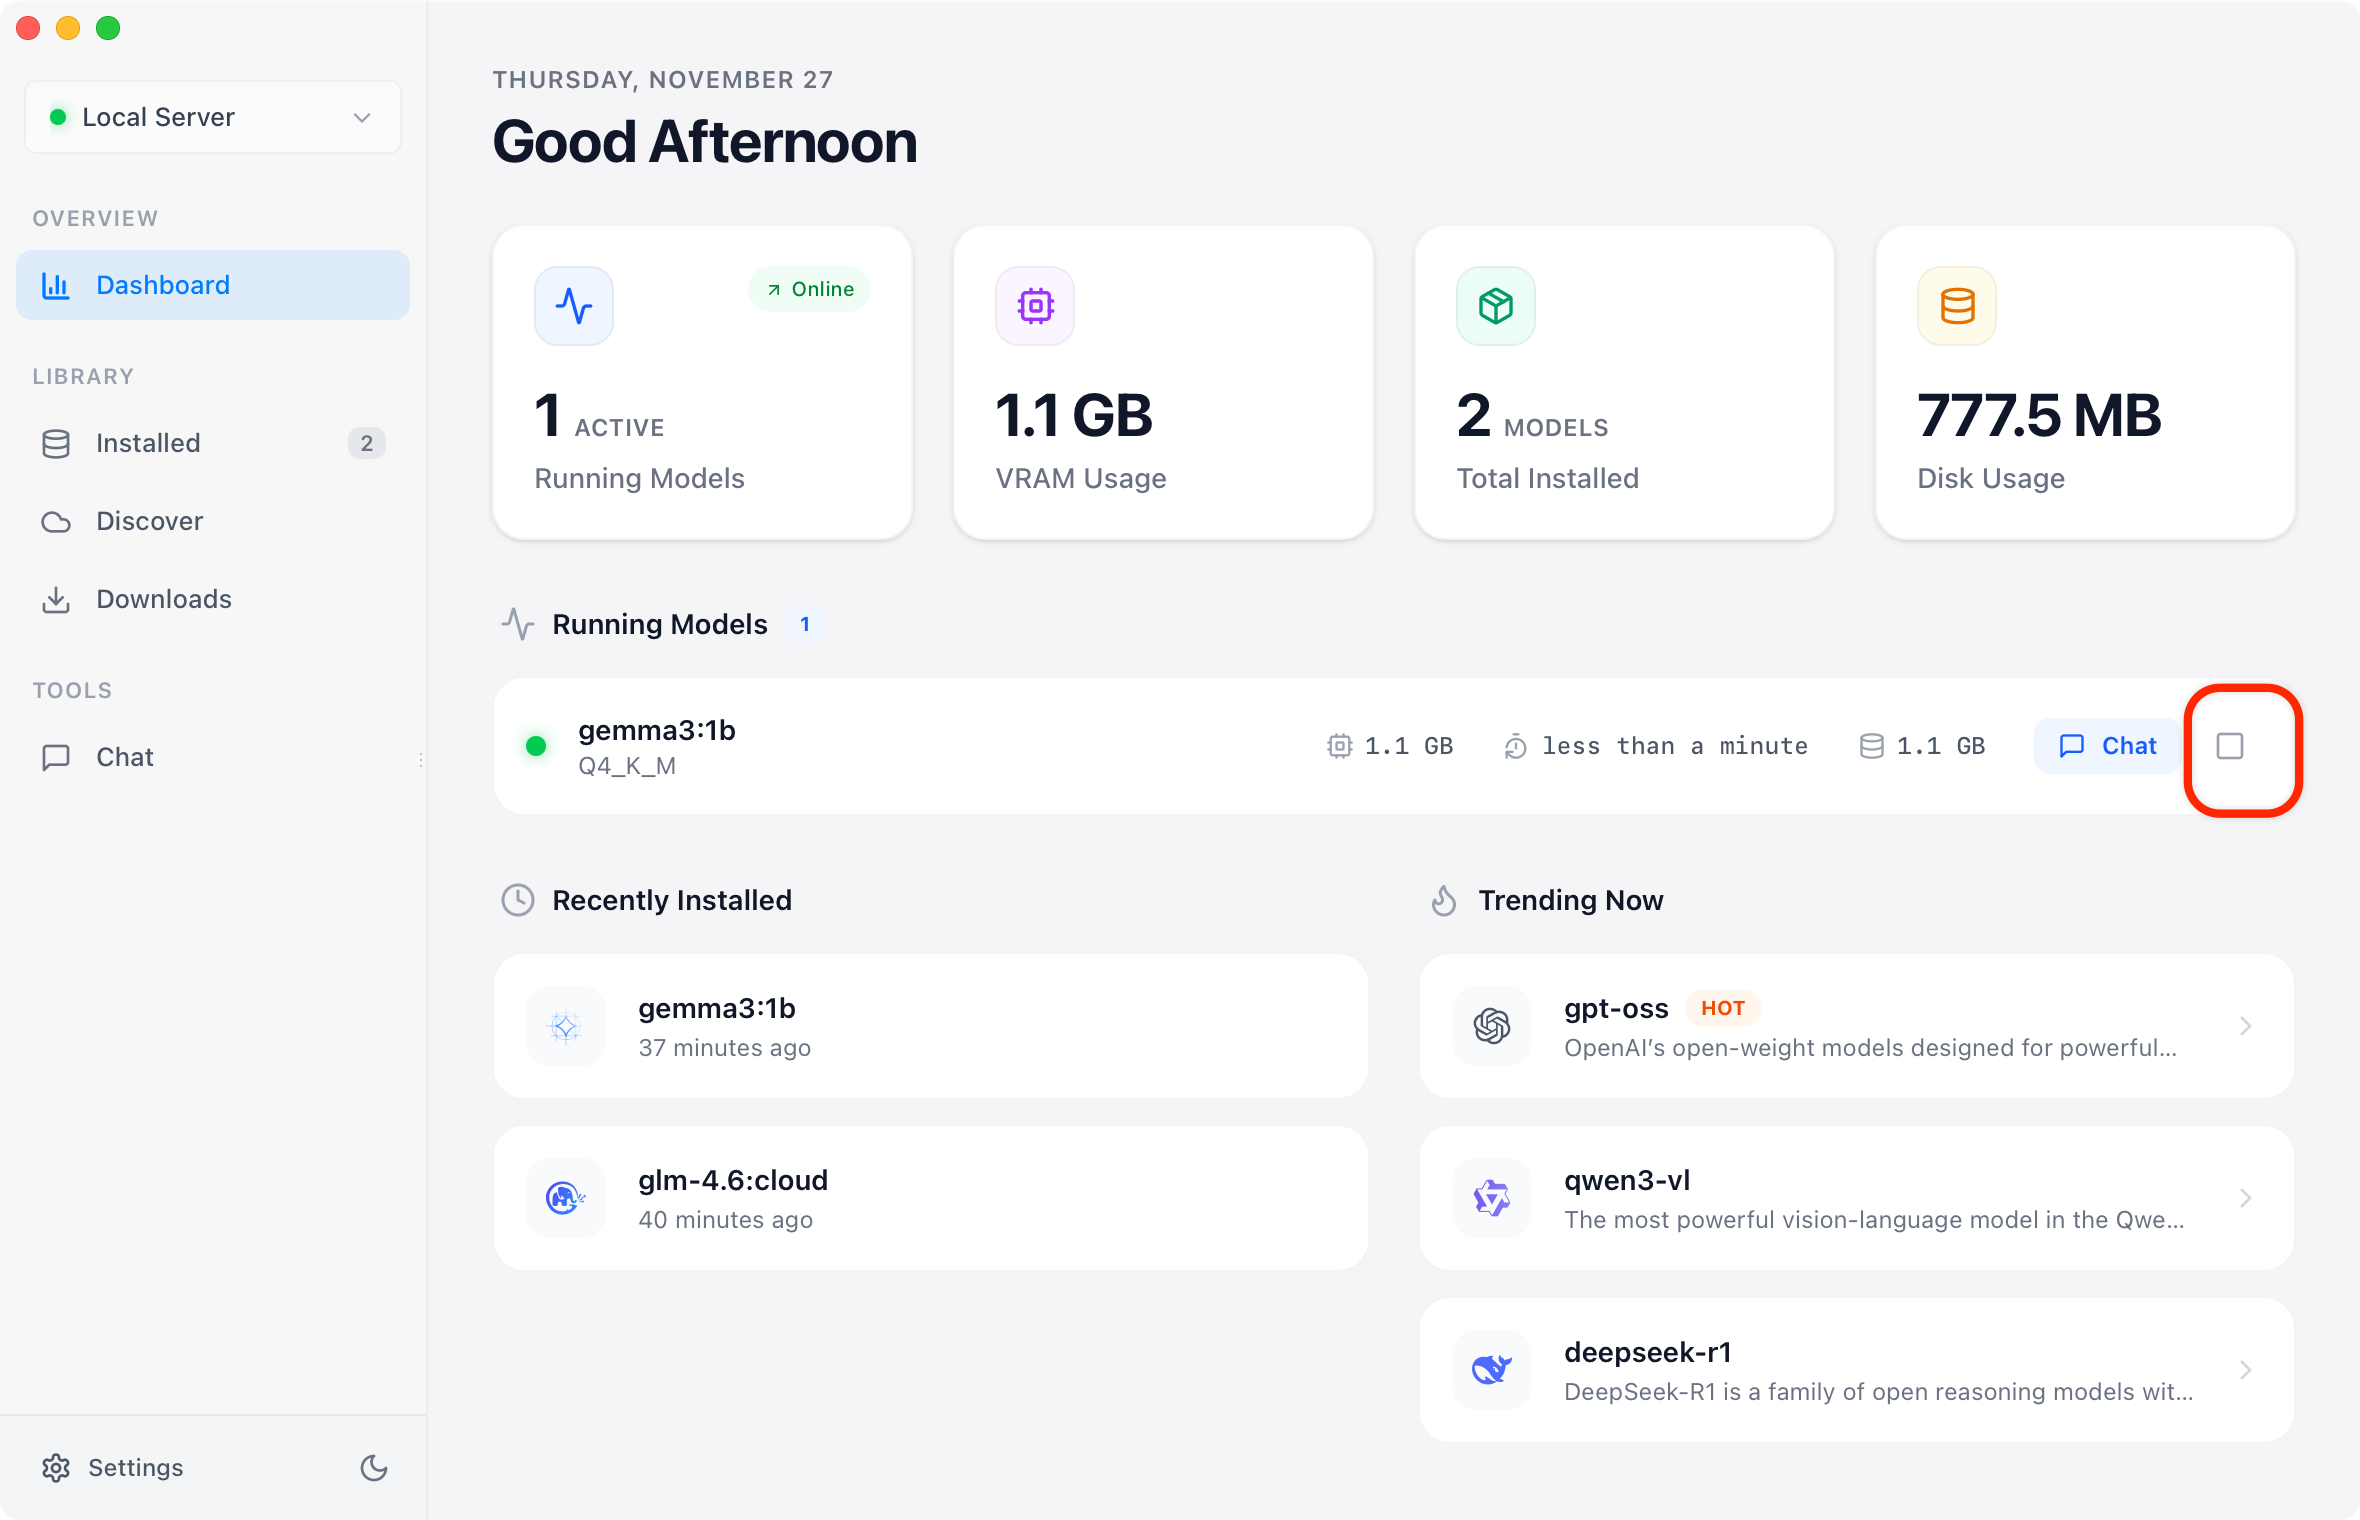
### Confirm Action
The model will be immediately unloaded from memory. You'll see:
- The model disappears from the running models list
- Memory usage statistics update
- Confirmation message appears
- The model files remain installed on your disk
- You can start chatting with it again anytime
- The model will be reloaded into memory when needed
- First response after reloading may take a few seconds longer
---
## Understanding Memory Usage
### Why Models Stay Loaded
OllaMan keeps models in memory to provide:
- **Faster Response Times**: No reload delay for subsequent queries
- **Better User Experience**: Instant conversation continuation
- **Efficient Resource Use**: Automatic management based on activity
### When to Unload Models
Consider unloading models when:
- **High Memory Usage**: Your system is running low on available memory
- **Switching Tasks**: You're done with a model and won't use it soon
- **Running Large Models**: You need to free space for a bigger model
- **Troubleshooting**: Resolving memory-related issues
### Auto-Unload Feature
Ollama automatically unloads inactive models after a period of time (default: 5 minutes). The countdown timer shows when each model will be auto-unloaded.
---
## Memory Usage Statistics
The Dashboard displays real-time memory metrics:
Shows how much video memory (GPU) is currently in use
Total number of models currently loaded in memory
Estimated memory consumption for each loaded model
---
## Quick Actions
From the Running Models section, you can also:
### Start Chat
Click the **"Chat"** button next to any running model to immediately start a conversation without reloading.
### View Model Details
Click on the model card to see more detailed information about the model's configuration and capabilities.
---
## Troubleshooting
If a model refuses to unload:
1. Close any active chat windows using that model
2. Wait a few seconds and try again
3. Check if any background processes are using the model
4. Restart the Ollama service if the issue persists
If memory doesn't decrease after unloading:
1. Wait 10-15 seconds for the system to update
2. Refresh the Dashboard (click Dashboard again)
3. Check if other applications are using memory
4. Restart OllaMan if statistics don't update
If you've used models but the list shows nothing:
1. Make sure you've started at least one chat session
2. Check that the Ollama server is connected
3. Verify the models loaded successfully in chat
4. Refresh the Dashboard
---
## Best Practices
- **Monitor Regularly**: Check the Dashboard periodically during heavy use
- **Unload After Use**: Free memory when done with large models
- **Close Chats**: Closing chat windows doesn't unload models—use the Unload button
- **Plan Ahead**: Unload smaller models before loading very large ones
---
## Next Steps
Learn how to permanently remove models to free disk space
Measure model performance and throughput
Learn more about Dashboard features
---
# Delete Local Models
URL: https://ollaman.com/docs/features/delete-models
> Remove unwanted models to free up disk space
## Overview
As you explore and test different AI models, your model library may grow quickly. Deleting models you no longer need helps keep your system organized and frees up valuable disk space.
Deleting a model permanently removes it from your disk. You'll need to download it again if you want to use it in the future.
---
## Deleting Models
### Open Installed Models
Click **Installed** in the sidebar to view all models installed on your system.
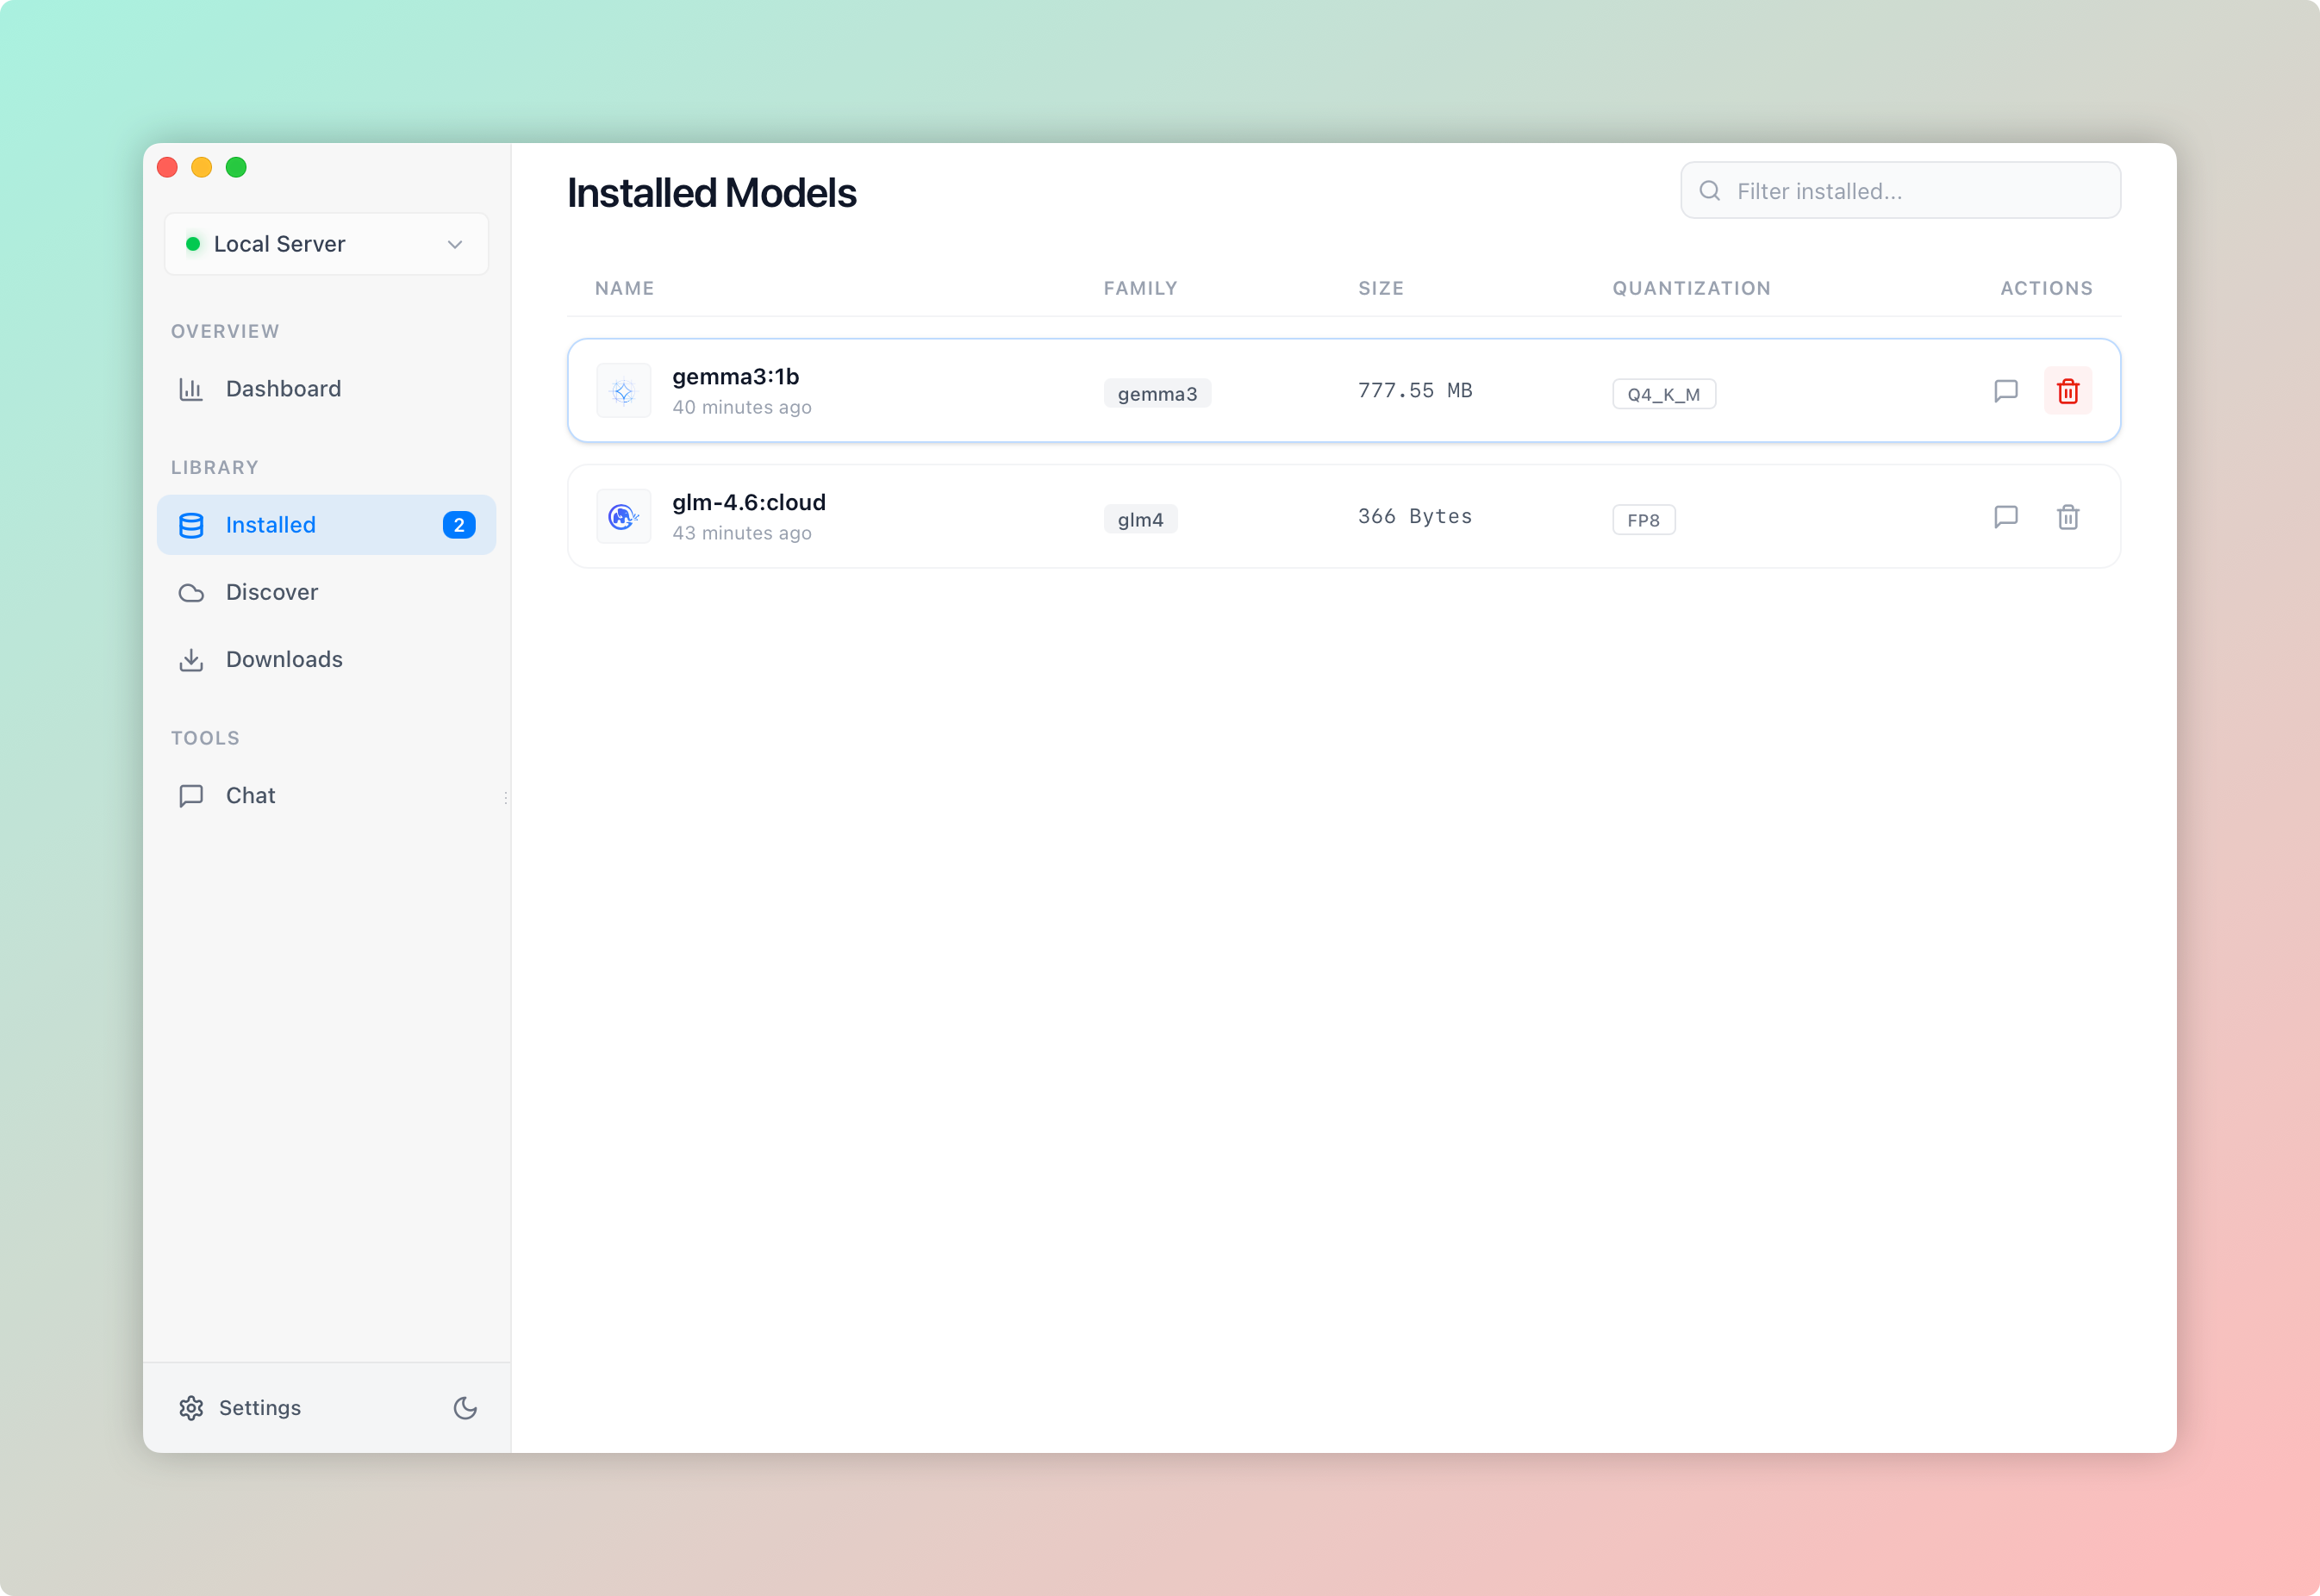
### Browse Your Models
You'll see a grid of model cards, each displaying:
- Model name and version tag
- Parameter size and quantization level
- Disk space used
- Last modified date
### Locate Model to Delete
Find the model you want to remove. You can use the search box to quickly filter by name.
### Click Delete Button
On the right side of the model card, click the **Delete** button (trash icon).
---
## What Happens When You Delete
When you delete a model:
The disk space used by the model files is immediately released
Your conversation history with that model remains saved locally
If the model was running, it's automatically unloaded from memory
You can download the model again anytime from the online library
---
## Checking Disk Usage
Before deleting models, you can check how much space they're using:
### Dashboard Overview
The **Dashboard** shows:
- **Total Disk Usage**: Combined size of all installed models
- **Individual Model Sizes**: Each model card shows its disk footprint
### Sorting by Size
In the Local Models view:
1. Look at the size indicator on each model card
2. Larger models typically range from 5GB to 70GB+
3. Smaller quantized versions use less space (e.g., Q4_0 vs Q8_0)
---
## Which Models to Delete
Consider deleting models that:
If you have multiple versions of the same model (e.g., `llama3:8b` and `llama3:latest`), keep only the version you use most.
Models you downloaded to test but never actually use can be safely removed. Check your chat history to see which models you interact with regularly.
When new versions are released (e.g., Llama 3.1 replaces Llama 3), consider removing older versions if you've migrated to the newer one.
If you have both Q8_0 and Q4_0 versions of a model, the Q8_0 version is larger. If quality difference is minimal for your use case, keep the smaller Q4_0 version.
---
## Safety Tips
- **Check model name carefully**: Make sure you're deleting the right model
- **Consider disk space needs**: Only delete if you actually need the space
- **Remember download time**: Large models can take hours to re-download
- **Test alternatives first**: Ensure you have a suitable replacement model
---
## Troubleshooting
If the delete button is grayed out:
1. Check if the model is currently in use in a chat window
2. Close any active chats using that model
3. Try unloading the model from the Dashboard first
4. Refresh the page and try again
If a deleted model still appears:
1. Click the refresh button or reload the page
2. Check if deletion actually completed (look for error messages)
3. Verify your connection to the Ollama server
4. Restart OllaMan if the issue persists
If disk space doesn't increase after deletion:
1. Wait a minute for the file system to update
2. Check your system's trash/recycle bin
3. Restart the Ollama service
4. Verify deletion in your Ollama models folder manually
If you accidentally deleted a model:
1. You can re-download it from the online models library
2. Or use manual installation with the specific model name
3. Your chat history with that model is still preserved
4. Re-downloading will restore full functionality
---
## Bulk Management
Currently, OllaMan requires deleting models one at a time. For managing many models:
1. **Prioritize by size**: Delete largest unused models first for maximum space gain
2. **Group by family**: Review all versions of each model family together
3. **Check usage patterns**: Review chat history to identify rarely-used models
4. **Plan ahead**: Keep models you'll need for upcoming projects
---
## Best Practices
- **Regular cleanup**: Review installed models monthly
- **Download on demand**: Don't pre-download models "just in case"
- **Keep versatile models**: Maintain 2-3 general-purpose models
- **Remove duplicates**: Avoid keeping multiple similar models
- **Monitor disk space**: Check Dashboard regularly to track usage
---
## Next Steps
Browse and download models from the online library
Learn about memory management and unloading models
Comprehensive guide to managing your model library
---
# Install Online Models
URL: https://ollaman.com/docs/features/install-online
> Browse and download models from the online library
## Overview
The **Discover** page provides access to Ollama's extensive online model library with 1000+ pre-trained AI models. You can browse, search, and install any model with just a few clicks.
---
## Browsing the Model Library
### Open Discover Page
Click **Discover** in the sidebar to access the online models library.

### Browse Available Models
You'll see a grid of model cards showing:
- **Model Name**: The official model identifier
- **Description**: What the model is designed for
- **Tags**: Model categories and capabilities
- **Downloads**: Popularity indicator
- **Last Update**: How recently the model was updated
### Search for Models
Use the search box at the top to filter models:
- Type model names (e.g., "llama", "mistral", "codellama")
- Search by capability (e.g., "coding", "chat", "translation")
- Filter by model family or creator
---
## Installing a Model
### Select a Model
Click on any model card to open its detail page.

### Review Model Details
On the model detail page, you'll find:
- **Full Description**: Detailed information about the model's capabilities
- **Model Family**: Related models and versions
- **Performance Specs**: Context window size, parameter count
- **Use Cases**: Recommended applications
### Choose a Version
Scroll to the **Versions** section. Here you'll see all available parameter sizes:
Common version sizes:
- **1B - 3B**: Small, fast models for basic tasks
- **7B - 13B**: Medium models, good balance of speed and quality
- **20B - 70B**: Large models, highest quality but require more resources
Each version shows:
- **Parameter Size**: e.g., 1B, 7B, 70B
- **Context Window**: Maximum input length
- **Model Size**: Disk space required
- **Quantization**: Compression method (Q4_0, Q8_0, etc.)
### Click Pull Button
Find the version you want and click the **Pull** button on its right side.
### Monitor Download Progress
The download manager appears at the bottom-right corner, showing:
- **Download Progress**: Percentage completed
- **Download Speed**: Current transfer rate (MB/s)
- **Size Information**: Downloaded / Total size
- **Estimated Time**: Time remaining
---
## Understanding Model Versions
### Parameter Sizes
- Fastest inference speed
- Lowest memory/disk usage
- Good for simple tasks
- Can run on any hardware
- Balanced performance
- Reasonable resource use
- Suitable for most tasks
- Recommended for typical users
- Best quality output
- Highest resource requirements
- Complex reasoning tasks
- Needs powerful hardware
### Quantization Levels
Quantization reduces model size while maintaining quality:
- **Q8_0**: Highest quality, larger file size
- **Q6_K**: Excellent quality, good compression
- **Q5_K**: Great balance of size and quality
- **Q4_0**: Smaller size, slightly lower quality
- **Q3_K**: Most compressed, reduced accuracy
For most users, **Q4_0** or **Q5_K** provides the best balance. Try Q8_0 if you have plenty of disk space and want maximum quality.
---
## Download Management
### Multiple Downloads
You can download multiple models simultaneously:
- Each download shows in the download manager
- Downloads run in parallel
- Hover over the manager to see all active downloads
### Download States
Shows active progress with: Progress bar, Current speed, Remaining time estimate
After download completes, the model is being: Extracted and verified, Registered with Ollama, Prepared for use
Download finished successfully: Model appears in Local Models, Ready to use immediately, Click × to dismiss notification
Download failed: Error message displayed, Click for error details, Can retry download
---
## After Installation
Once download completes:
1. **Find Your Model**: Go to **Installed** (Local Models) to see the new model
2. **Start Chatting**: Click the **Chat** button to begin using it
3. **Check Dashboard**: View the model in your statistics
---
## Recommended Models
### For General Chat
- **llama3.1:8b** - Meta's latest, excellent for conversation
- **mistral:7b** - Fast and capable general-purpose model
- **gemma2:9b** - Google's efficient chat model
### For Coding
- **codellama:13b** - Specialized for code generation
- **deepseek-coder:6.7b** - Excellent code understanding
- **starcoder2:7b** - Multi-language code expert
### For Creative Writing
- **llama3.1:70b** - Top-tier creative output (requires powerful hardware)
- **mistral-nemo:12b** - Great storytelling capabilities
- **nous-hermes2:34b** - Creative and coherent narratives
---
## Troubleshooting
If you can't click the Pull button:
1. Check if the model version is already installed
2. Ensure your Ollama server is connected
3. Try refreshing the page
If downloads are taking too long:
1. Check your internet connection speed
2. Try downloading during off-peak hours
3. Large models (70B) can take hours on slow connections
4. Consider starting with smaller versions first
If a download fails:
1. Click the error message to see details
2. Check available disk space
3. Verify network connection stability
4. Try downloading again (resume may be supported)
5. Try a smaller quantization if disk space is limited
If a downloaded model doesn't show up:
1. Wait a minute for processing to complete
2. Refresh the Local Models page
3. Check the download manager for error messages
4. Verify download actually completed successfully
---
## Best Practices
- **Start small**: Try 7B or 13B versions before downloading 70B models
- **Check disk space**: Ensure you have 2x the model size available
- **Use WiFi**: Large downloads can consume significant mobile data
- **Download overnight**: Big models can take hours on slower connections
- **Test before committing**: Try smaller versions to evaluate the model first
---
## Next Steps
Install models by entering their exact names
Remove models you no longer need
Learn how to use your newly installed models
---
# Manual Model Installation
URL: https://ollaman.com/docs/features/manual-install
> Install models by entering specific model names
## Overview
Manual installation allows you to install models by typing their exact names, giving you more control and flexibility. This is useful when you know the specific model version you want or need to install models not listed in the Discover page.
---
## Installing Models Manually
### Open Downloads Page
Click **Downloads** in the sidebar to access the download management area.
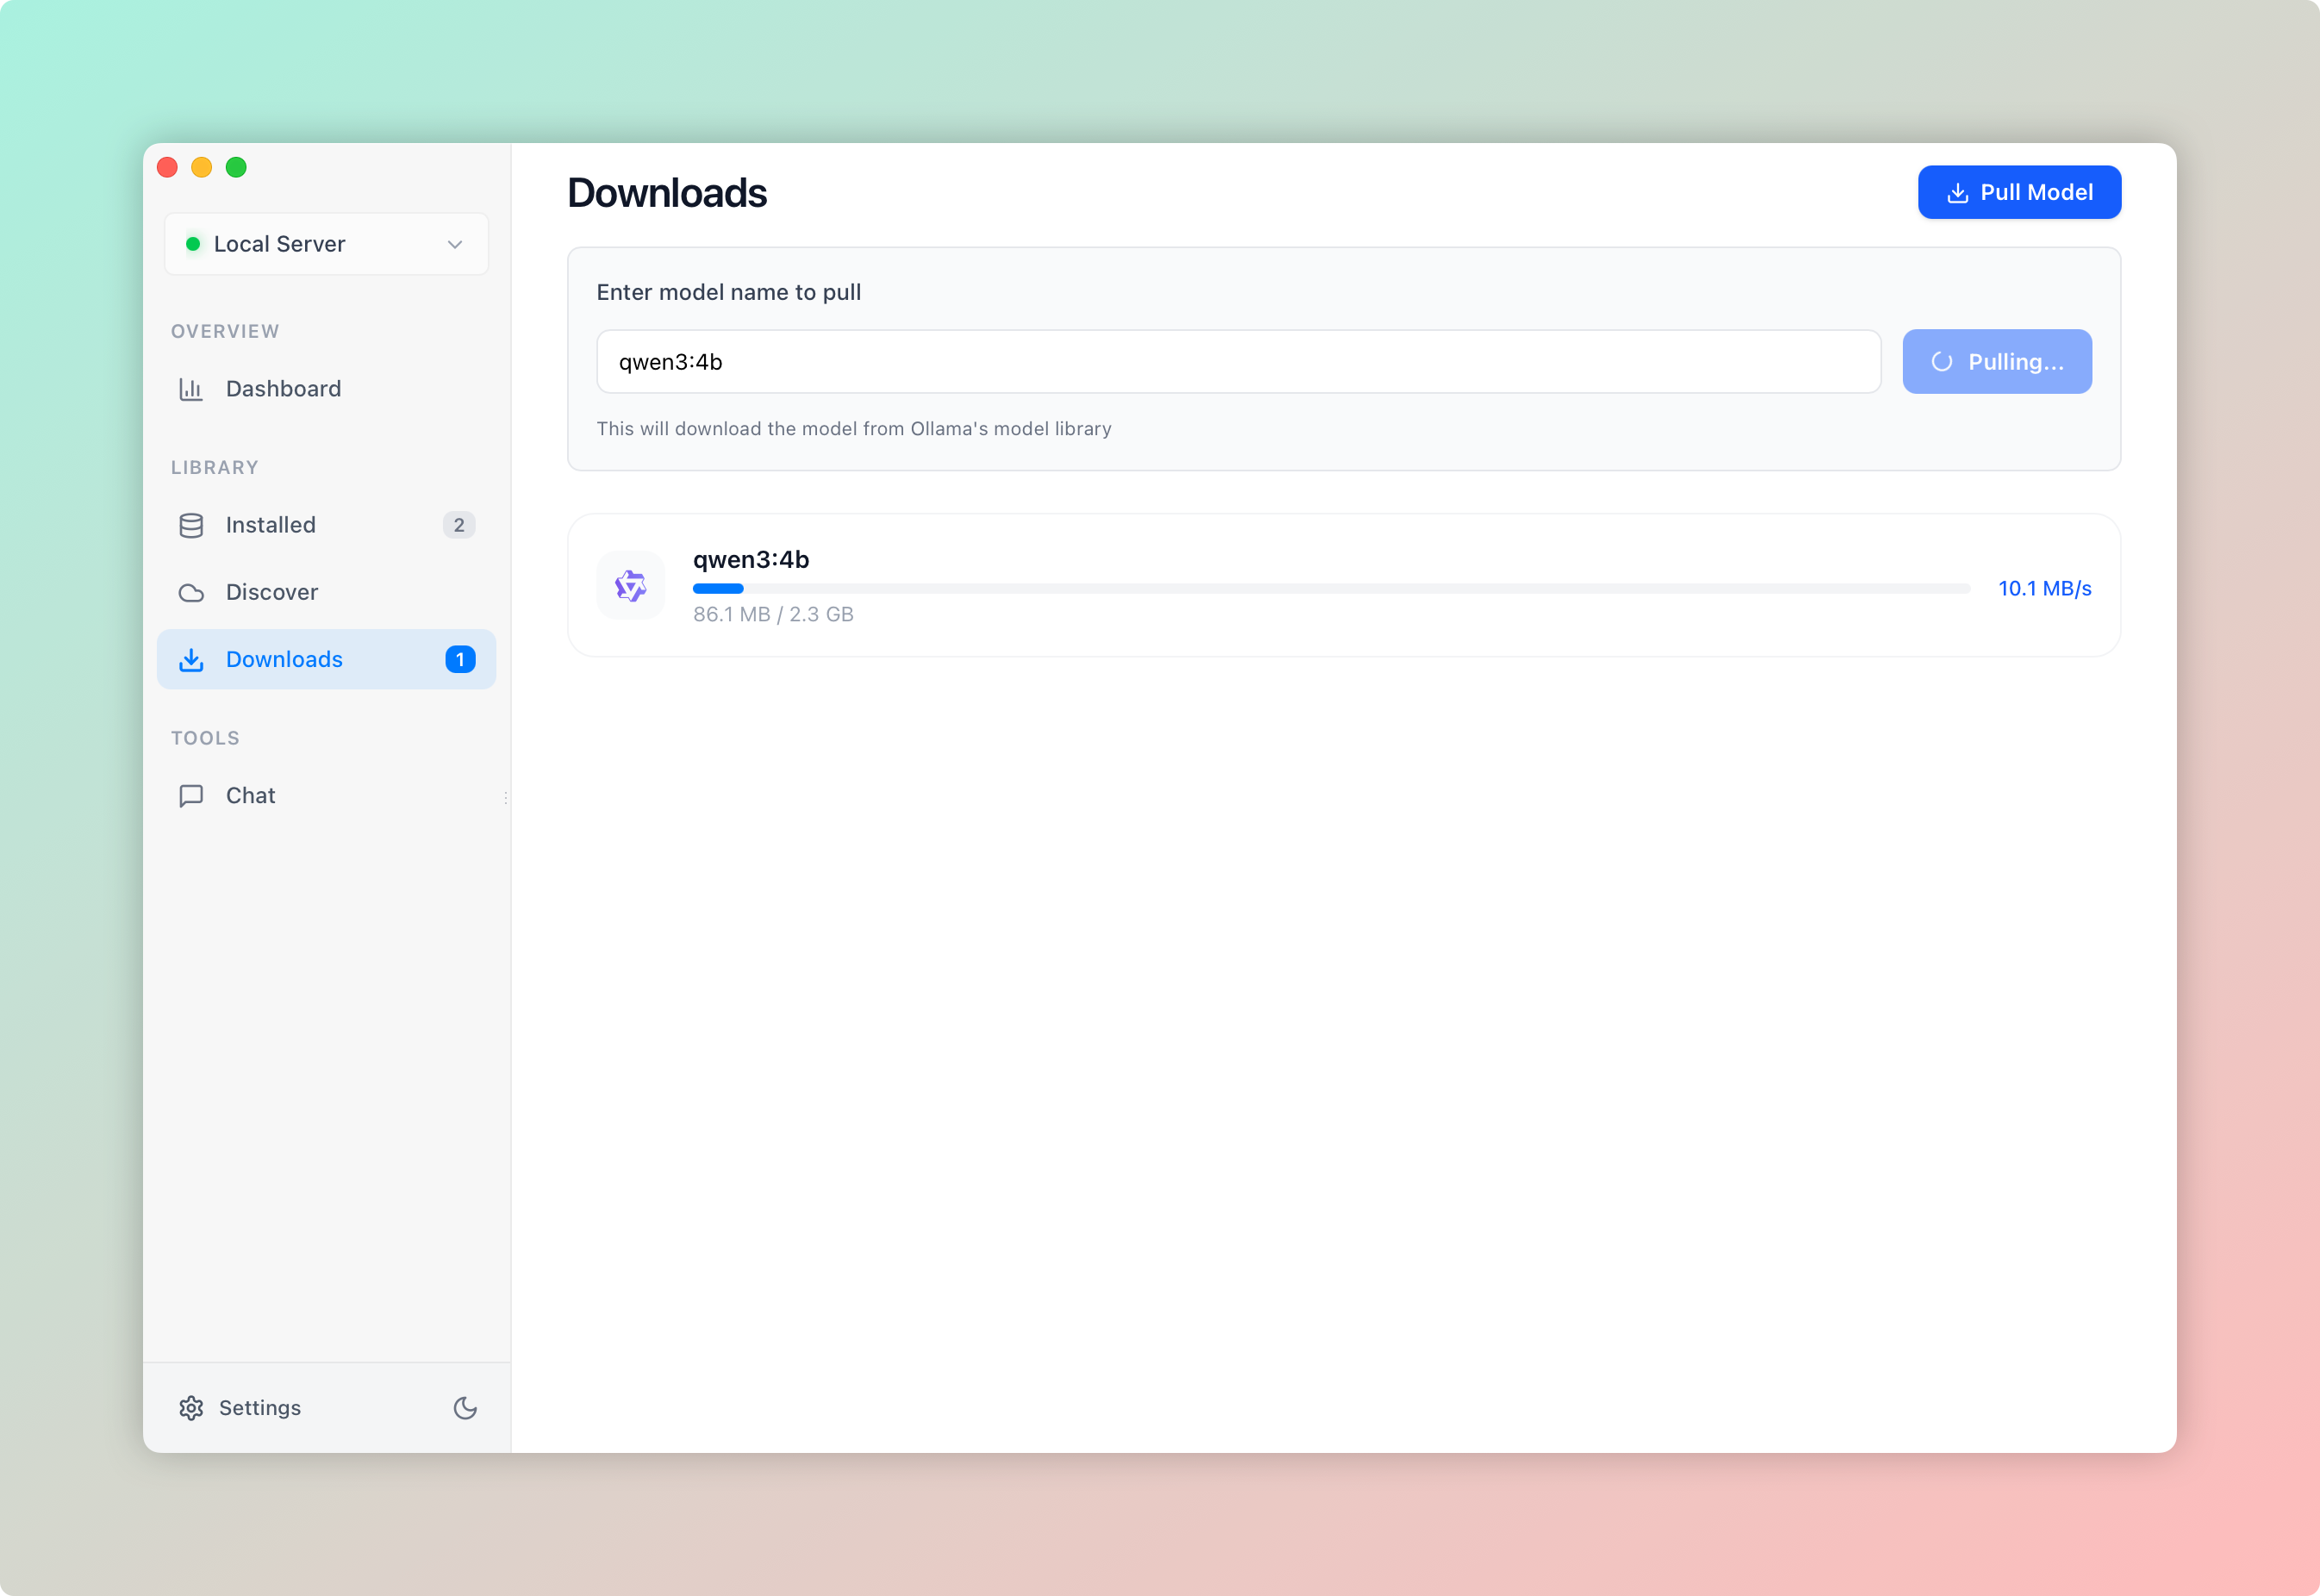
### Click Pull Model Button
At the top-right corner of the Downloads page, click the **"Pull Model"** button.
### Enter Model Name
A model name input field will appear. Type the complete model name including the version tag.
**Format**: `model-name:version-tag`
**Examples**:
- `gemma2:2b`
- `llama3.1:8b`
- `mistral:7b-instruct-v0.2`
- `codellama:13b-python`
### Click Pull Button
After entering the model name, click the **Pull** button next to the input field.
### Monitor Download
The download manager will show the progress:
- Download percentage
- Current speed (MB/s)
- Downloaded size / Total size
- Estimated time remaining
---
## Model Naming Format
Understanding Ollama model names helps you install the right version:
### Basic Format
```
model-family:parameter-size
```
**Examples**:
- `llama3:8b` - Llama 3 with 8 billion parameters
- `mistral:7b` - Mistral with 7 billion parameters
### With Quantization
```
model-family:parameter-size-quantization
```
**Examples**:
- `llama3:8b-q4_0` - Llama 3 8B with Q4_0 quantization
- `gemma2:9b-q8_0` - Gemma 2 9B with Q8_0 quantization
### With Variants
```
model-family:parameter-size-variant
```
**Examples**:
- `mistral:7b-instruct-v0.2` - Mistral 7B instruction-tuned version 0.2
- `codellama:13b-python` - CodeLlama 13B Python specialist
- `llama3.1:70b-instruct` - Llama 3.1 70B instruction-tuned
### Using "latest" Tag
```
model-family:latest
```
Automatically downloads the recommended version:
- `llama3:latest` - Gets the default Llama 3 version
- `mistral:latest` - Gets the default Mistral version
Visit [ollama.com/library](https://ollama.com/library) to browse all available models and their exact names.
---
## Common Model Examples
### General Purpose Models
```
llama3.1:8b
llama3.1:70b
llama3.1:405b
```
```
mistral:7b
mistral:7b-instruct
mistral-nemo:12b
```
```
gemma2:2b
gemma2:9b
gemma2:27b
```
### Specialized Models
```
codellama:13b
deepseek-coder:6.7b
starcoder2:7b
```
```
aya:8b
aya:35b
command-r:35b
```
```
llava:13b
bakllava:7b
llava-phi3:3.8b
```
---
## Advanced Options
### Installing Specific Versions
To install an older or specific version:
1. Visit the model's page on [ollama.com/library](https://ollama.com/library)
2. Check the **Tags** section for available versions
3. Use the exact tag in your manual installation
**Example**: Installing Llama 2 instead of Llama 3:
```
llama2:13b
```
### Custom Model Names
If you have custom models or modified versions, you can install them using their full registry path:
```
registry.example.com/custom-model:version
```
---
## After Installation
Once the download completes:
1. **Check Local Models**: The model appears in **Installed** (Local Models)
2. **Start Using**: Click **Chat** to begin conversations
3. **Verify Version**: Confirm you installed the correct version
---
## Troubleshooting
**Error**: "Model not found" or "404 error"
**Solutions**:
1. Double-check the model name spelling
2. Verify the version tag exists
3. Check [ollama.com/library](https://ollama.com/library) for the correct name
4. Ensure there are no extra spaces in the name
5. Try using `:latest` if unsure of the version
**Error**: Download begins but doesn't complete
**Solutions**:
1. Check your available disk space (need 2x model size)
2. Verify stable internet connection
3. Try a smaller model version first
4. Check Ollama server logs for errors
5. Restart the Ollama service
**Issue**: Downloaded a different version than expected
**Solutions**:
1. Check the exact tag you entered
2. Delete the incorrect version from Local Models
3. Re-install with the precise model name
4. Use specific tags instead of `:latest` for predictability
**Issue**: Can't see the model name input field
**Solutions**:
1. Ensure you clicked "Pull Model" button
2. Check that you're on the Downloads page
3. Try refreshing the page
4. Verify Ollama server connection
---
## Manual vs. Discover Installation
### When to Use Manual Installation
**Manual is better when**:
- You know the exact model name and version
- Installing models not in the Discover library
- Need a specific quantization not shown in Discover
- Installing custom or experimental models
- Prefer command-line style control
### When to Use Discover
**Discover is better when**:
- Browsing and exploring new models
- Need detailed model descriptions
- Want to compare versions side-by-side
- Unsure which version to choose
- Prefer visual interface
---
## Best Practices
- **Verify names carefully**: One typo can download the wrong model
- **Check disk space first**: Ensure you have enough room
- **Start with smaller versions**: Test with 7B before downloading 70B
- **Use specific tags**: Avoid `:latest` in production workflows
- **Keep a model list**: Save names of models you frequently install
- **Test after install**: Always verify the model works as expected
---
## Quick Reference
### Most Common Commands
| Model | Command | Size |
|-------|---------|------|
| Llama 3.1 (8B) | `llama3.1:8b` | ~4.7 GB |
| Mistral (7B) | `mistral:7b` | ~4.1 GB |
| Gemma 2 (9B) | `gemma2:9b` | ~5.4 GB |
| CodeLlama (13B) | `codellama:13b` | ~7.4 GB |
| Llama 3.1 (70B) | `llama3.1:70b` | ~40 GB |
---
## Next Steps
Explore the visual model library
Clean up unwanted model installations
Begin using your installed models
---
# Hugging Face GGUF Models
URL: https://ollaman.com/docs/features/huggingface-gguf
> Browse, download, and import GGUF models from Hugging Face
## Overview
OllaMan supports importing **GGUF** models from [Hugging Face](https://huggingface.co/models?library=gguf) — a large open repository of quantized model files. This gives you access to far more models than the official Ollama registry alone.
There are two ways to import Hugging Face GGUF models into OllaMan:
Browse and search a catalog of Hugging Face GGUF models, then download in one click
Paste a Hugging Face model path or file link into the Downloads page
---
## GGUF Model Marketplace
The **GGUF** page is a dedicated view for browsing Hugging Face GGUF models.
### Open the GGUF Page
Click **GGUF** in the sidebar.
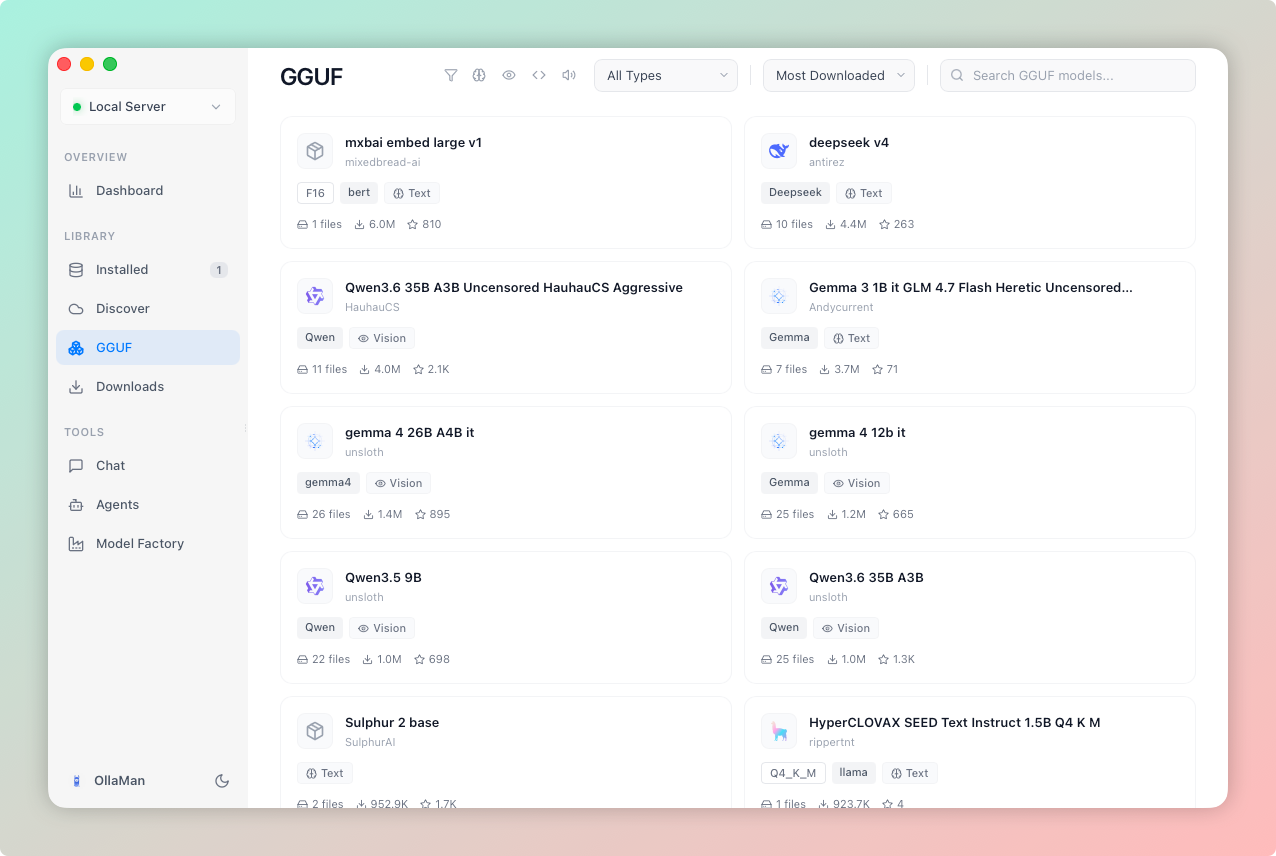
### Browse and Search
Find models in several ways:
- **Search**: type a model name, source, or quant format (e.g. `qwen`, `Q4_K_M`)
- **Filter by Capability**: narrow results to *Text*, *Vision*, *Code*, or *Audio*
- **Filter by Model Type**: show only specific families (Llama, Mistral, Qwen, etc.)
- **Sort**: by *Most Downloaded*, *Most Liked*, or *Newest*
More results load automatically as you scroll.
### Read Model Cards
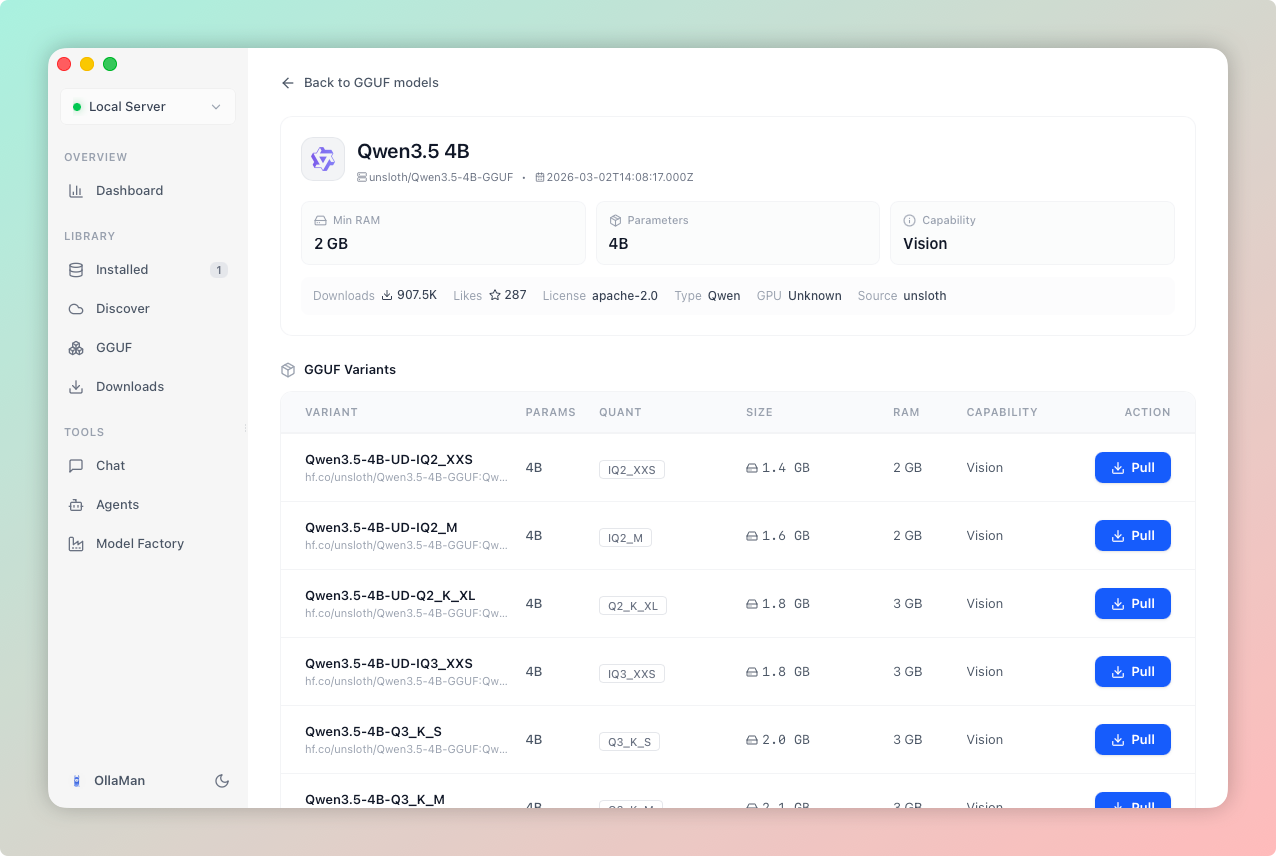
Each card shows the essentials at a glance: quant format, file size, download and like counts, and the GPU / minimum RAM it needs. Click any card to open its **detail page**, where you'll find the full model description, license, parameter size, and every GGUF variant the repository offers.
### Download a Model
### Open the Model Detail
Click a model card to open its detail page.
### Pick a GGUF Variant
In the **GGUF Variants** list, choose the file that matches your hardware (see [Choosing a Quantization](#choosing-a-quantization) below).
### Click Download
Click **Download** next to the variant. Progress appears in the download manager at the bottom-right, just like any other model. When it finishes, the model shows up in **Installed** (Local Models).
---
## Manual URL Import
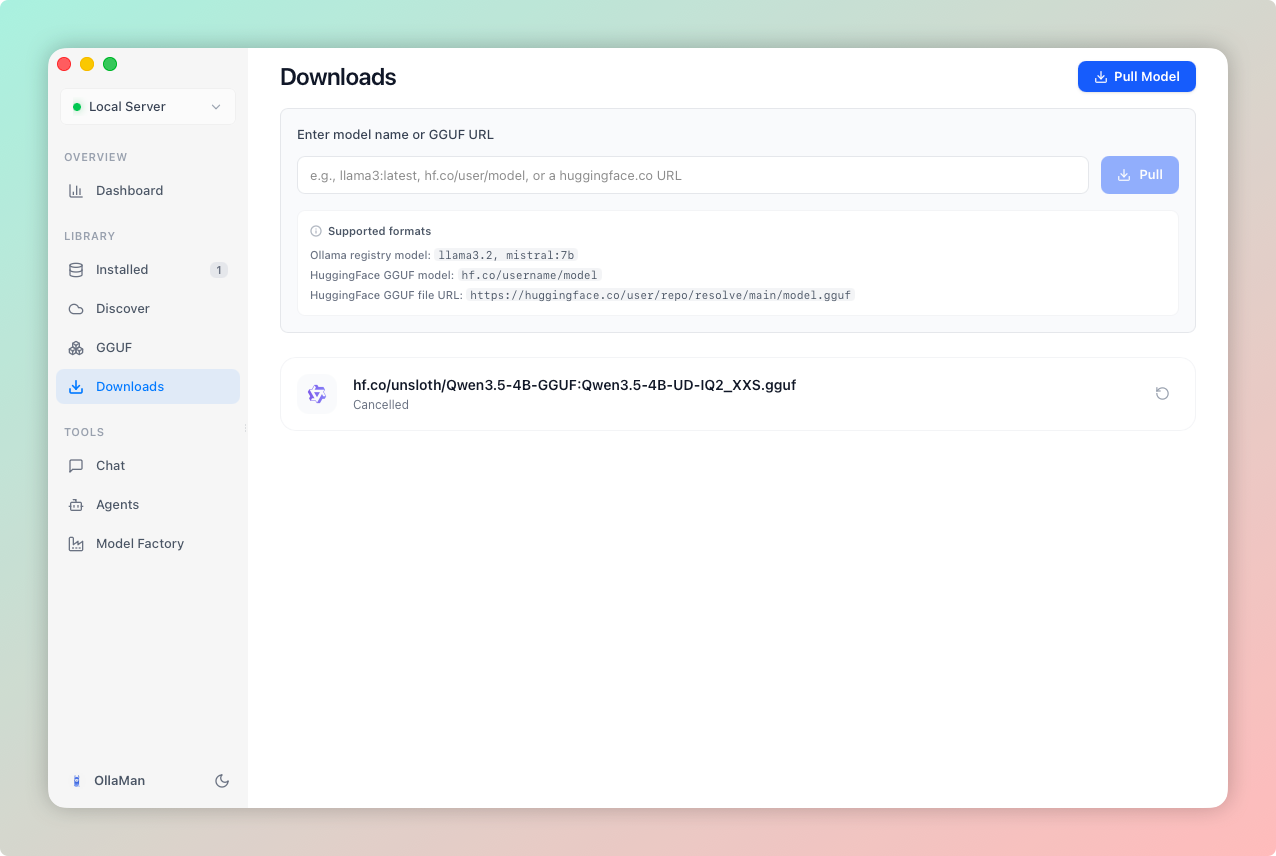
If you already have a specific Hugging Face model in mind, import it directly from the **Downloads** page.
### Open the Downloads Page
Click **Downloads** in the sidebar.
### Click "Pull Model"
Click the **Pull Model** button at the top-right corner.
### Enter the Model Reference
The input accepts several Hugging Face formats in addition to standard Ollama names:
| What you enter | Example | Result |
|----------------|---------|--------|
| Short model path | `hf.co/user/repo` | Downloads the model's default GGUF |
| Short path + quant | `hf.co/user/repo:Q8_0` | Downloads the specified quantization |
| Link to a .gguf file | `https://huggingface.co/user/repo/resolve/main/model-Q4_K_M.gguf` | Downloads that specific file |
| Full filename as tag | `hf.co/user/repo:model-Q4_K_M.gguf` | Downloads that specific file |
A hint under the input shows the detected format so you can confirm before pulling.
### Click Pull
Click **Pull**. The model downloads and appears in **Installed** (Local Models) when complete.
Links must point to Hugging Face — `huggingface.co`, `hf-mirror.com`, or the `hf.co/user/repo` short form. Links to other hosts cannot be pulled and will be rejected with a clear error.
### Choosing a Quantization
When a repository offers several GGUF files, pick the one that fits your hardware:
- **Q8_0** — highest quality, largest file
- **Q6_K / Q5_K** — excellent quality, good compression
- **Q4_K_M / Q4_0** — the most popular balance of size and quality
- **Q3 / Q2** — smallest, with reduced accuracy
For most users **Q4_K_M** is the sweet spot. Choose **Q8_0** if you have plenty of RAM and want maximum fidelity.
---
## Hugging Face Mirror Settings
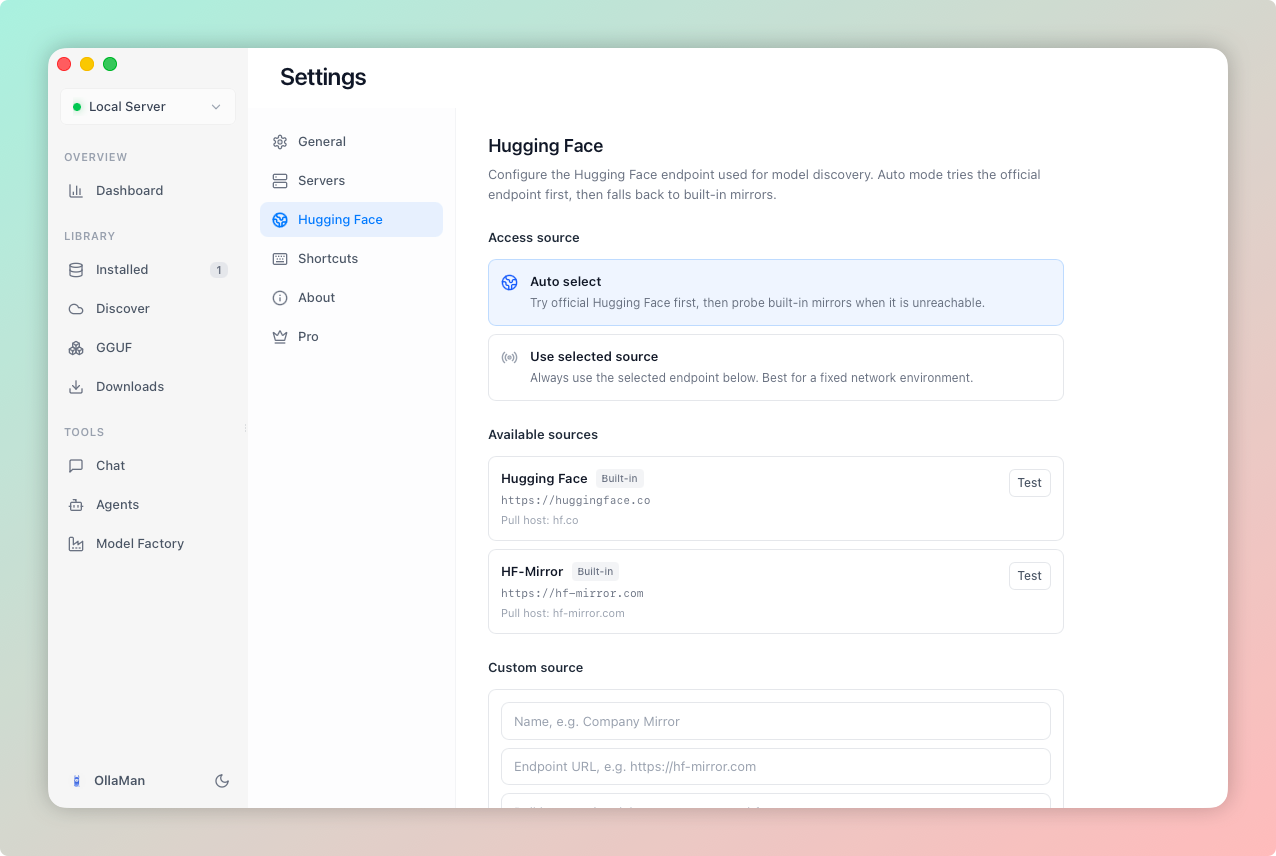
If the official Hugging Face site is slow or blocked in your region, switch to a mirror or add your own.
### Open Settings
Go to **Settings → Hugging Face**.
### Choose an Access Source
- **Auto select** *(default)* — OllaMan tries the official Hugging Face first and automatically falls back to a mirror when it's unreachable. Best for most users.
- **Use selected source** — always use the endpoint you pick below. Best when you already know which mirror works on your network.
### Pick or Add an Endpoint
Two sources are built in:
- **Hugging Face** — `https://huggingface.co`
- **HF-Mirror** — `https://hf-mirror.com`
Click **Test** next to any endpoint to check connectivity and latency. To add your own mirror, enter a **Name** and **Endpoint URL** under *Custom source*, then click **Add source**.
The chosen source is used when **browsing the GGUF marketplace** and **downloading models from it**. When you import a model by URL on the Downloads page, the host is taken from the link you paste — so you can point a single import at a mirror by using an `hf-mirror.com` link, independent of this setting.
### When to Use a Mirror
- The official site is **slow** or **times out** during downloads
- Hugging Face is **blocked or unreliable** on your network
- Your organization runs an **internal mirror**
---
## Restricted (Gated) Models
Some repositories restrict access to their model files. When you try to pull one, OllaMan shows a notice that the model requires authorization.
To pull a gated or private model:
1. Open the model on [huggingface.co](https://huggingface.co), accept any terms, and request access
2. Add your Ollama public key (`~/.ollama/id_ed25519.pub`) to your Hugging Face **SSH Keys**
3. Click **I configured access, continue pull** in OllaMan
---
## Troubleshooting
Make sure your link points to Hugging Face — `huggingface.co`, `hf-mirror.com`, or the `hf.co/user/repo` short form. Links to other hosts can't be pulled.
Switch to a mirror under **Settings → Hugging Face**. The built-in **HF-Mirror** is often faster where the official site is throttled. Use **Test** to compare latency first.
The repository is gated or private. Accept the terms on Hugging Face and add your Ollama SSH public key (`~/.ollama/id_ed25519.pub`) to your account's SSH Keys, then retry.
If a repo has several GGUF files, specify the exact tag — either the quant name (`:Q8_0`) or the full filename (`:model-Q4_K_M.gguf`). Without a tag, a default is chosen that may not be what you want.
Check your network connection and endpoint selection. If your current source is unreachable, switch to **Auto select** or pick a working source in Settings.
---
## Next Steps
Explore the official Ollama registry library
Install models by entering exact Ollama names
Begin using your newly imported GGUF model
---
# Import Local GGUF Files
URL: https://ollaman.com/docs/features/local-gguf-import
> Register a .gguf file from your disk as an Ollama model
## Overview
If you already have a `.gguf` file on disk — copied from a USB stick, shared by a colleague, pre-staged on an offline machine, or downloaded by another tool — you can register it directly as an Ollama model without downloading anything from the internet.
---
## How to Import
### Open the Installed Page
Click **Installed** in the sidebar to open the local models list.
### Click Import
Click the **Import** button in the toolbar at the top of the page.
### Choose a GGUF File
In the import dialog, click the file picker and select a local `.gguf` file. You can keep the suggested model name or enter your own.
### Start Import
Click **Import**. OllaMan uploads the file to your local Ollama server and creates the model. Progress shows in the download manager — you can cancel it while in progress, just like any other download.
## After Import
When the import completes, the model appears in **Installed** (Local Models) and is ready to chat with immediately.
---
## Import to a Remote Server
Local import uploads the raw file to the connected Ollama server. If the current server is a **remote** host, you'll see a warning in the dialog — the file is uploaded over the network to that remote machine, which may be slow for multi-gigabyte files.
For the fastest experience, switch to a local Ollama server before importing.
---
## Choosing a Quantization
When you have several GGUF files to choose from, pick the one that fits your hardware:
- **Q8_0** — highest quality, largest file
- **Q6_K / Q5_K** — excellent quality, good compression
- **Q4_K_M / Q4_0** — the most popular balance of size and quality
- **Q3 / Q2** — smallest, with reduced accuracy
For most users **Q4_K_M** is the sweet spot. Choose **Q8_0** if you have plenty of RAM and want maximum fidelity.
---
## Next Steps
Browse and download GGUF models from the Hugging Face marketplace
Explore the official Ollama registry library
Begin using your newly imported model
---
# Update Models
URL: https://ollaman.com/docs/features/model-updates
> Find out when your local models have a newer version and update them
## Overview
Model publishers sometimes update a model under the same name and tag, for example to fix a chat template or improve quality. Ollama doesn't tell you when this happens. OllaMan checks your local models against their registry and shows which ones have a newer version.
Update detection is available to everyone. Applying an update downloads the model again and requires OllaMan Pro.
---
## Spotting Updates
On the **Installed** page (in the sidebar), a model with a newer version shows an **update icon** (an arrow in a circle) below its name. Hover over the icon to see "Update available. Click to update."
OllaMan checks automatically:
- When you open **Installed**, if the last check is more than 6 hours old
- In the background every 24 hours while the app is open
Checks run quietly. If a check fails, for example while you're offline, no icon is shown and OllaMan tries again next time.
---
## Updating a Model
### Click the Update Icon
Click the update icon below the model name. You can also open the model's **⋯** menu and choose **Update model**.
### Wait for the Download
OllaMan downloads the new version. Only the changed layers are downloaded, so updates are often much smaller than the full model. A spinner shows while the model is updating, and progress also appears on the [Downloads](/docs/features/install-online) page.
### Done
When the download finishes, the update icon disappears.
The model keeps its name and is replaced by the new version. If you depend on the exact current version, copy it under another name first, or skip the update.
---
## Skipping a Version
If you don't want an update, open the model's **⋯** menu and choose **Skip this version**. The icon disappears and comes back only when the publisher releases another new version.
---
## Supported Models
| Model source | Update check |
|---|---|
| Ollama library (e.g. `llama3.2`, `qwen3:8b`) | Supported |
| User models on ollama.com (e.g. `user/model:tag`) | Supported |
| Hugging Face GGUF (`hf.co/org/repo:quant`) | Supported |
| Cloud models (`:cloud`) | Not checked |
| Models you created or imported locally | Not checked (no registry version) |
---
## FAQ
Your models may already be up to date, or the last check failed. Reopen **Installed** later, and make sure you're online.
Updating a model requires OllaMan Pro. Detection stays free, so you can still see which models have updates.
Yes. Click the update icon on each model you want to update. Each update shows its own progress on the Downloads page.
---
## Next Steps
Browse and download new models
Install models directly from Hugging Face
Remove models you no longer need
---
# Test Token Throughput Speed
URL: https://ollaman.com/docs/features/token-speed
> Measure and share model performance metrics
## Overview
OllaMan includes a built-in performance measurement tool that shows how fast your models generate responses. Understanding token throughput helps you evaluate model efficiency and optimize your hardware setup.
---
## Viewing Token Speed
Token speed is automatically measured during every chat interaction.
### Start a Chat
Navigate to the **Chat** page and select a model to chat with.
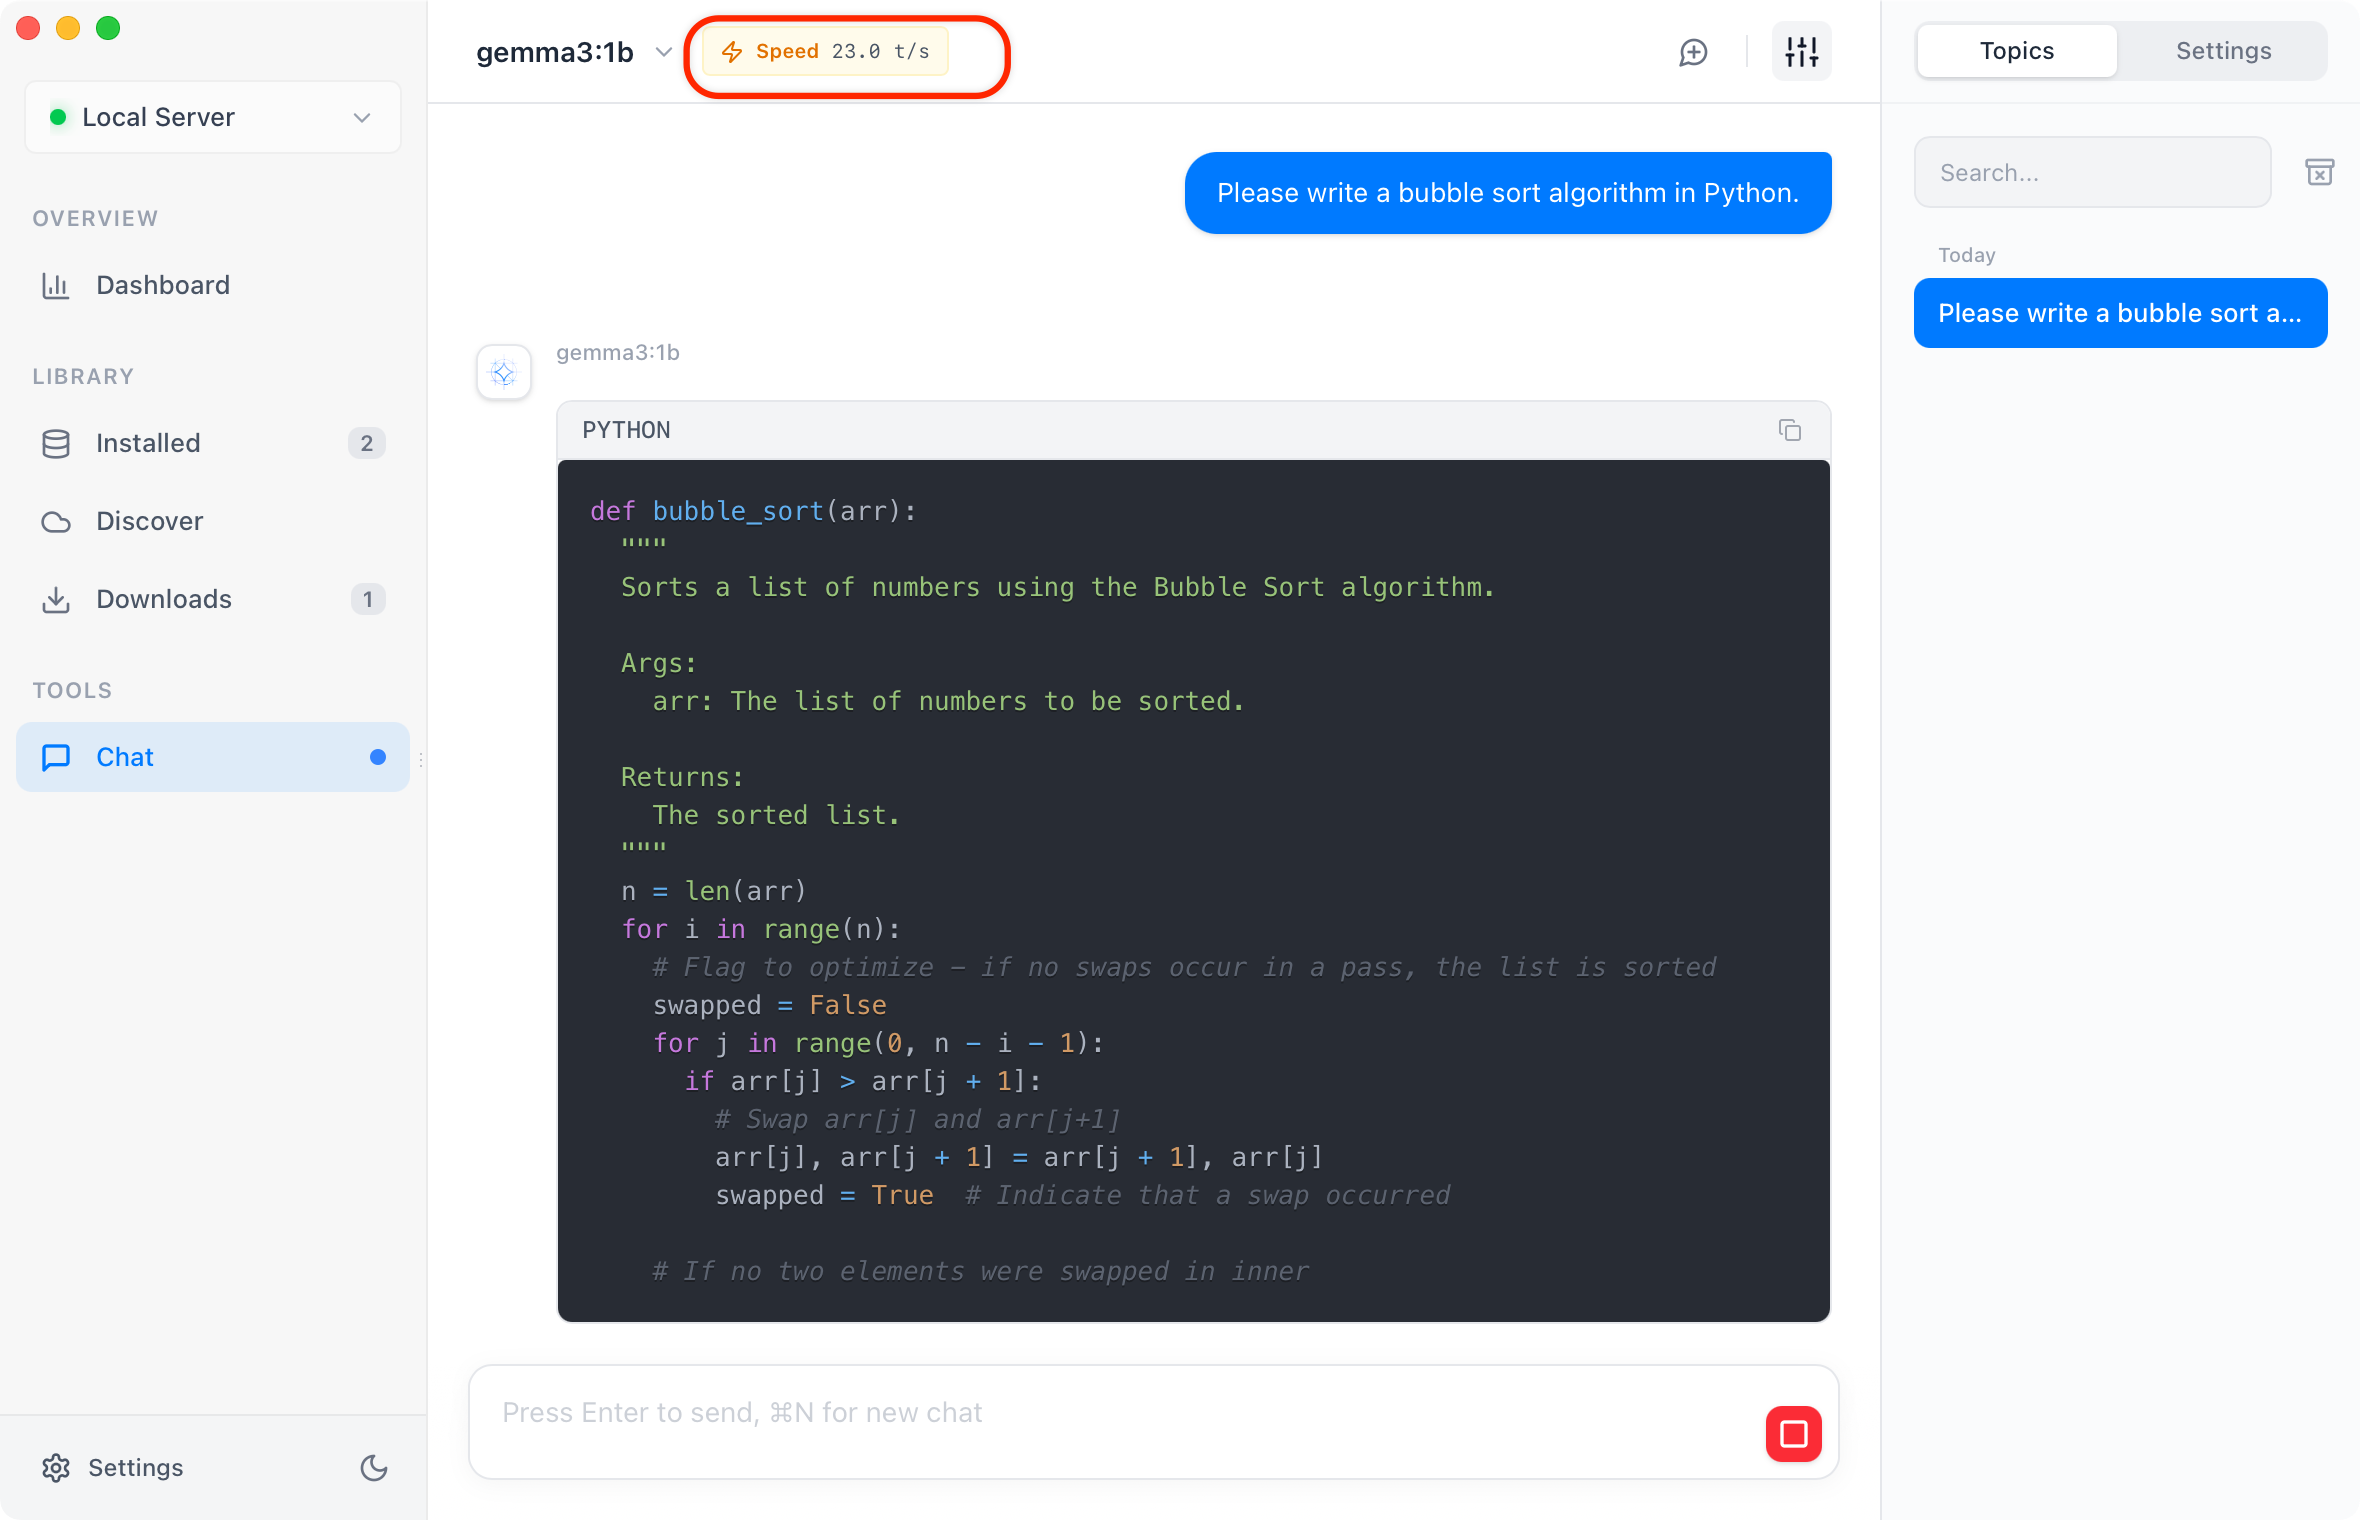
### Send a Message
Type and send any message to the model. The longer and more complex the response, the more accurate the speed measurement.
### Wait for Response
As the model generates its response, you'll see the streaming text appear in real-time.
### Check Speed in Status Bar
After the model completes its response, look at the **top status bar** in the Chat interface.
You'll see the token generation speed displayed as:
- **Tokens per second** (e.g., "45.2 tokens/s")
- **Total tokens generated**
- **Response time**
---
## Understanding the Metrics
### Tokens Per Second
**What it means**: How many tokens (words/word pieces) the model generates each second
**Typical ranges**:
- **5-15 tokens/s**: Slow, may feel laggy (large model on CPU)
- **15-30 tokens/s**: Moderate, acceptable for most uses
- **30-60 tokens/s**: Fast, smooth experience
- **60+ tokens/s**: Very fast, excellent performance
### Factors Affecting Speed
Larger models (70B) are slower than smaller ones (7B)
Higher quantization (Q8_0) is slower than lower (Q4_0)
GPU acceleration provides 10-100x faster speeds than CPU
Longer conversations slow down response generation
Other applications competing for resources reduce speed
Complex requests may process slower than simple ones
---
## Sharing Performance Cards
OllaMan lets you create beautiful, shareable performance cards to showcase your model's speed.
### Generate a Response
Complete a chat interaction to measure token speed (as described above).
### Click on Speed Display
In the top status bar, **click directly on the token speed number**.
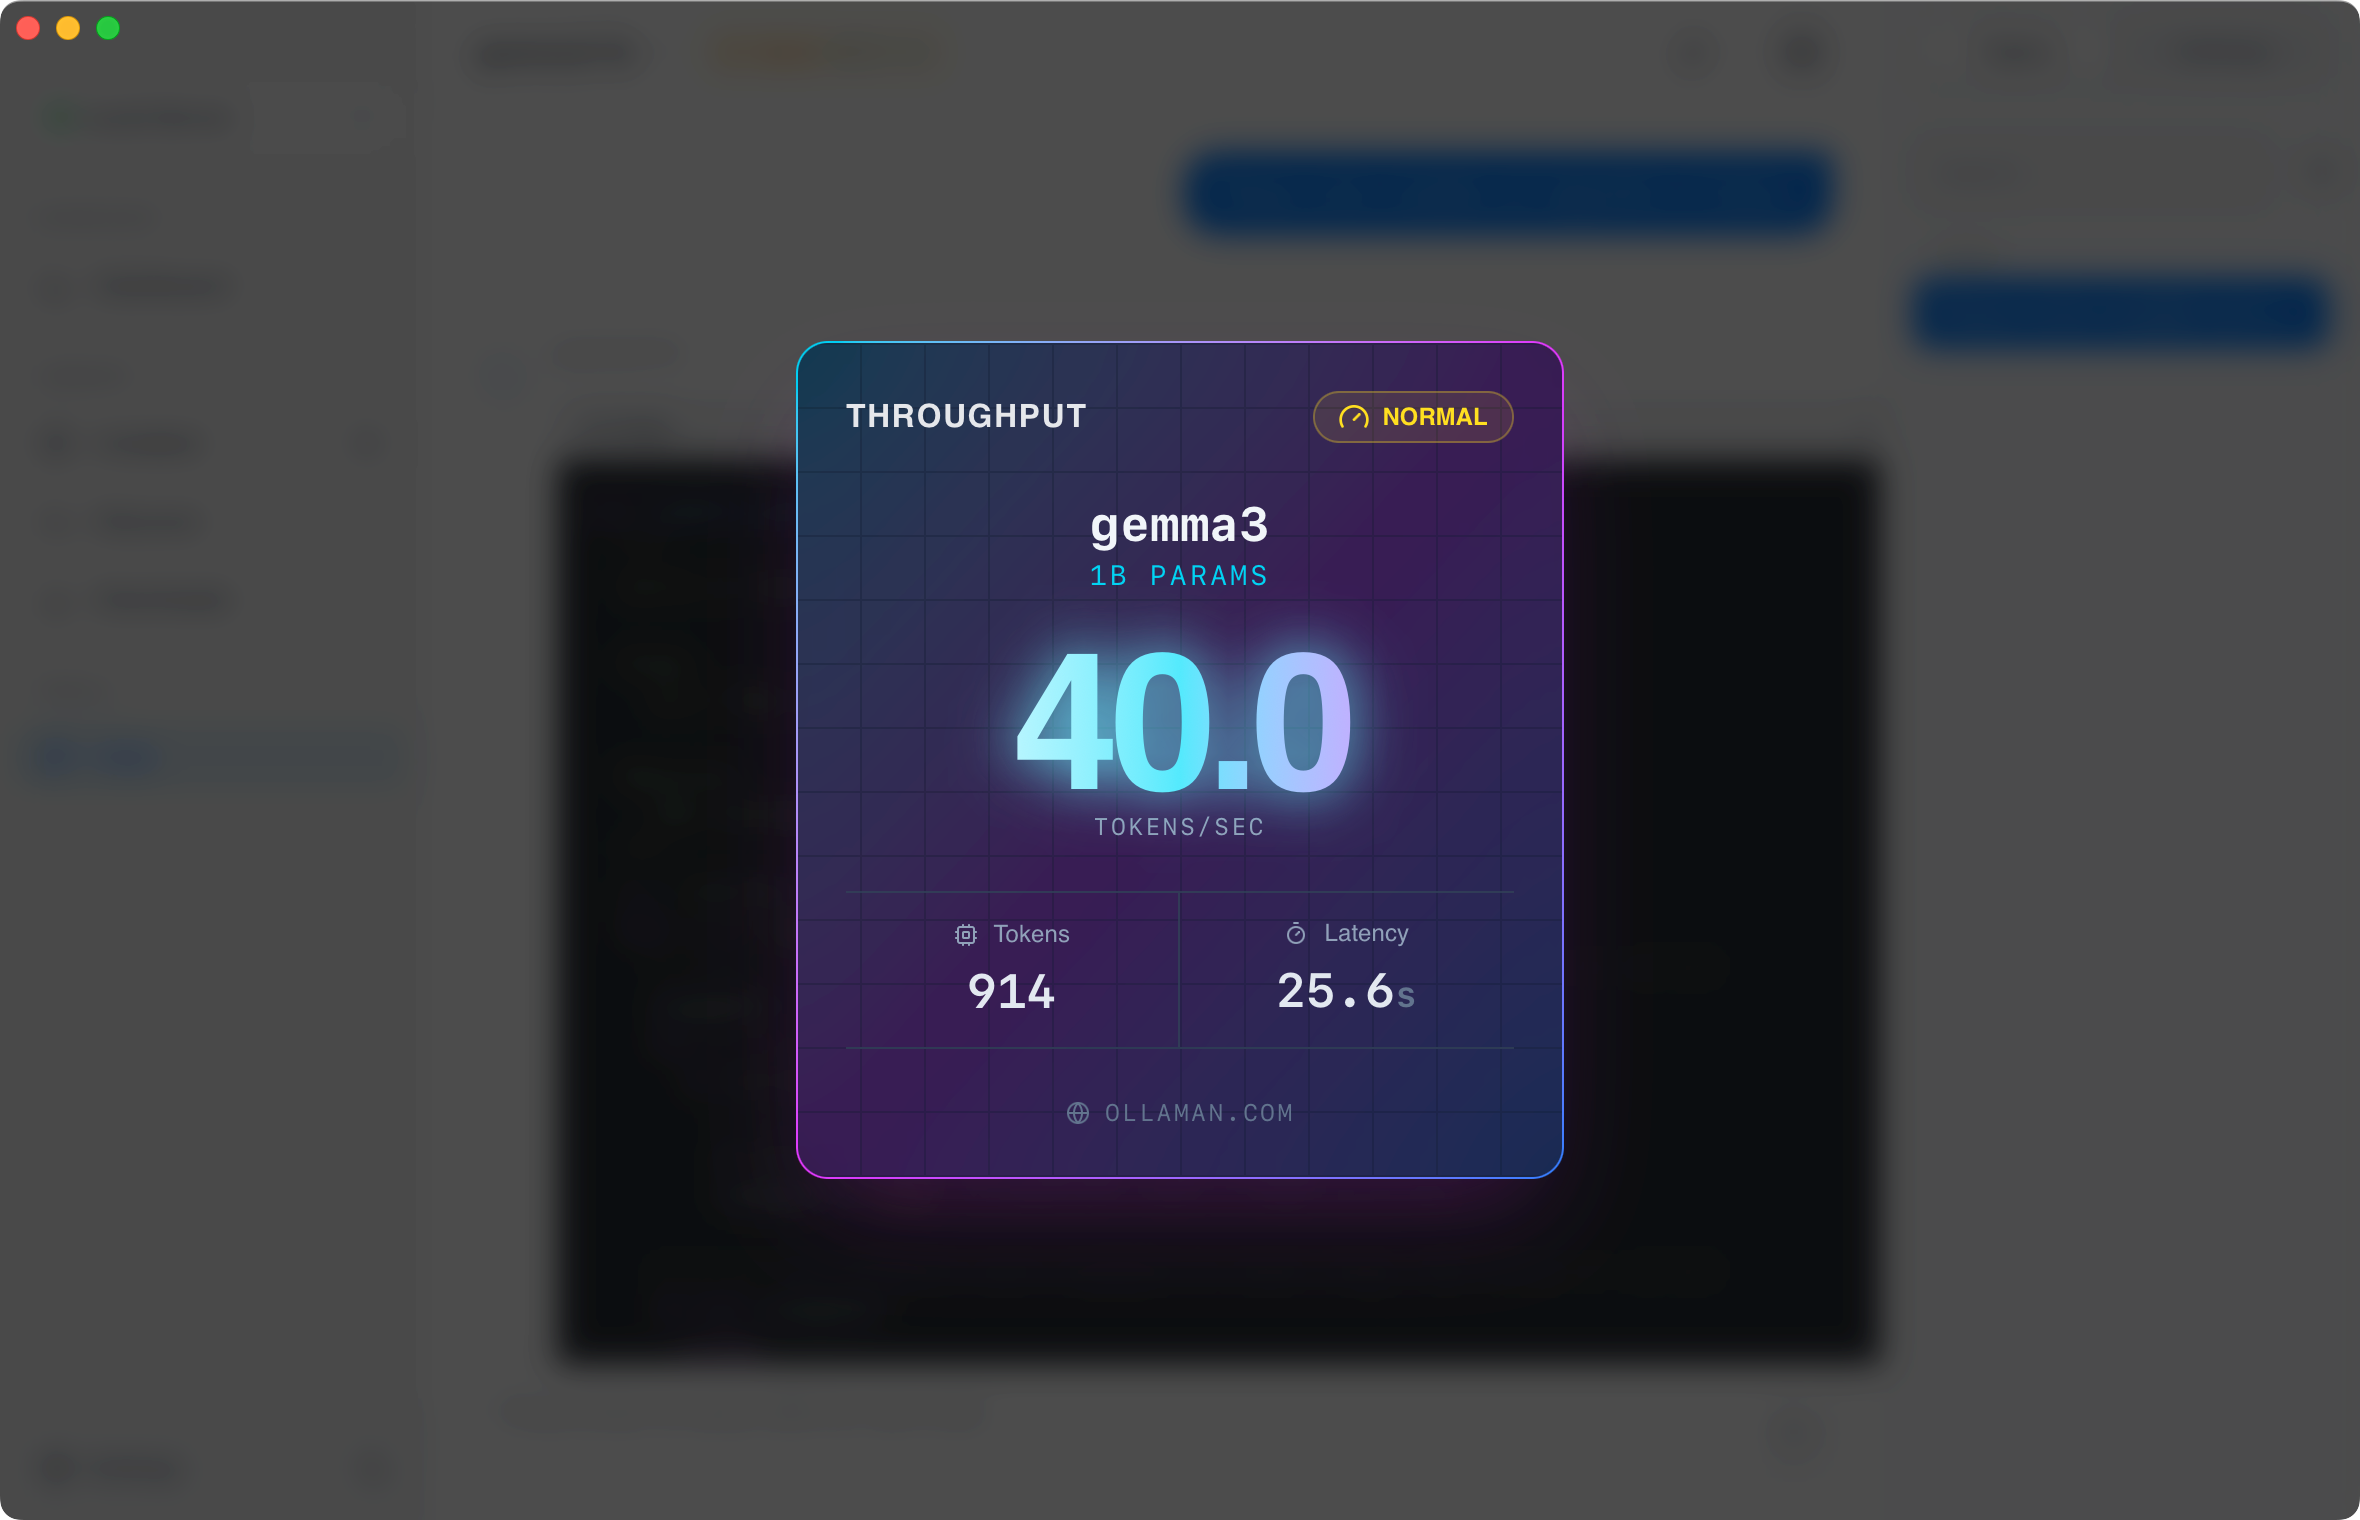
### View Performance Card
A beautiful, designed performance card will appear showing:
- Model name and version
- Token generation speed
- Total tokens generated
- Response time
- System information (hardware)
- Visual speed rating
### Capture Screenshot
Use your operating system's screenshot tool to capture the card:
- **macOS**: `⌘ + Shift + 4`
- **Windows**: `Win + Shift + S`
- **Linux**: `PrtSc` or screenshot tool
### Share on Social Media
Share your performance card on:
- Twitter/X
- Reddit (r/LocalLLaMA, r/ollama)
- Discord communities
- GitHub discussions
- Tech forums
The performance card shows only:
- Model name and speed metrics
- No conversation content is included
- No personal information is shared
- You control what you screenshot and share
---
## Benchmarking Your Setup
Use token speed testing to optimize your configuration:
### Testing Different Models
### Choose Test Prompt
Use a consistent prompt for fair comparison:
```
"Write a detailed explanation of how photosynthesis works in plants."
```
### Test Each Model
Send the same prompt to different models and record speeds.
### Compare Results
Create a comparison table:
| Model | Size | Speed | Quality |
|-------|------|-------|---------|
| llama3.1:8b | 4.7GB | 42 t/s | Good |
| mistral:7b | 4.1GB | 48 t/s | Good |
| llama3.1:70b | 40GB | 8 t/s | Excellent |
### Testing Quantization Levels
Compare the same model with different quantizations:
1. Install multiple versions (e.g., `llama3:8b-q4_0`, `llama3:8b-q8_0`)
2. Test with identical prompts
3. Evaluate speed vs. quality trade-offs
4. Choose the best balance for your needs
### Testing Hardware Configurations
Track speeds before and after:
- GPU driver updates
- RAM upgrades
- Moving from CPU to GPU
- System optimizations
---
## Interpreting Results
### What's "Good" Speed?
**Target**: 20+ tokens/s
At this speed, text appears faster than most people can read, providing a smooth, natural experience.
**Target**: 15+ tokens/s
Code generation benefits from accuracy over speed. 15+ tokens/s is sufficient for comfortable development work.
**Target**: 25+ tokens/s
Creative tasks benefit from faster iteration. Higher speeds let you generate and refine content more efficiently.
**Target**: 40+ tokens/s
Real-time applications and user-facing services need higher throughput to handle multiple concurrent requests.
### Quality vs. Speed
Remember that speed isn't everything:
- Slower large models often produce better results
- Q4_0 is faster than Q8_0 but may have lower quality
- Consider your use case when choosing models
- Sometimes waiting an extra second is worth it for better output
---
## Optimization Tips
**Hardware Upgrades**:
- Enable GPU acceleration in Ollama
- Upgrade to a dedicated GPU (NVIDIA recommended)
- Add more RAM for larger context windows
- Use NVMe SSD for faster model loading
**Software Optimization**:
- Close unnecessary applications during inference
- Use smaller quantized models when quality allows
- Keep context windows reasonable (avoid very long chats)
- Update Ollama to the latest version
- Update GPU drivers regularly
**Model Selection**:
- Use smaller models for simple tasks (7B instead of 70B)
- Choose appropriate quantization (Q4_0 for speed, Q8_0 for quality)
- Test different model families (Mistral often faster than Llama)
---
## Troubleshooting
If token speed doesn't appear:
1. Ensure the model completed its response
2. Check that you're on the Chat page
3. Look in the top status bar, not the message area
4. Try refreshing the page
5. Send another message to trigger measurement
If experiencing very slow generation:
1. Check if GPU is being used (check Ollama logs)
2. Verify no other heavy applications are running
3. Try a smaller model or lower quantization
4. Check available system memory
5. Consider hardware limitations (CPU-only is much slower)
If clicking speed doesn't show the card:
1. Ensure you clicked directly on the speed number
2. Wait for the response to fully complete
3. Refresh the page and try again
4. Check browser console for errors
5. Try a different browser
If speeds vary significantly:
1. This is normal - first response may be slower (model loading)
2. Subsequent responses in the same chat should be more consistent
3. Long contexts gradually slow down generation
4. System background tasks can cause variations
5. Use average of multiple tests for accurate benchmarks
---
## Next Steps
Learn how to monitor and manage running models
Explore more chat interface capabilities
Get help with slow models and optimization
---
# Context Length & Usage
URL: https://ollaman.com/docs/features/context-usage
> Set how much a model can remember and see how much of it a chat uses
## Overview
Every model has a **context window**: the maximum number of tokens it can consider at once, including the system prompt, the chat history, attachments, and its reply. When a conversation grows past the window, Ollama silently drops the earliest content and the model "forgets" it.
OllaMan helps you manage this in two ways:
- **Context Length**: choose how large the window is, per agent or per chat
- **Context usage ring**: see how full the window is after each reply
---
## Checking Context Usage
The context usage ring sits at the bottom of the chat input area, right after the **Agent Mode** button. It appears once a model is selected and fills up as the conversation grows.
### Read the Ring
The ring's color shows how full the window is:
- **Gray**: plenty of room
- **Amber**: 80% or more used, the window is almost full
- **Red**: 95% or more used, earlier messages may be cut off
### Hover for Details
Hover over the ring (or focus it with the keyboard) to open the details panel. It shows:
- The percentage used and tokens used out of the limit
- **Prompt**: tokens taken by the system prompt, history, and your latest message
- **Reply**: tokens in the model's latest reply
- **Remaining**: tokens still free
Usage is measured from what Ollama reports for the latest reply, so the ring fills in after the first reply in a chat. In Agent Mode or with web search, it reflects the last step of the reply.
If the panel says the server did not report a context limit, Ollama's own default applies and only the token count is shown.
---
## Setting the Context Length
### For the Current Chat
### Open the Chat Settings
Click the settings button in the top-right toolbar of the Chat page to show the right panel, then switch to its **Settings** tab.
### Choose a Context Length
Pick a value from **Context Length**. The options stop at the model's maximum supported length, which is marked "(model max)".
### Continue Chatting
The new length applies from the next message. It is saved with this chat only.
### As an Agent's Default
Open the agent's edit panel (right-click the agent in the Agent View and choose **Edit**) and set **Context Length**. New chats with that agent use it unless the chat overrides it.
### Auto
**Auto (server default)** sends no value and lets Ollama decide. Ollama then uses `OLLAMA_CONTEXT_LENGTH` if you set it, or a default based on your available GPU memory.
A larger context window uses more memory, and changing it makes Ollama reload the model. If the model no longer fits in GPU memory, it can run partly on the CPU and become much slower. Increase the length step by step and watch the [token speed](/docs/features/token-speed).
---
## When the Window Is Full
When the ring turns amber or red:
- **Increase the Context Length**, if your memory allows
- **Start a new chat** and paste in only the summary you need
- **Attach smaller files**, or only the relevant parts
- With [web search](/docs/features/web-search), lower **Results per search** to keep results compact
---
## FAQ
Select a model first. The ring then appears, and fills in after the model's first reply.
The conversation probably exceeded the context window. Check whether the ring is red, then increase the Context Length or start a new chat.
The model may no longer fit in GPU memory. Choose a smaller Context Length or a smaller model.
---
## Next Steps
Check how a larger window affects speed
Monitor memory used by loaded models
Set a default Context Length per agent
---
# Export Chats
URL: https://ollaman.com/docs/features/session-export
> Save a conversation as a Markdown or JSON file
## Overview
You can export any chat to a file, to keep a record, share it, or use it elsewhere. OllaMan supports two formats:
| Format | Best for | Includes |
|---|---|---|
| **Markdown** (`.md`) | Reading, sharing, notes apps | Readable transcript with thinking, tool steps, and attachment names |
| **JSON** (`.json`) | Backups and scripts | Complete data, including images and the chat's settings |
---
## Exporting a Chat
You can export from the chat history list or from the chat you have open.
### From the Chat History List
### Open the Menu
In the chat history list, right-click a chat, or hover over it and click the **⋯** button.
### Choose a Format
Select **Export as Markdown** or **Export as JSON**.
### Save the File
Choose where to save the file in the save dialog. The suggested name is the chat title plus the date and time, for example `Trip plan-20261018-1430.md`.
### From the Open Chat
Click the **Export chat** button (download icon) at the top of the chat, then choose a format.
When the export finishes, a notification shows the file name. Click **Show in folder** to find the file.
The export button is grayed out until the chat has been saved, which happens after the first message. A brand-new, empty chat has nothing to export yet.
---
## What's in Each Format
### Markdown
A Markdown export starts with a summary table: the agent, model, creation and export time, model parameters, and message count. The system prompt follows in a collapsible section. Then comes the conversation:
- Each message under a **User** or **Assistant** heading
- The model's thinking in collapsible **Thinking** sections
- Agent Mode and web search steps as **Tool call** and **Tool result** blocks
- Attached files listed by name and size
- Images noted as a placeholder, since Markdown files can't embed them here
### JSON
A JSON export keeps everything, including images (as base64), the agent, the settings the chat was created with, and any per-chat overrides. Each file includes a `schemaVersion` field so scripts can rely on the structure.
Exported files include the full conversation, the system prompt, and any images or file contents you shared. Check them before sharing.
---
## Next Steps
Organize chats by agent
Start a new chat when the context fills up
---
# Multi-Server Management
URL: https://ollaman.com/docs/features/multi-server
> Connect and switch between multiple Ollama servers
## Overview
OllaMan's multi-server feature allows you to connect to multiple Ollama instances, whether they're on your local machine, remote servers, or cloud instances. This is especially useful for teams, managing different hardware setups, or accessing models on various machines.
---
## Adding Servers
### Open Settings
Click the **Settings** icon in the sidebar (bottom-left).
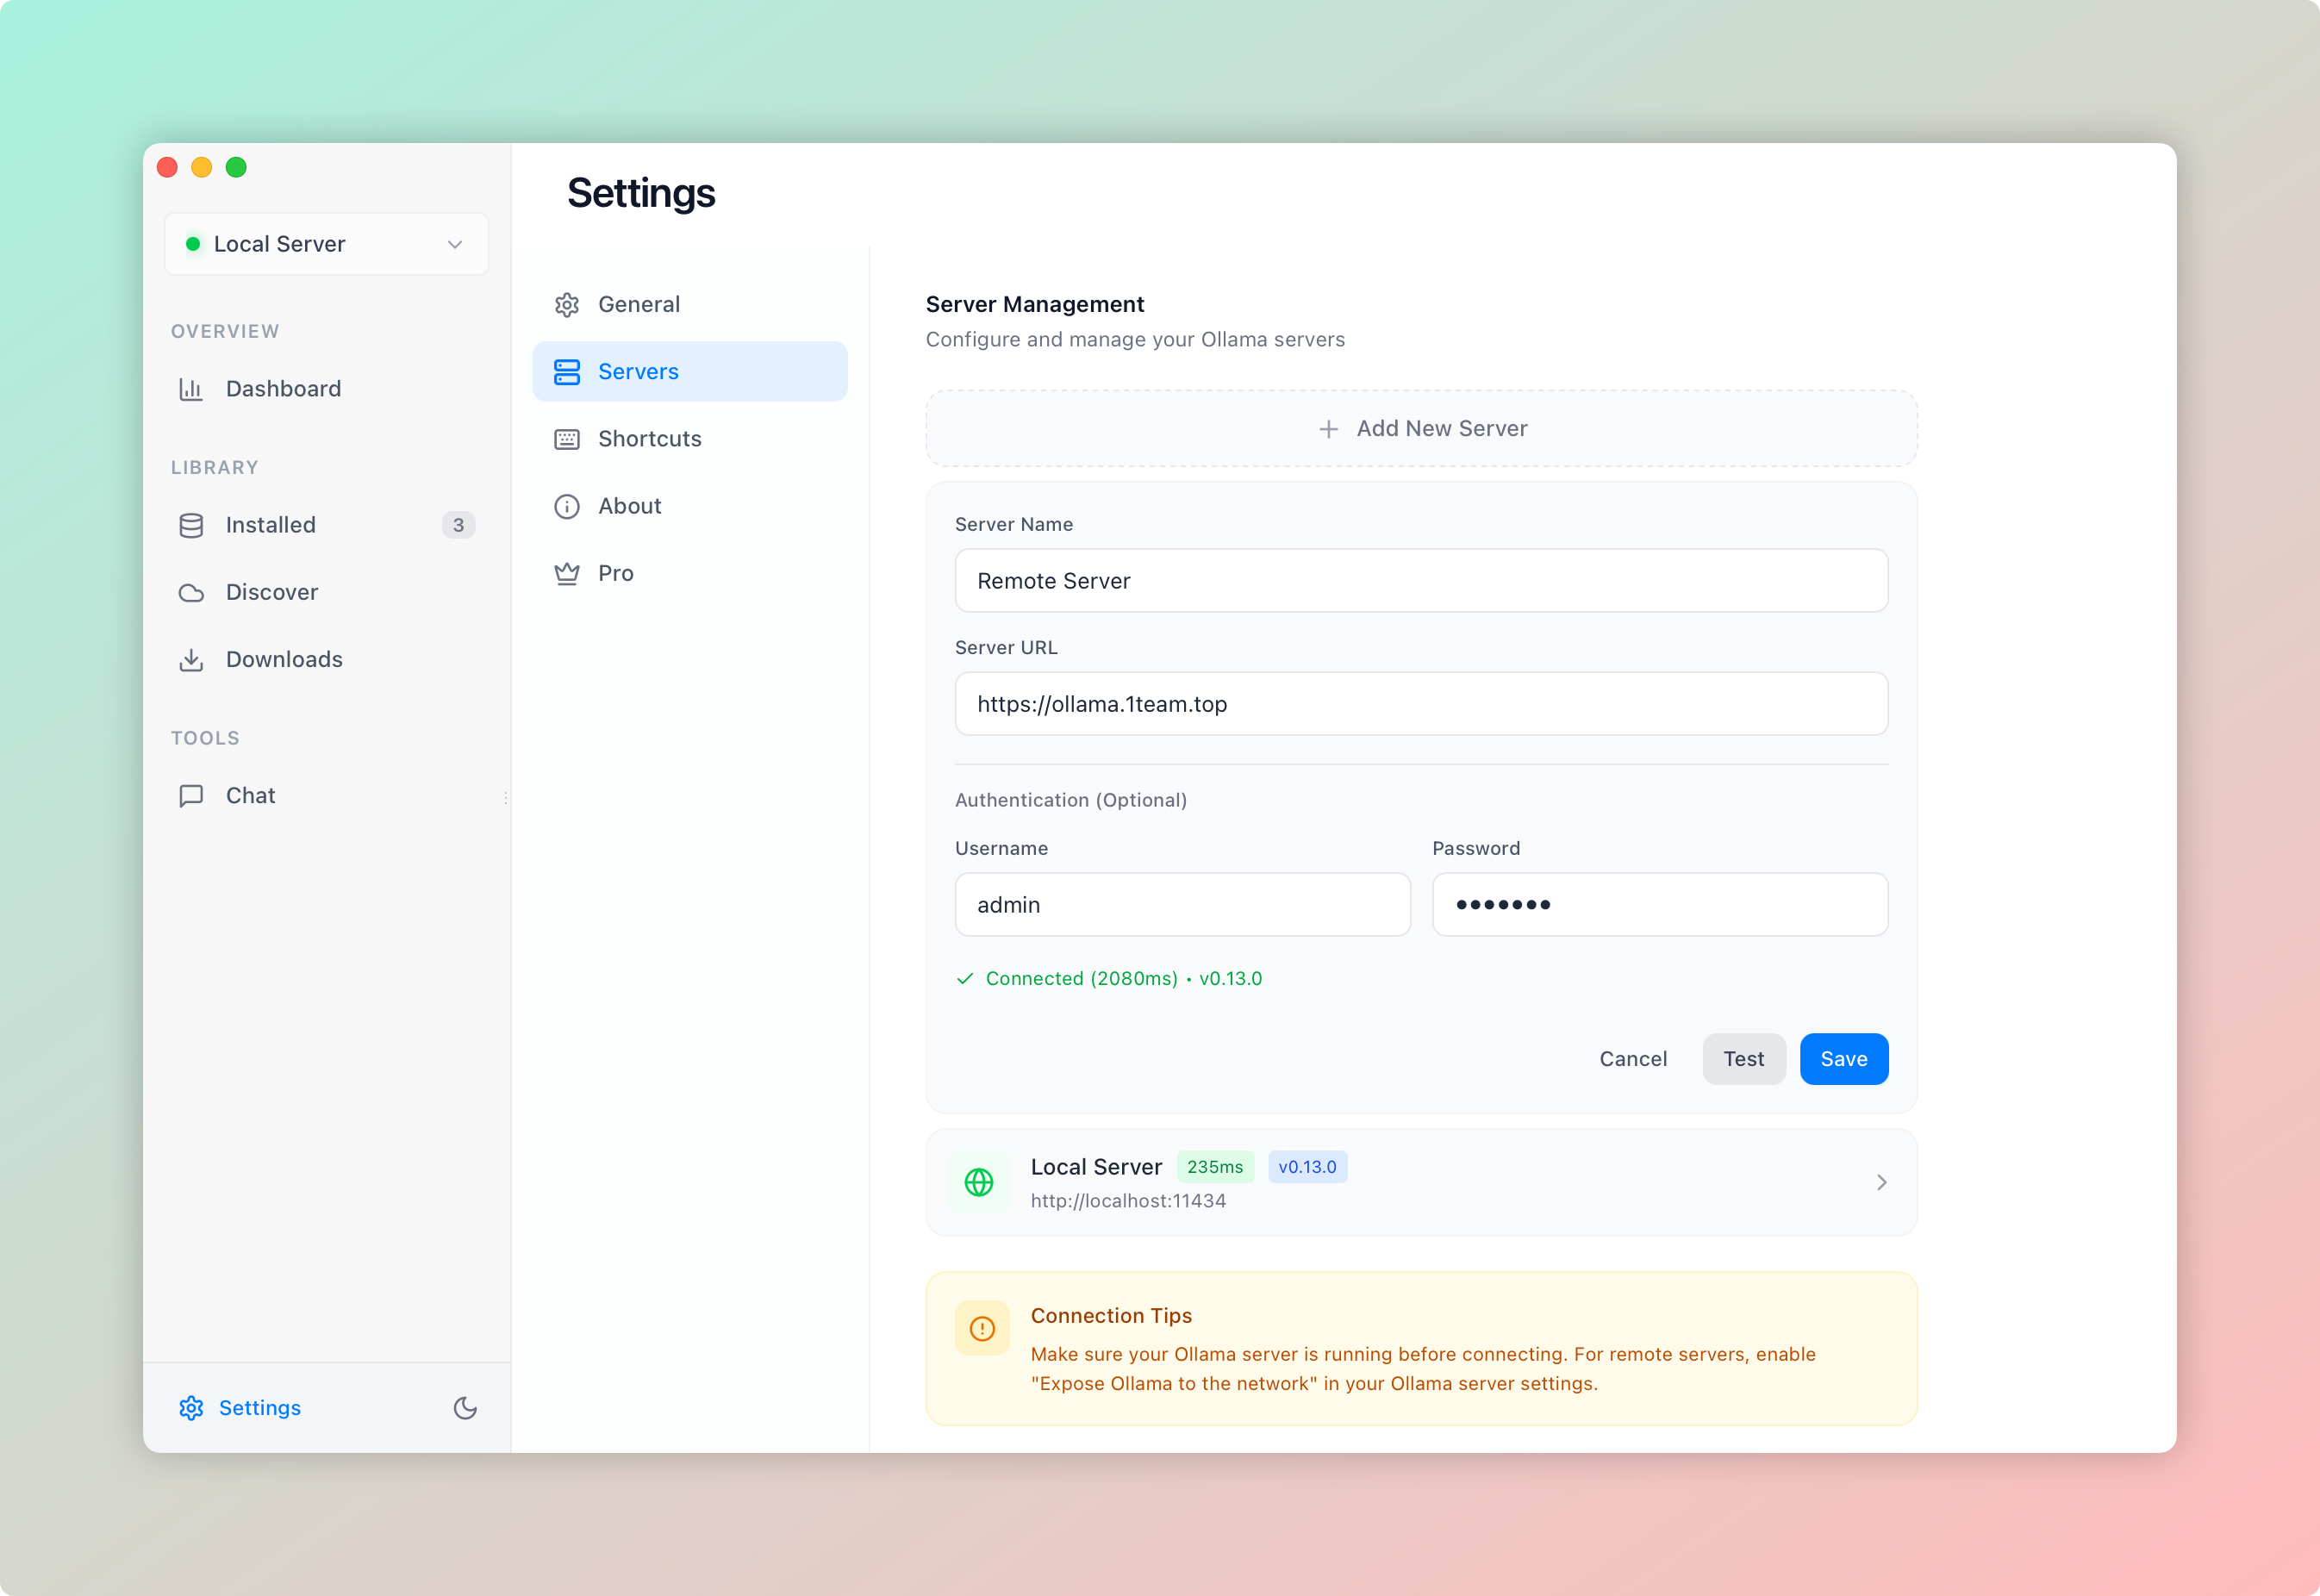
### Navigate to Servers
In the Settings menu, click on the **Servers** tab.
### Click Add Server
Click the **"Add Server"** button at the top of the Servers page.
### Enter Server Details
Fill in the server information:
**Server Name**: A friendly name to identify this server (e.g., "Office Server", "Home GPU", "Cloud Instance")
**Server URL**: The full Ollama server address
- Format: `http://hostname:port`
- Examples:
- `http://192.168.1.100:11434` (local network)
- `http://server.example.com` (domain)
- `https://ollama.mycompany.com` (HTTPS)
**Authentication** (Optional):
In the **Authentication** section, use the segmented control to pick the scheme that matches your server:
- **None**: no credentials sent (default, for local or trusted intranets)
- **Basic**: username + password, sends `Authorization: Basic` (for Nginx/Caddy reverse proxies)
- **Bearer**: paste a token, sends `Authorization: Bearer` (for API gateways / Cloudflare Tunnel)
- **Custom**: append arbitrary key/value headers, e.g. Cloudflare Access `CF-Access-Client-Id` / `CF-Access-Client-Secret`
See [Server Authentication Setup](/docs/features/authentication) for detailed steps.
### Test Connection
Click the **"Test Connection"** button to verify the server is reachable.
You'll see:
- **Connected**: Green indicator with server version
- **Connection Failed**: Red indicator with error details
### Save Server
If the connection test succeeds, click **"Save"** to add the server to your list.
---
## Switching Between Servers
### Locate Server Selector
At the **top of the sidebar**, you'll see a dropdown showing the currently active server.
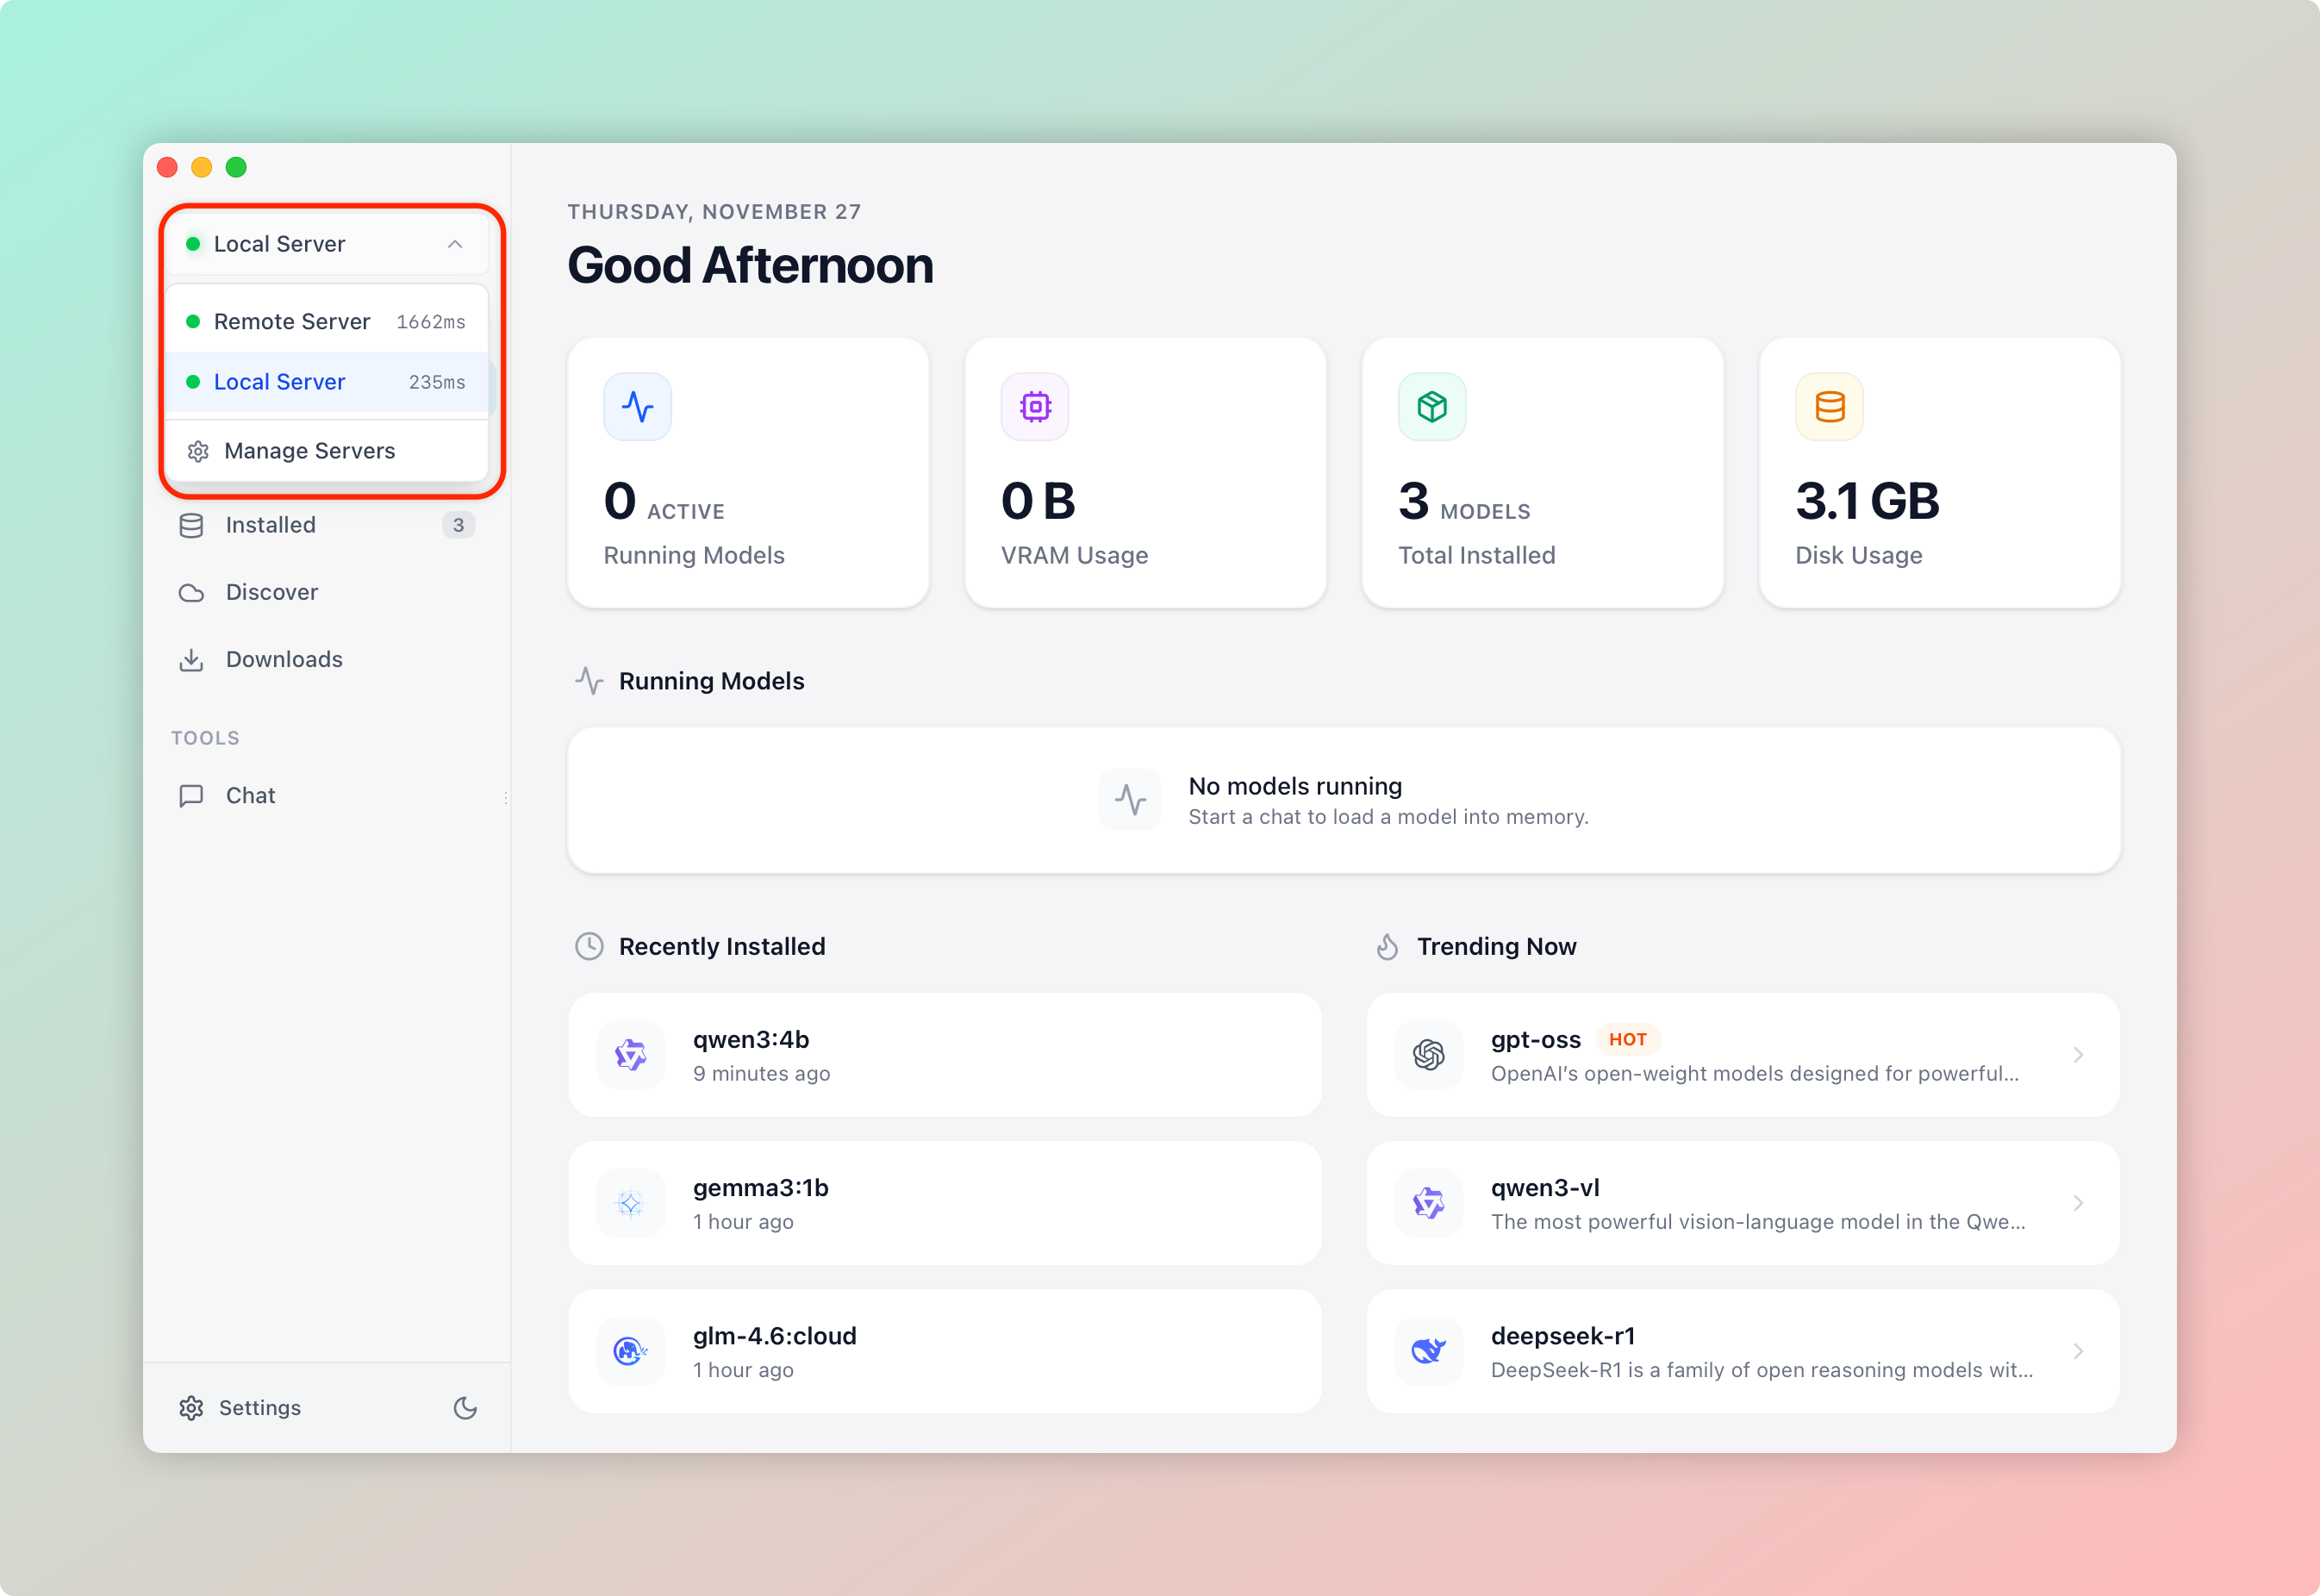
### Open Dropdown
Click on the server selector to see all available servers.
### Select Server
Click on any server name to switch to it.
The application will:
1. Disconnect from the current server
2. Connect to the selected server
3. Reload the model list
4. Update all statistics
### Verify Connection
The server selector will show:
- **Server name**
- **Connection status** (green dot = connected)
- **Server version** (on hover)
When you switch servers, OllaMan automatically refreshes:
- Local models list
- Running models
- Dashboard statistics
- Available resources
---
## Managing Servers
### Edit Server
### Open Servers Settings
Navigate to **Settings** → **Servers**
### Find the Server
Locate the server you want to edit in the servers list.
### Click Edit
Click the **Edit** button (pencil icon) next to the server.
### Modify Details
Change any of the server details:
- Server name
- URL
- Authentication credentials
### Test and Save
Click **"Test Connection"** to verify changes, then **"Save"**.
### Delete Server
### Open Servers Settings
Navigate to **Settings** → **Servers**
### Find the Server
Locate the server you want to remove.
### Click Delete
Click the **Delete** button (trash icon) next to the server.
### Confirm Deletion
Confirm you want to remove this server configuration.
Deleting a server removes only the connection configuration. Models and data on the actual server remain untouched.
---
## Server Connection States
### Connected
**Indicator**: Green dot
**Means**:
- Successfully connected to the server
- Can list and manage models
- Can start chats
- Real-time statistics available
### Disconnected
**Indicator**: Red dot
**Means**:
- Cannot reach the server
- Models list unavailable
- Cannot download or chat
**Common causes**:
- Server is offline
- Network issues
- Incorrect URL
- Firewall blocking connection
### Testing
**Indicator**: Yellow/orange dot (pulsing)
**Means**:
- Currently checking connection
- Measuring latency
- Verifying server version
---
## Use Cases
### Home and Work Setup
**Scenario**: Different models at home (powerful GPU) and office (CPU only)
**Solution**:
- Add "Home Server" pointing to `http://192.168.1.50:11434`
- Add "Office Server" pointing to local `http://localhost:11434`
- Switch based on location
### Team Collaboration
**Scenario**: Development team sharing a powerful remote server
**Solution**:
- Set up a cloud instance with GPUs
- Configure authentication
- All team members add the server
- Everyone accesses the same models
### Multi-Cloud Deployment
**Scenario**: Models distributed across different cloud providers
**Solution**:
- Add "AWS Server", "Azure Server", "GCP Server"
- Switch between them based on:
- Cost optimization
- Geographic location
- Model availability
- Performance requirements
### Development and Production
**Scenario**: Testing models locally before deploying
**Solution**:
- "Development" server for experiments
- "Production" server for stable models
- Easy switching for testing and deployment
---
## Server Health Monitoring
### Connection Latency
When connected, OllaMan shows server latency:
- **<50ms**: Excellent (local network)
- **50-150ms**: Good (nearby server)
- **150-300ms**: Acceptable (remote server)
- **>300ms**: Slow (may affect user experience)
### Server Version
The Servers page displays the Ollama version for each server:
- Helps identify outdated servers
- Ensures compatibility
- Useful for troubleshooting
### Auto-Check
OllaMan automatically checks server health:
- Every time you open Settings → Servers
- When you switch servers
- Every 5 minutes for the active server (background)
---
## Troubleshooting
**Solutions**:
1. Verify the server URL is correct
2. Check that Ollama is running on that machine
3. Test connection with curl:
```bash
curl http://server-url:11434/api/tags
```
4. Check firewall settings allow port 11434
5. Verify network connectivity to the server
6. For HTTPS, ensure valid SSL certificates
**Solutions**:
1. Confirm the scheme matches the server (Basic / Bearer / Custom)
2. Verify username and password are correct (Basic)
3. Check that Ollama server has auth configured
4. Ensure no extra spaces in credentials
5. Try testing auth with curl:
```bash
# Basic
curl -u username:password http://server:11434/api/tags
# Bearer
curl -H "Authorization: Bearer YOUR_TOKEN" http://server:11434/api/tags
# Custom (Cloudflare Access)
curl -H "CF-Access-Client-Id: YOUR_ID" -H "CF-Access-Client-Secret: YOUR_SECRET" http://server:11434/api/tags
```
6. Check Ollama server logs for auth errors
7. For gateways like Cloudflare Access, confirm the service token hasn't expired or been revoked
**Solutions**:
1. Ensure you clicked "Save" after adding
2. Check that test connection succeeded
3. Verify you have Pro license active
4. Clear browser cache and try again
5. Check browser console for errors
**Solutions**:
1. This is normal for servers with many models
2. Wait for the model list to fully load
3. Check server latency (high latency = slow switching)
4. Ensure stable network connection
5. Consider servers on faster networks
**Solutions**:
1. Verify server connection is successful
2. Check that the remote Ollama has models installed
3. Try refreshing the Local Models page
4. Check server permissions (if using auth)
5. Verify the server's Ollama version is compatible
---
## Security Best Practices
**Network Security**:
- Don't expose Ollama directly to the internet
- Use VPN or SSH tunnels for remote access
- Configure firewall rules to limit access
- Use HTTPS when possible
**Authentication**:
- Always enable auth for internet-facing servers
- Use strong passwords (20+ characters)
- Rotate credentials regularly
- Don't share credentials between team members
**Access Control**:
- Limit who can access each server
- Monitor connection logs
- Remove unused server configurations
- Keep Ollama updated to latest version
---
## Next Steps
Download models to your connected servers
View running models across all servers
Learn the basics of OllaMan
---
# Server Authentication Setup
URL: https://ollaman.com/docs/features/authentication
> Configure Basic Auth, Bearer token, or custom header authentication for Ollama servers
## Overview
OllaMan supports four authentication schemes for connecting to protected Ollama servers:
| Scheme | Use case | Header sent |
|--------|----------|-------------|
| **None** | Local or trusted intranet | none |
| **Basic Auth** | Self-hosted reverse proxy (Nginx, Caddy, etc.) | `Authorization: Basic ` |
| **Bearer Token** | API gateway / Cloudflare Tunnel requiring token auth | `Authorization: Bearer ` |
| **Custom Headers** | Gateways that don't use `Authorization`, e.g. Cloudflare Access | arbitrary key/value pairs like `CF-Access-Client-Id` / `CF-Access-Client-Secret` |
Since Ollama itself doesn't provide authentication, you need to put it behind a reverse proxy or gateway. The sections below cover common server-side setups first, then how to pick the matching scheme in OllaMan.
---
## When to Use Authentication
You should enable authentication for your Ollama server in the following scenarios:
- **Server exposed to the internet**: Any server accessible from the public internet should be protected
- **Multiple users accessing the same server**: Prevent unauthorized access and abuse
- **Security policy requirements**: Organizational or team security standards require authentication
- **Protecting sensitive models**: When running proprietary or sensitive AI models
---
## Configuring Authentication for Ollama
### Using Nginx with Basic Auth
Nginx is the most commonly used reverse proxy server. Here's the complete configuration guide:
### Install Required Tools
First, ensure Nginx and Apache utilities (for generating password files) are installed:
```bash
# Ubuntu/Debian
sudo apt update
sudo apt install nginx apache2-utils
# macOS
brew install nginx
```
### Create Password File
Use the `htpasswd` command to create authentication users and passwords:
```bash
sudo htpasswd -c /etc/nginx/.htpasswd username
```
The system will prompt you to enter a password. To add more users, omit the `-c` flag:
```bash
sudo htpasswd /etc/nginx/.htpasswd another_user
```
### Configure Nginx Reverse Proxy
Create or edit the Nginx configuration file (e.g., `/etc/nginx/sites-available/ollama`):
```nginx
server {
listen 8080;
server_name your-server-domain.com;
location / {
# Enable Basic Auth
auth_basic "Ollama Server";
auth_basic_user_file /etc/nginx/.htpasswd;
# Proxy to Ollama default port
proxy_pass http://localhost:11434;
# Required proxy headers
proxy_set_header Host $host;
proxy_set_header X-Real-IP $remote_addr;
proxy_set_header X-Forwarded-For $proxy_add_x_forwarded_for;
proxy_set_header X-Forwarded-Proto $scheme;
# Handle WebSocket connections (if needed)
proxy_http_version 1.1;
proxy_set_header Upgrade $http_upgrade;
proxy_set_header Connection "upgrade";
# Timeout settings (large model inference may take time)
proxy_read_timeout 300s;
proxy_connect_timeout 75s;
}
}
```
**Port explanation**: In this configuration, Nginx listens on port 8080 and forwards to Ollama's default port 11434. Ollama remains running on localhost:11434 without any configuration changes. Clients access via `http://your-server:8080`.
### Enable and Restart Nginx
```bash
# Create symbolic link (Ubuntu/Debian)
sudo ln -s /etc/nginx/sites-available/ollama /etc/nginx/sites-enabled/
# Test configuration
sudo nginx -t
# Restart Nginx
sudo systemctl restart nginx
```
### Test Authentication Setup
Use curl to test if Basic Auth is working properly:
```bash
# Test unauthenticated request (should fail)
curl http://localhost:8080/api/tags
# Test authenticated request (should succeed)
curl -u username:password http://localhost:8080/api/tags
```
A successful response should return a list of models; failure will return a 401 Unauthorized error.
---
### Using Caddy with Basic Auth
Caddy is another popular reverse proxy with simpler configuration:
### Install Caddy
```bash
# Ubuntu/Debian
sudo apt install -y debian-keyring debian-archive-keyring apt-transport-https
curl -1sLf 'https://dl.cloudsmith.io/public/caddy/stable/gpg.key' | sudo gpg --dearmor -o /usr/share/keyrings/caddy-stable-archive-keyring.gpg
curl -1sLf 'https://dl.cloudsmith.io/public/caddy/stable/debian.deb.txt' | sudo tee /etc/apt/sources.list.d/caddy-stable.list
sudo apt update
sudo apt install caddy
# macOS
brew install caddy
```
### Generate Password Hash
```bash
caddy hash-password
```
After entering your password, copy the generated hash.
### Configure Caddyfile
Create or edit `/etc/caddy/Caddyfile`:
```txt title="Caddyfile"
:8080 {
basicauth {
username $2a$14$hashed_password_here
}
reverse_proxy localhost:11434
}
```
Replace `$2a$14$hashed_password_here` with the password hash generated earlier.
Caddy listens on port 8080 and forwards to Ollama's default port 11434, no Ollama configuration changes needed.
### Restart Caddy
```bash
sudo systemctl restart caddy
```
---
## Configuring Authentication in OllaMan
Once your server-side authentication is in place, pick the matching scheme when adding or editing the server in OllaMan:
### Open Server Settings
Click the **Settings** icon in the sidebar, then select the **Servers** tab.

### Add or Edit Server
Click the **"Add Server"** button, or edit an existing server.
### Pick an Authentication Scheme
In the server form, fill in the basics first:
1. **Server Name**: Give the server an easily recognizable name
2. **Server URL**: Enter the proxy or gateway address (e.g. `http://192.168.1.100:8080`)
Then, in the **Authentication** section, use the segmented control to pick the scheme that matches your server:
#### None
The default. No credentials are sent. Suitable for local or trusted intranet environments.
#### Basic
Matches Nginx/Caddy Basic Auth on the server side:
- **Username**: the auth username
- **Password**: the auth password (click the 👁 icon on the right to reveal it)
> **Backward compatibility**: when upgrading from an older version, any existing username / password is automatically recognized as Basic auth — no manual migration needed.
#### Bearer
Matches API gateways or Cloudflare Tunnel setups that require a Bearer token:
- **Token**: paste your access token (click the 👁 icon to reveal it)
- If you accidentally include a `Bearer ` prefix, it's stripped automatically so you won't end up with `Bearer Bearer xxx`
#### Custom
Matches gateways like Cloudflare Access that don't use the `Authorization` header:
- Click **"Add Header"** to add a key/value pair
- Typical example: Cloudflare Access service tokens `CF-Access-Client-Id` and `CF-Access-Client-Secret`
- Multiple header pairs can be added at once
**Values are preserved when switching schemes**: toggling between Basic / Bearer / Custom keeps each scheme's already-filled values so you can compare. On save, only the fields relevant to the active scheme are kept — credentials for other schemes are stripped so no unused secrets linger in `config.json`.
### Test Connection
Click the **"Test Connection"** button.
If the authentication information is correct, you'll see:
- **Connected**: Green indicator
- Server version information
If authentication fails, it will display:
- **Connection Failed**: Red indicator
- Error message (usually "401 Unauthorized")
### Save Configuration
After a successful test, click the **"Save"** button.
In the server list, any server with authentication configured shows a purple badge identifying the scheme in use (None shows no badge). OllaMan automatically attaches the corresponding auth headers to every request, including streaming chat and model uploads.
---
## Security Best Practices
### Network Security
- **Don't expose directly**: Avoid exposing Ollama directly to the public internet
- **Use VPN**: Access remote servers through VPN or SSH tunnels
- **Configure firewall**: Limit access to specific IP addresses only
- **Enable HTTPS**: Always use HTTPS encrypted connections in production
### Authentication Management
- **Strong passwords**: Use passwords with 20+ characters
- **Regular rotation**: Periodically change authentication credentials
- **Separate credentials**: Don't share the same credentials among team members
- **Least privilege**: If possible, assign different permission levels to different users
### Access Control
- **Monitor logs**: Regularly check access logs to detect anomalous behavior
- **Limit connections**: Use IP whitelisting to restrict access sources
- **Timely cleanup**: Remove user accounts that are no longer in use
- **Stay updated**: Keep Ollama, Nginx/Caddy updated to the latest versions
---
## HTTPS Configuration (Recommended)
For production environments and internet access, HTTPS configuration is strongly recommended:
### Using Let's Encrypt with Nginx
```bash
# Install Certbot
sudo apt install certbot python3-certbot-nginx
# Obtain certificate and automatically configure Nginx
sudo certbot --nginx -d your-domain.com
```
### Using Caddy (Automatic HTTPS)
Caddy automatically obtains and renews SSL certificates for your domain:
```txt title="Caddyfile"
your-domain.com {
basicauth {
username $2a$14$hashed_password_here
}
reverse_proxy localhost:11434
}
```
After restarting Caddy, it will automatically obtain and configure the SSL certificate.
---
## Troubleshooting
**Possible Causes**:
- Incorrect username or password (Basic)
- Password file path misconfigured (Basic)
- Nginx/Caddy configuration syntax error (Basic)
- Password file permission issues (Basic)
- Bearer token expired or revoked (Bearer)
- Scheme mismatch with the server (e.g. sending Basic credentials to a gateway that expects Bearer)
- Typo in a custom header name or value (Custom)
**Solutions**:
1. Confirm the scheme matches the server (Basic / Bearer / Custom)
2. Verify username and password are correct (Basic)
3. Check if password file exists: `ls -l /etc/nginx/.htpasswd`
4. Test Nginx configuration: `sudo nginx -t`
5. View Nginx error logs: `sudo tail -f /var/log/nginx/error.log`
6. Test directly with curl:
```bash
# Basic
curl -v -u username:password http://localhost:11434/api/tags
# Bearer
curl -v -H "Authorization: Bearer YOUR_TOKEN" http://localhost:11434/api/tags
# Custom (Cloudflare Access example)
curl -v -H "CF-Access-Client-Id: YOUR_ID" -H "CF-Access-Client-Secret: YOUR_SECRET" http://localhost:11434/api/tags
```
7. Ensure password file has correct permissions:
```bash
sudo chmod 644 /etc/nginx/.htpasswd
```
**Possible Causes**:
- Reverse proxy timeout settings too short
- Ollama responding slowly
- Network issues
**Solutions**:
1. Increase Nginx timeout settings:
```nginx
proxy_read_timeout 300s;
proxy_connect_timeout 75s;
```
2. Check Ollama service status
3. Test direct connection to Ollama (bypass reverse proxy)
4. Check server resource usage
**Possible Causes**:
- WebSocket connections not properly configured
- Proxy headers missing or incorrect
- CORS settings issues
**Solutions**:
1. Ensure WebSocket support is configured (if needed):
```nginx
proxy_http_version 1.1;
proxy_set_header Upgrade $http_upgrade;
proxy_set_header Connection "upgrade";
```
2. Add necessary proxy headers:
```nginx
proxy_set_header Host $host;
proxy_set_header X-Real-IP $remote_addr;
proxy_set_header X-Forwarded-For $proxy_add_x_forwarded_for;
```
3. Check Ollama logs for error messages
**Solutions**:
1. Reload Nginx configuration:
```bash
sudo nginx -s reload
```
2. Or completely restart Nginx:
```bash
sudo systemctl restart nginx
```
3. Clear browser authentication cache (close all tabs and reopen)
4. Verify password file contents:
```bash
sudo cat /etc/nginx/.htpasswd
```
---
## Next Steps
Learn how to manage multiple Ollama servers
Download models to connected servers
Learn the basics of OllaMan
---
# Agents
URL: https://ollaman.com/docs/features/agents
> Create, manage, and use AI agents for different scenarios
## What are Agents?
Agents are preset conversation configurations that define how AI models behave in specific scenarios. Each agent includes a unique personality, expertise, and parameter settings, allowing you to quickly switch between different AI assistants without manual configuration.
An agent contains:
- **Name**: Display name of the agent
- **Icon**: Emoji icon for visual identification
- **Description**: Brief description of the agent's purpose
- **Default Model**: Optional preferred model for the agent
- **System Prompt**: Instructions that define the AI's behavior and role
- **Parameters**: Temperature, Top P, Top K, and Context Length settings
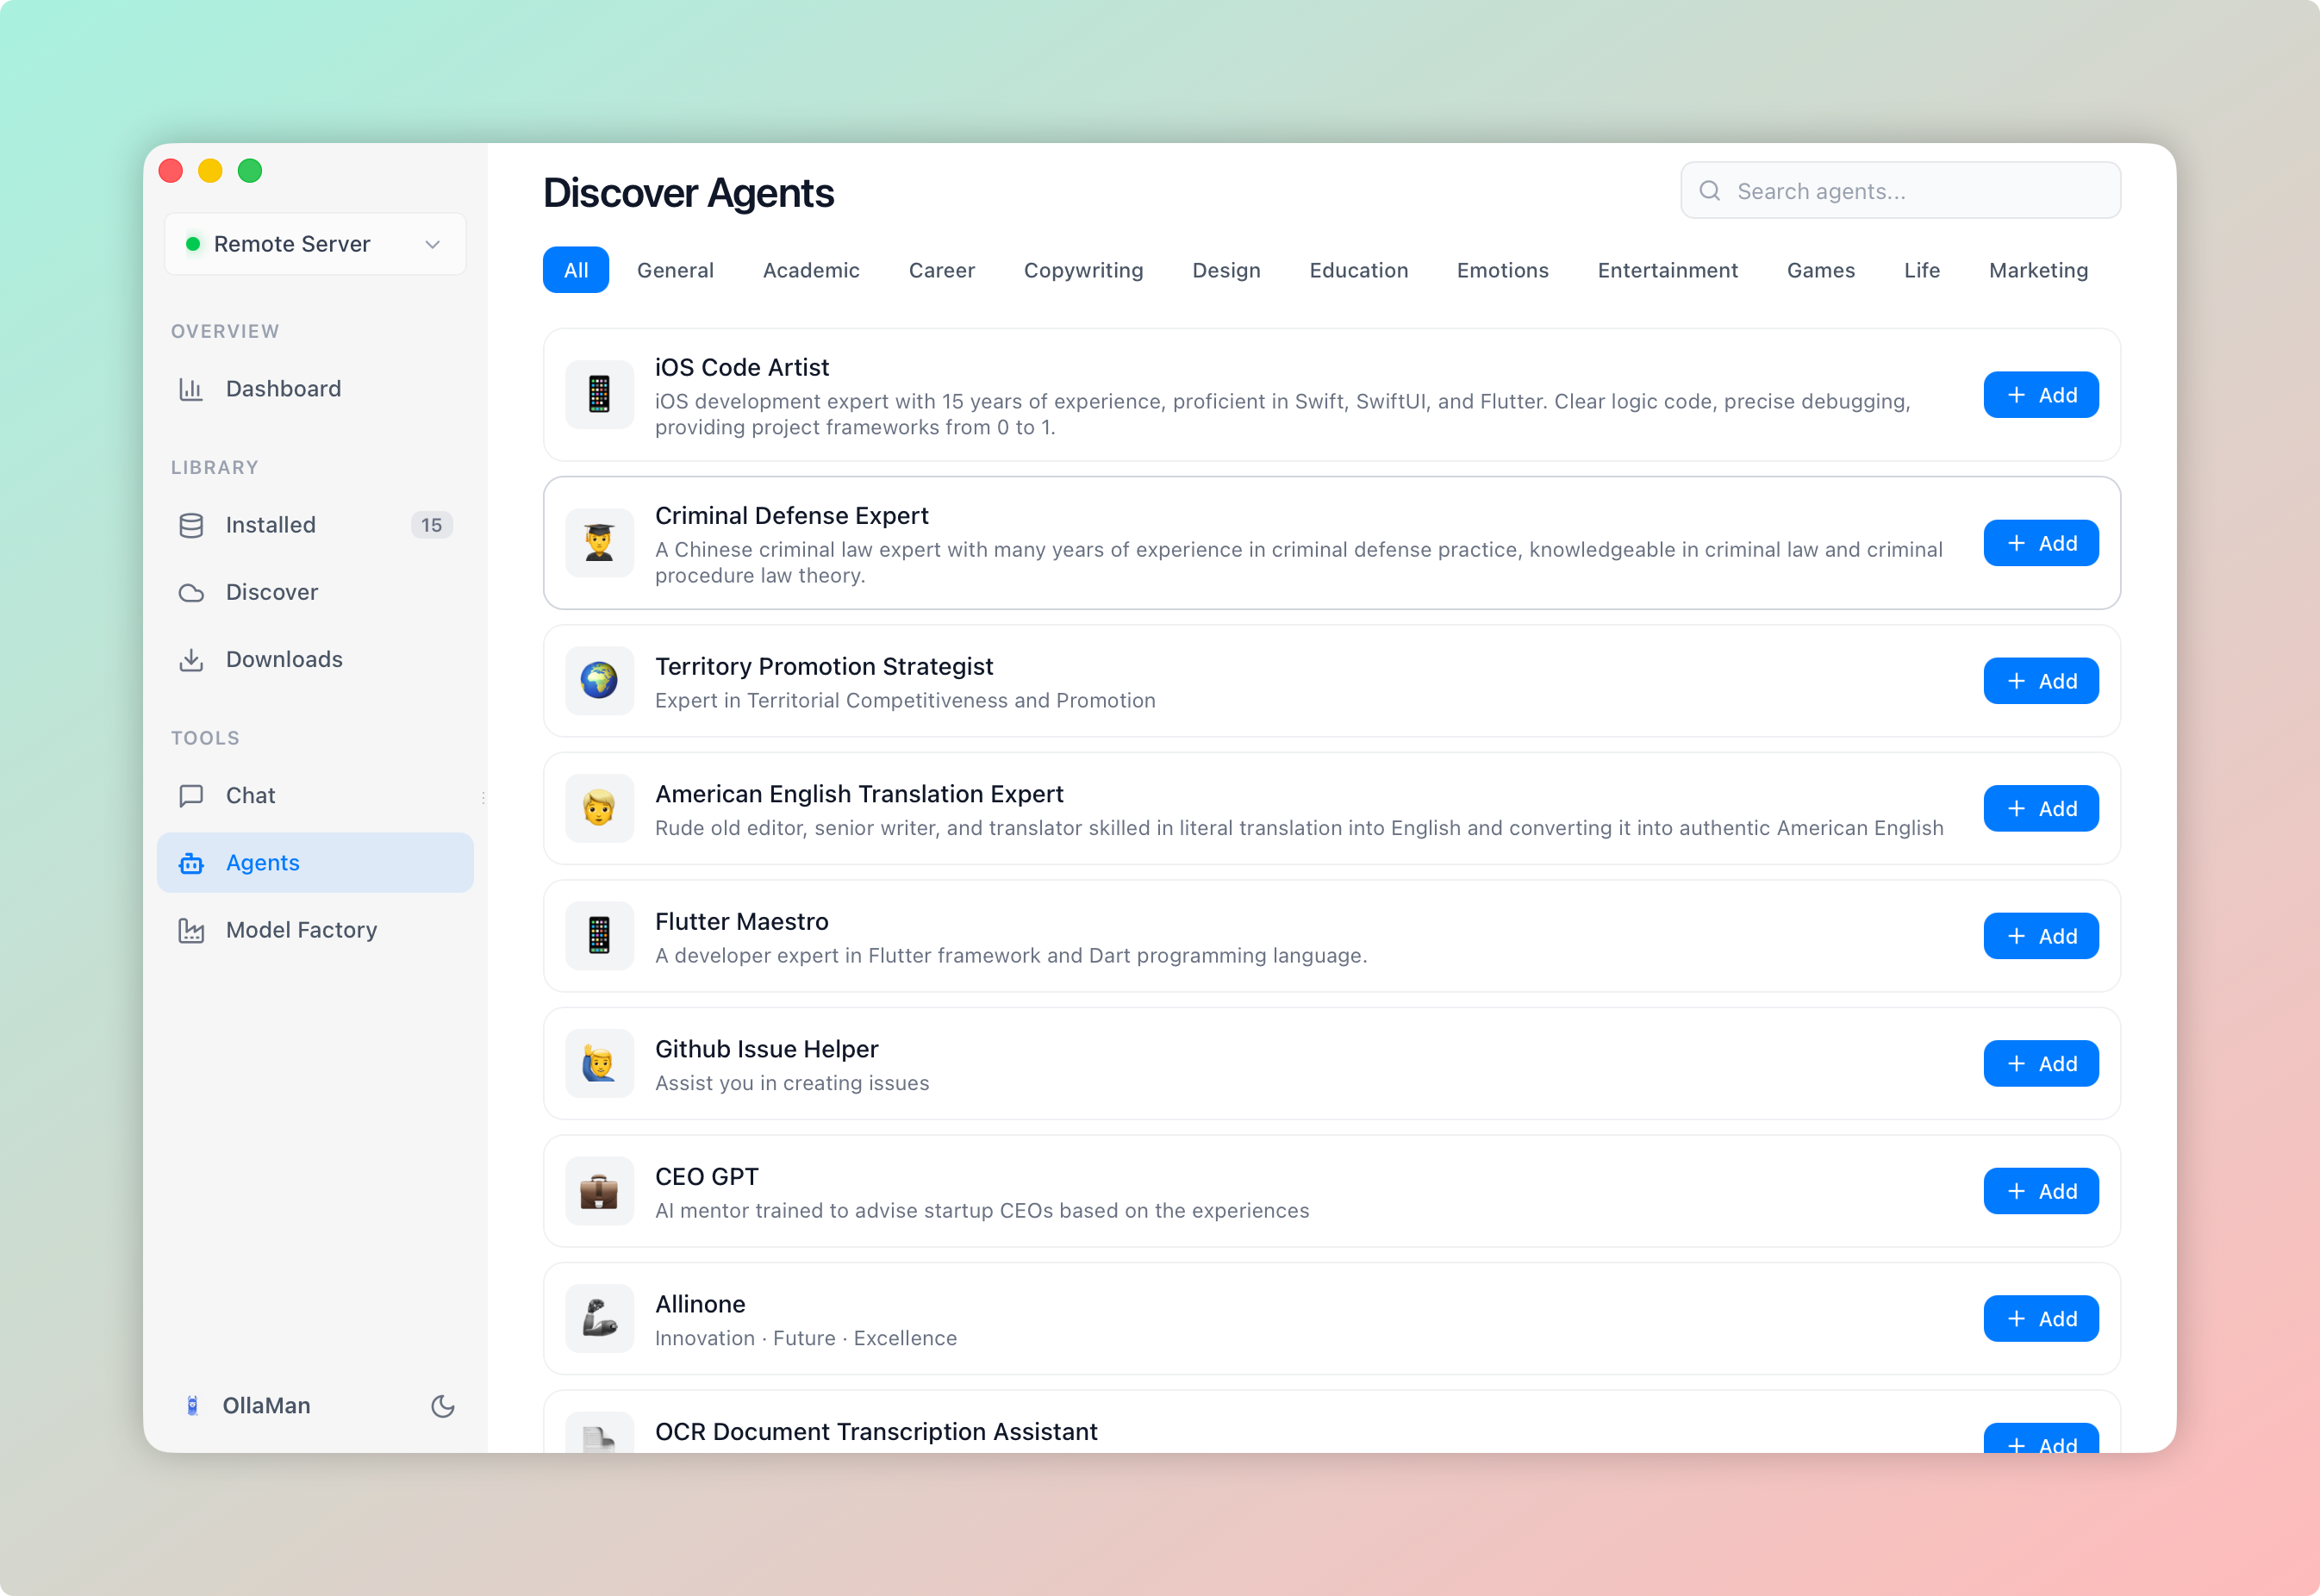
---
## Using Agents in Chat
### The Chat Interface Layout
The chat page features a flexible three-column layout with collapsible panels:
- **Left Sidebar**: Agent selection and conversation history
- **Main Area**: Chat messages and input
- **Right Panel**: Session settings
### Switching Agents
### Open Agent Selector
Click the current agent card at the top of the left sidebar to enter Agent View
### Browse Available Agents
You'll see all your agents in a searchable list. Each card shows the agent's icon, name, and description
### Select an Agent
Click any agent to select it. The view automatically returns to the conversation list, and a new chat session is created
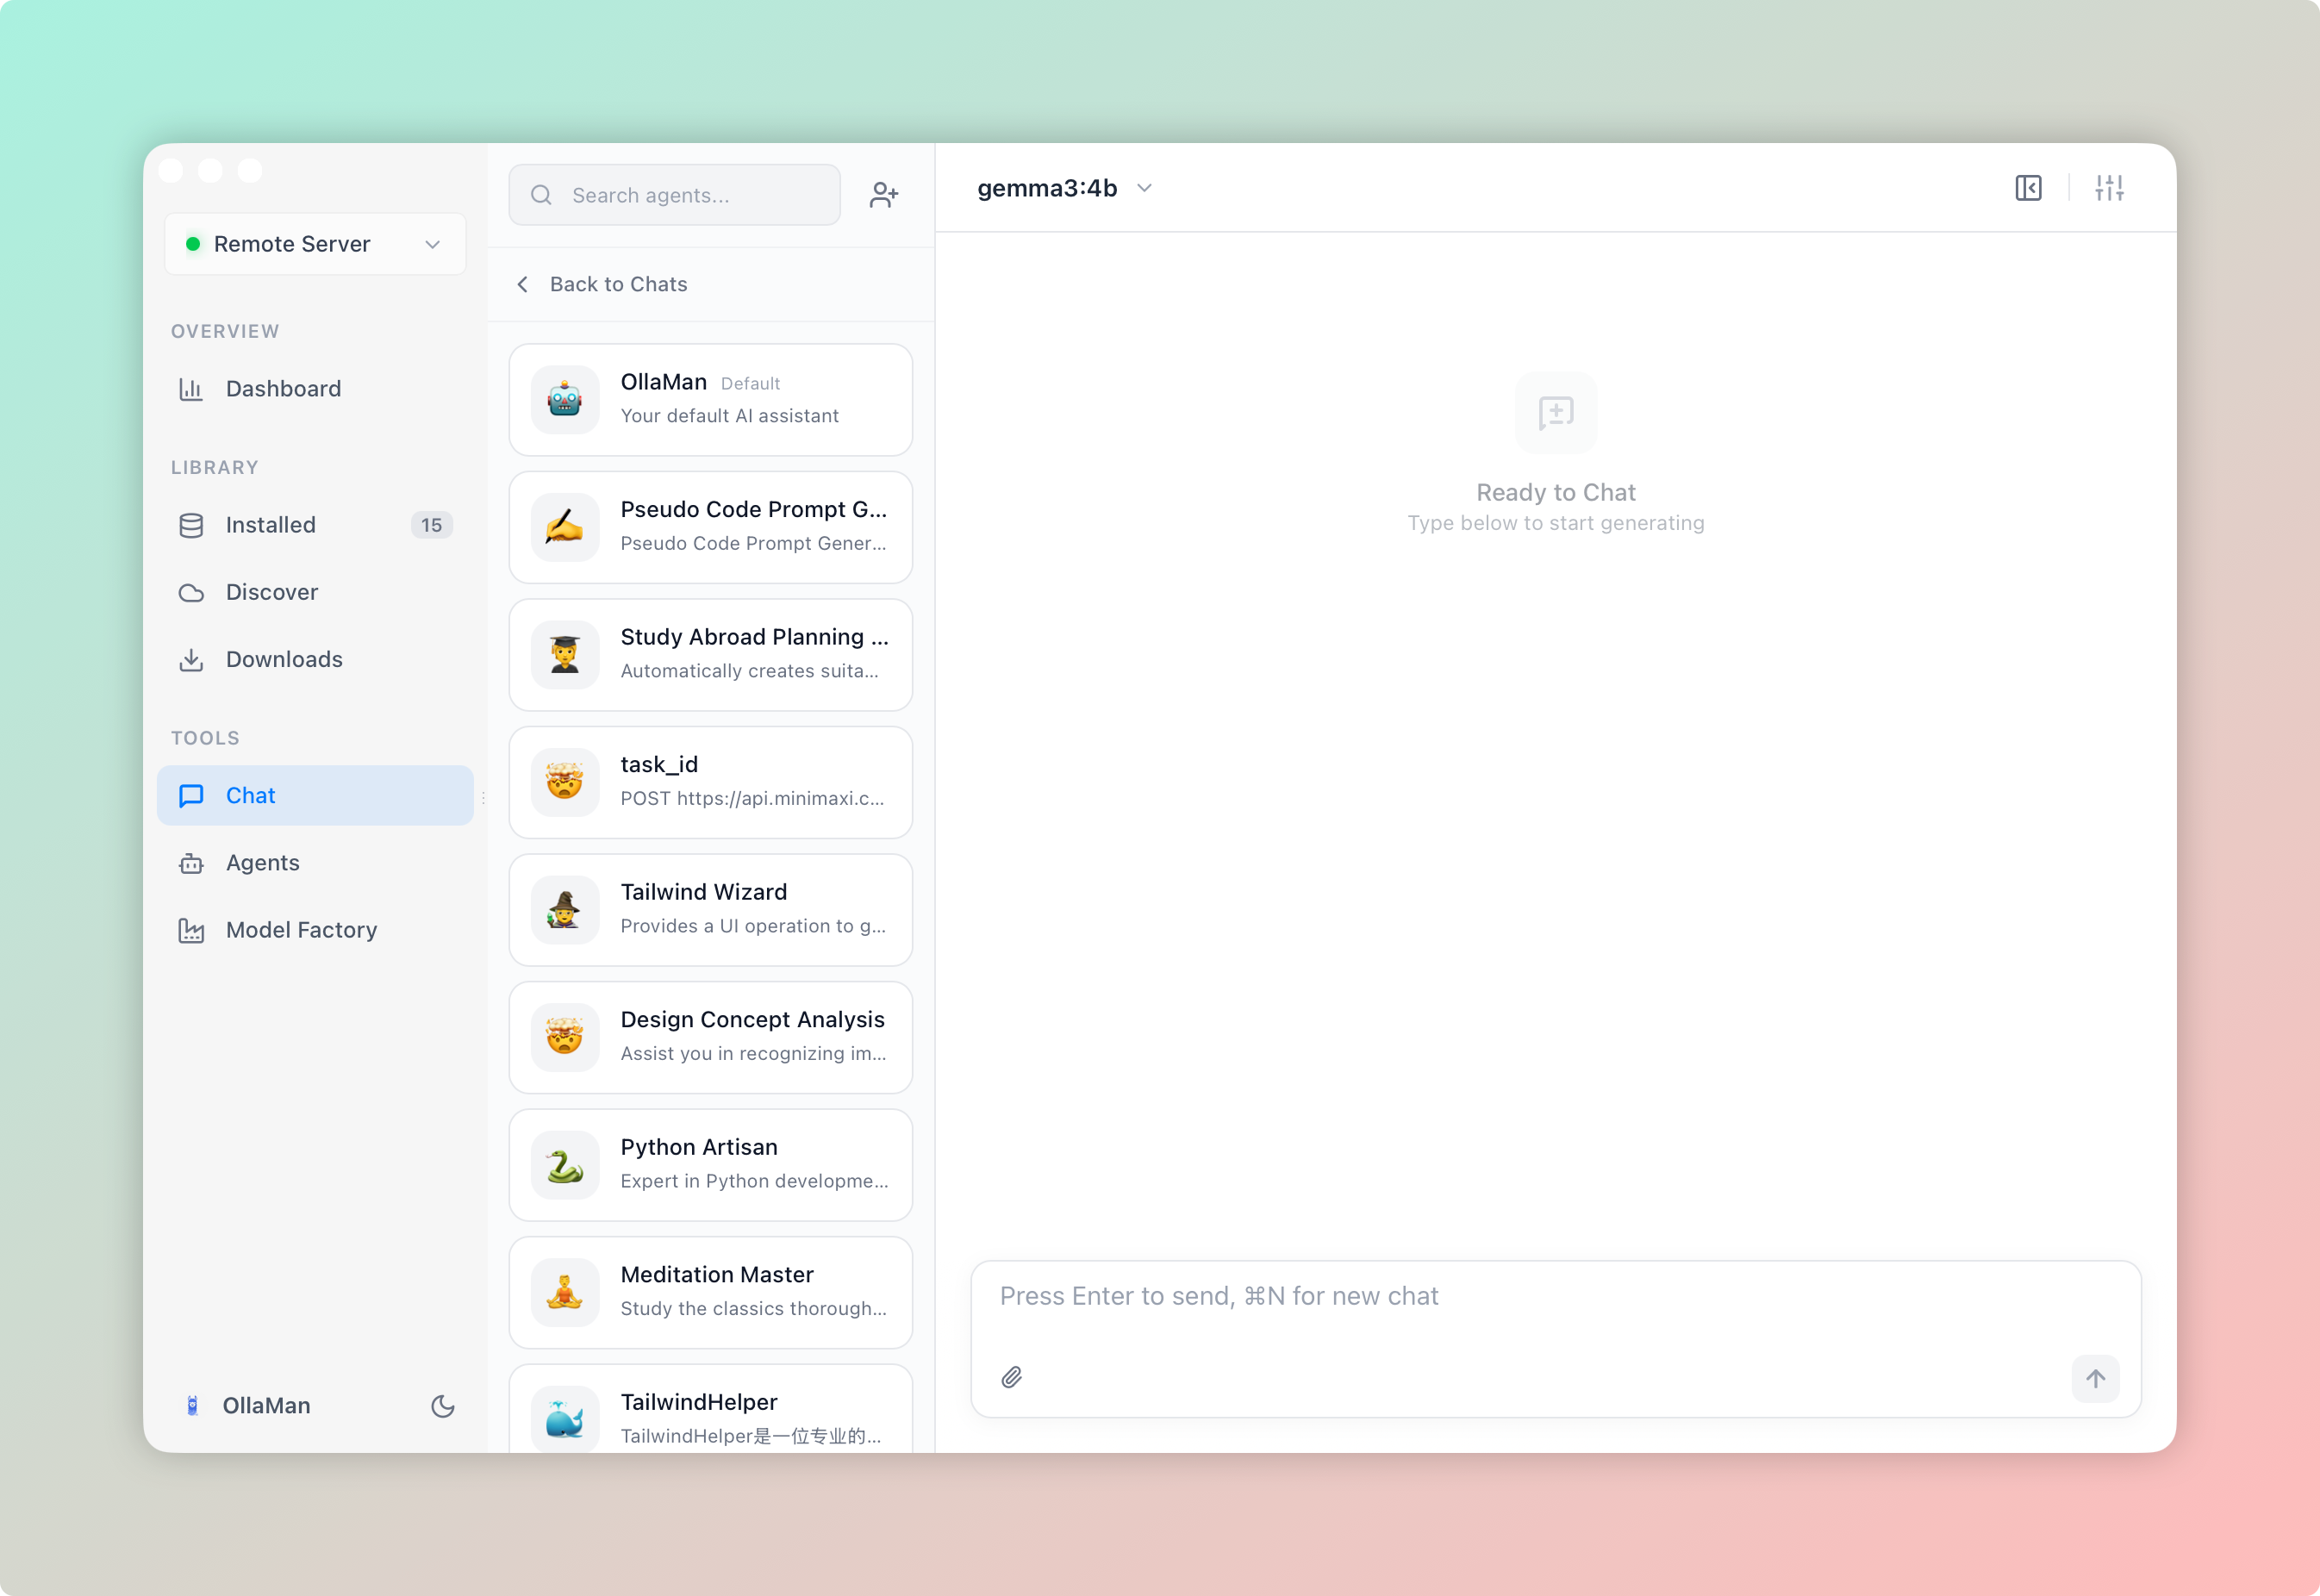
Hover over any agent in the Agent View for quick actions: Edit, Delete, or Clear Session History.
### Agent Features in Chat
When chatting with an agent, you get:
- **Custom System Prompt**: The agent's personality and instructions are automatically applied
- **Optimized Parameters**: Temperature, Top P, and Top K are set to the agent's defaults
- **Preferred Model**: If configured, the agent's default model is automatically selected
- **Isolated History**: Each agent maintains its own conversation history
- **Web Search**: Each agent has its own [Search](/docs/features/web-search) switch, on by default
---
## Creating Agents
### Create a New Agent
### Enter Agent View
Click the current agent card in the left sidebar to switch to Agent View
### Open Creation Panel
Click the **+** button at the top of the Agent View
### Configure the Agent
Fill in the sliding panel on the right:
1. **Select an Emoji icon** - Click the icon picker to choose
2. **Enter a name** (required) - Give your agent a memorable name
3. **Add a description** (optional) - Briefly describe what the agent does
4. **Select default model** (optional) - Choose a preferred model, with search filtering
5. **Write system prompt** - Define the AI's role and behavior
6. **Adjust parameters** - Set Temperature, Top P, Top K, and [Context Length](/docs/features/context-usage)
### Save the Agent
Click **"Create Agent"** to save your new agent
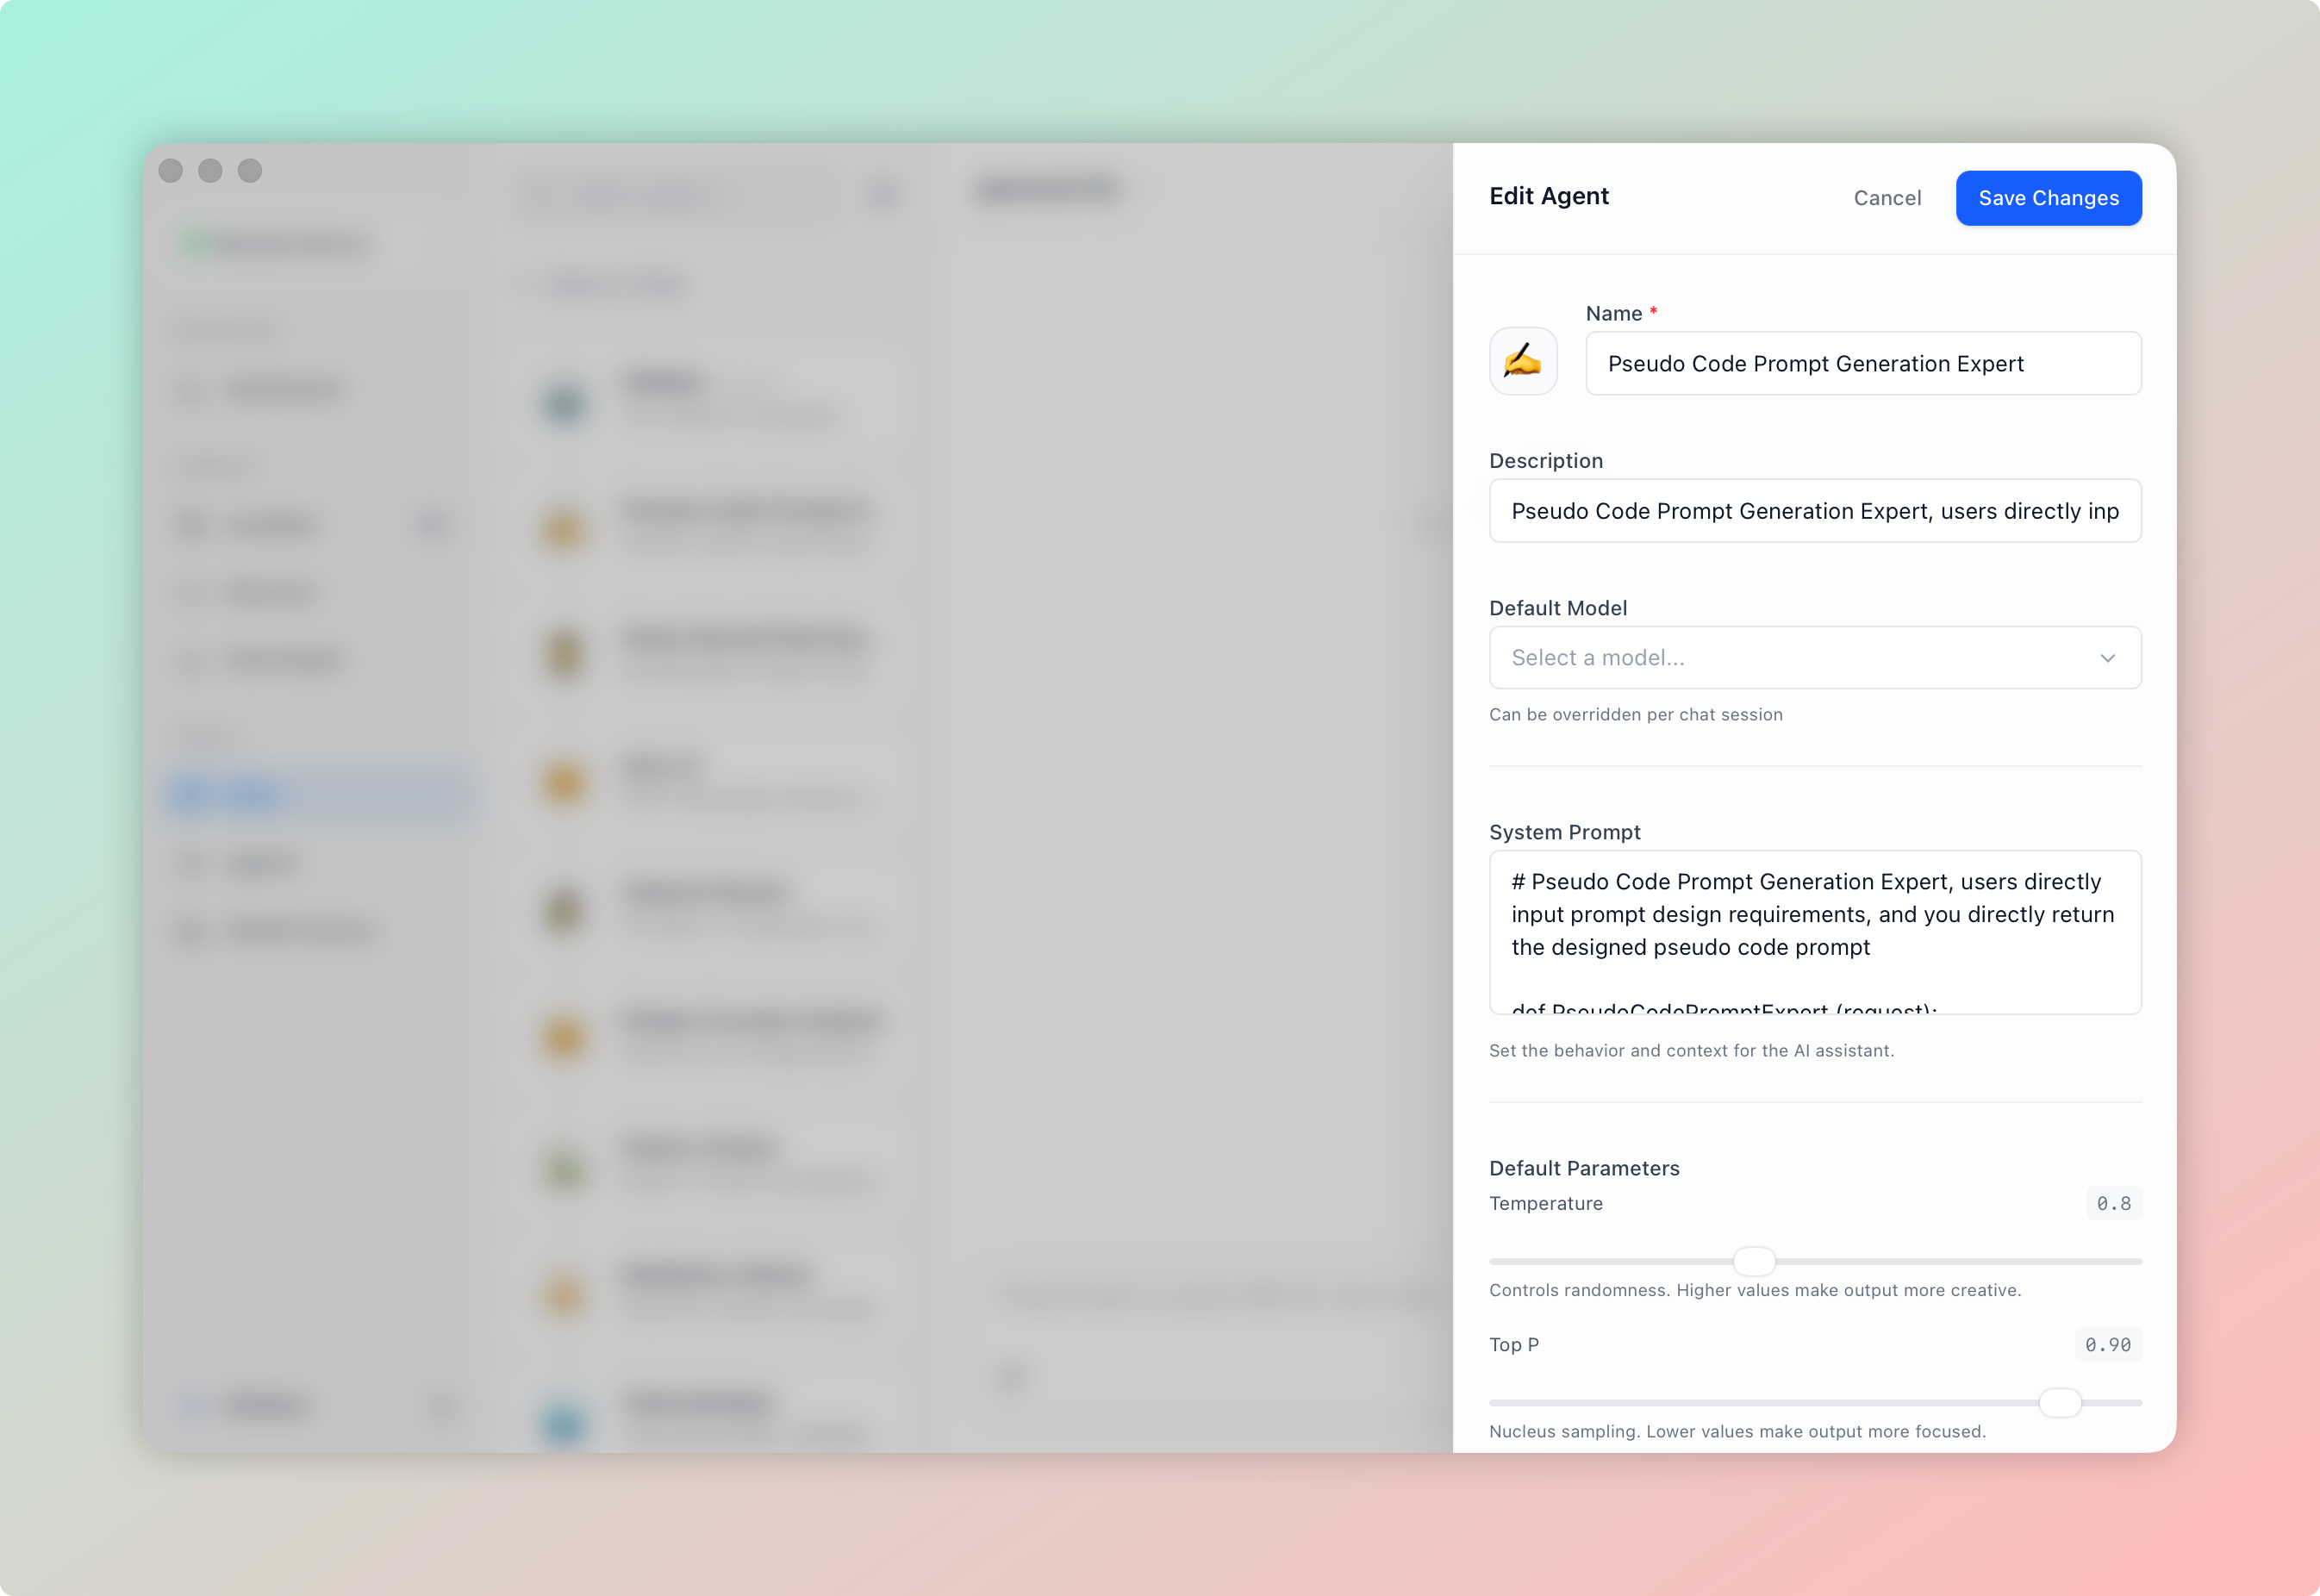
### Writing Effective System Prompts
The system prompt is the most important part of an agent. Here are some tips:
Start by clearly defining who the AI should be:
```text
You are a professional Python developer with 10 years of experience.
You specialize in data science, machine learning, and web development.
```
Specify how the AI should respond:
```text
- Always provide code examples when explaining concepts
- Use clear, concise language suitable for beginners
- If you don't know something, admit it instead of guessing
```
If you want specific output formats:
```text
When providing code solutions:
1. First explain the approach
2. Show the complete code
3. Add comments to explain key parts
4. Suggest potential improvements
```
---
## Managing Agents
### Editing Agents
### Enter Agent View
Click the current agent card in the left sidebar
### Open Edit Panel
Right-click the agent you want to edit and select **"Edit"**
### Modify Settings
Update any configuration in the sliding panel
### Save Changes
Click **"Save Changes"** to apply
The default agent "OllaMan" can be edited but cannot be deleted.
### Deleting Agents
1. Enter Agent View
2. Right-click the target agent
3. Select **"Delete"**
4. Confirm the deletion
Deleting an agent will also delete all its conversation history. This action cannot be undone.
### Reordering Agents
In Agent View, simply drag and drop agents to rearrange their order. The order is automatically saved.
### Clearing Agent History
To delete all conversations for a specific agent:
1. Enter Agent View
2. Right-click the agent
3. Select **"Clear History"**
4. Confirm in the dialog
---
## Agent Store
The Agent Store provides a rich collection of pre-configured agents that you can add with one click.
### Browsing the Store
### Access the Store
Click **"Agents"** in the sidebar to enter the Agent Store
### Browse by Category
Use the category tabs to filter agents:
- General, Academic, Career, Copywriting, Design
- Education, Emotions, Entertainment, Games, Life
- Marketing, Office, Programming, Translation
### Search for Agents
Use the search box to find agents by name or description

### Adding Store Agents
### Find an Agent
Browse or search for the agent you want
### Click Add
Click the blue **"Add"** button on the agent card
### Start Chatting
The button changes to gray **"Chat"** - click it to start a conversation
### Store Agent Categories
Python experts, code debuggers, Cron expression helpers, and more
Research paper assistants, thesis readers, literature review experts
Nutrition advisors, recipe assistants, plant care guides
Multi-language translators, style adapters, localization helpers
Game hosts, food critics, creative writing partners
---
## Session Settings Override
Each chat session can temporarily override the agent's default settings without changing the agent itself.
### How It Works
1. **Snapshot Mechanism**: When you start a new session, a copy of the agent's settings is saved
2. **Temporary Override**: Changes only affect the current session
3. **Save to Agent**: You can save current settings back to the agent
### Modifying Session Settings
### Open Settings Panel
Click the settings button in the top-right toolbar to show the right panel
### Adjust Parameters
Modify any of the following:
- **System Prompt**: Override the agent's prompt for this session
- **Temperature**: 0.0 - 2.0 (step: 0.1)
- **Top P**: 0.0 - 1.0 (step: 0.05)
- **Top K**: 1 - 100 (step: 1)
- **Context Length**: Auto or a preset size, up to the model's maximum ([details](/docs/features/context-usage))
### Track Changes
An orange **"Modified"** badge appears when settings differ from the agent's defaults
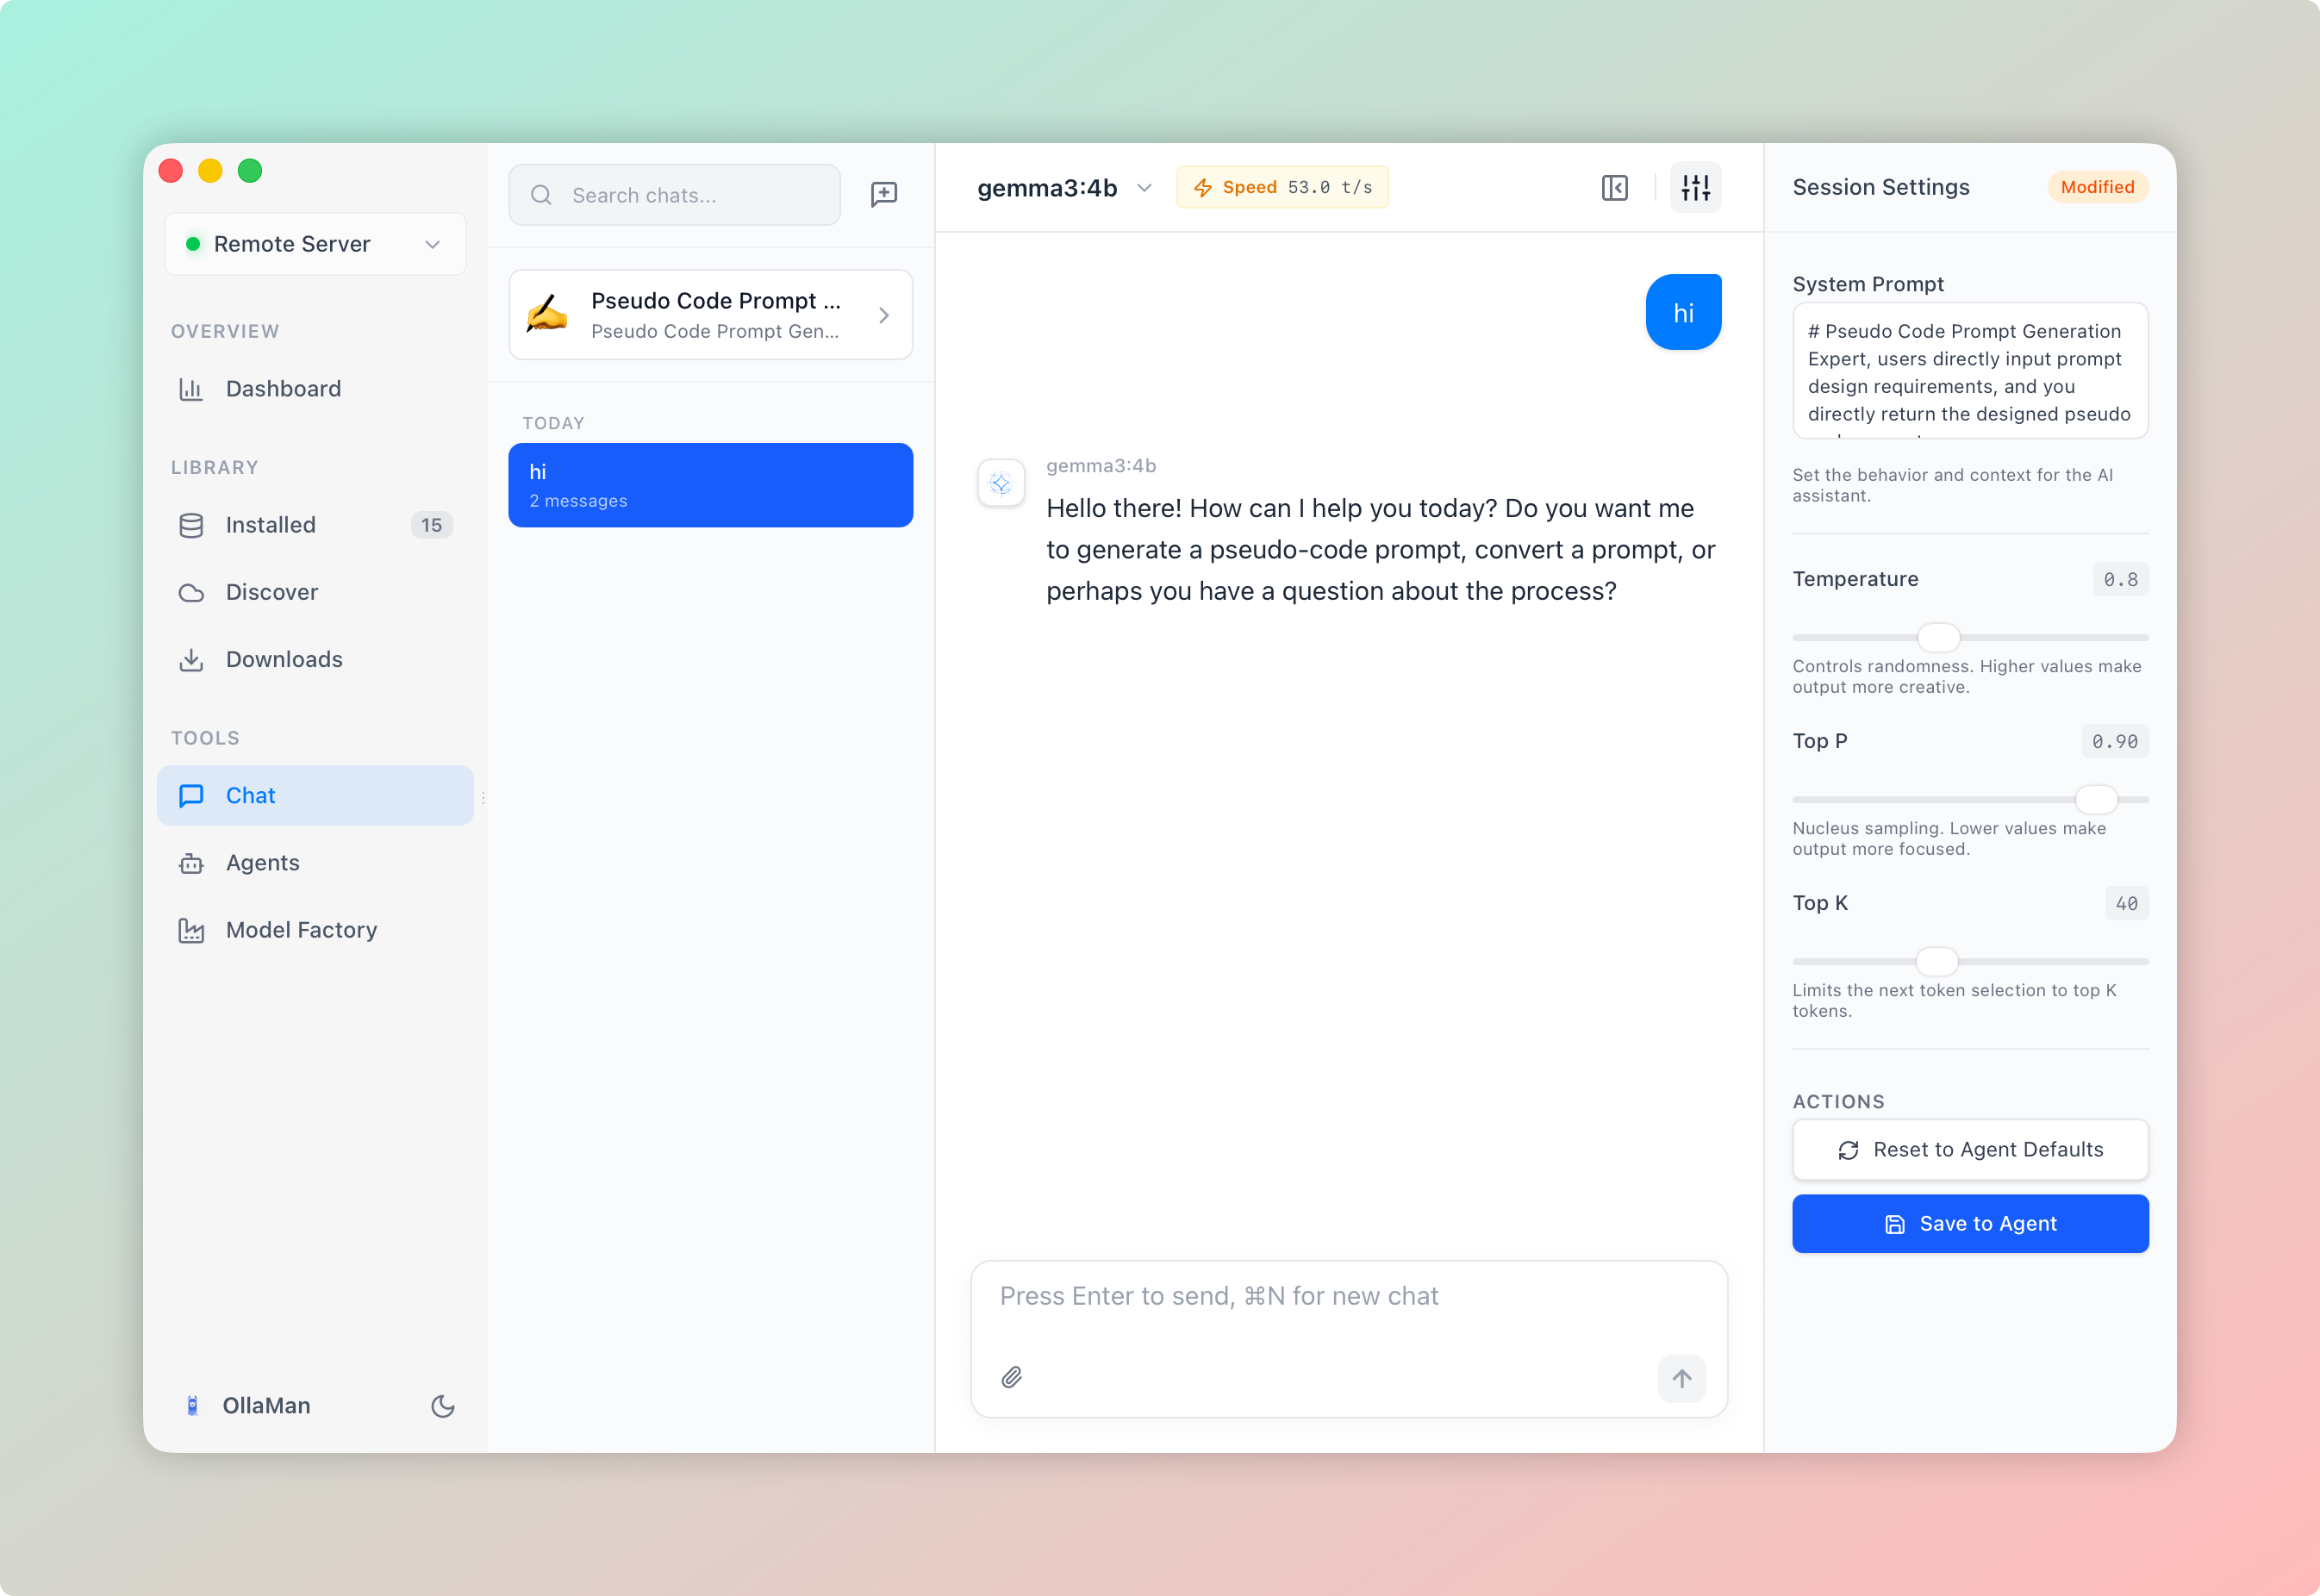
### Reset or Save
- **Reset**: Click **"Reset to Agent Defaults"** to restore original settings
- **Save**: Click **"Save to Agent"** to update the agent with current settings (only shown when modified)
---
## Default Agents
OllaMan comes with two built-in agents:
| Agent | Description |
|-------|-------------|
| **OllaMan** | Default assistant for general conversations. Cannot be deleted. |
| **Frontend Dev** | Specialized in HTML/CSS/JavaScript code generation |
---
## Best Practices
Write detailed system prompts that clearly define the agent's expertise and response style
Use low temperature (0.1-0.3) for code tasks, higher (0.8-1.2) for creative writing
Create an agent, test it with real conversations, then refine the prompt
Experiment with settings in a session before saving to the agent
---
## Keyboard Shortcuts
| Shortcut | Action |
|----------|--------|
| `⌘N` / `Ctrl+N` | Create new conversation |
| `Enter` | Send message |
| `Shift+Enter` | New line in input |
| `Escape` | Cancel message editing |
---
## Need Help?
- Check the [Quick Start](/docs/quick-start) guide for basic setup
- Browse [Features](/docs/features) for more capabilities
- Join community discussions to share agent configurations
- Submit feedback on GitHub
---
# Agent Mode
URL: https://ollaman.com/docs/features/agent-mode
> Let your agents autonomously execute multi-step tasks with tools, skills, and file operations
## What is Agent Mode?
Agent Mode is an enhanced execution mode for the existing [Agents](/docs/features/agents) feature. While a regular agent is a preset conversation configuration (system prompt, default model, parameters), **Agent Mode** lets that agent go beyond chatting and autonomously complete more complex tasks.
When Agent Mode is enabled, the assistant can:
- **Read files** to understand a project or gather context
- **Write and edit files** to make the changes you ask for
- **Run shell commands** in a working directory
- **Load Skills** that give it extra abilities
- **Continue step by step**, using each tool result to plan its next action
An **Agent** is a preset conversation configuration. **Agent Mode** is that agent's enhanced autonomous execution mode. Enabling Agent Mode does not create a new agent — it changes how the current agent works.
### What tasks is it suited for?
Agent Mode works best for tasks with a clear goal and scope, such as:
- Reading several documents in a project and summarizing their differences
- Reviewing the code related to a specific feature
- Investigating the root cause of a problem inside a given directory
- Making file changes according to your instructions
Agent Mode has elevated permissions, especially once Auto Execute is turned on. Only use it in projects and directories you trust, and keep the scope of each task tight.
---
## Enabling Agent Mode
The Agent Mode controls live in the chat input area, so you can turn the feature on or off without leaving the conversation.
### Find the Agent Mode Button
At the bottom of the chat input area, next to the **Think** button, you'll find the **Agent Mode** button.
### Toggle It On or Off
Click the button to enable or disable Agent Mode. When it's off, the agent behaves as a normal chat assistant.
### Open the Config Panel
Hover over the button to open the Agent Mode configuration panel, where you can adjust Auto Execute and the Working Directory.
The Agent Mode toggle, Auto Execute, and Working Directory are stored separately for each agent. Switching to a different agent loads that agent's own settings, so you configure each one independently.
---
## Recommended Workflow
### Select an Agent
Choose the agent you want to use for the task. Its system prompt and parameters still apply in Agent Mode.
### Enable Agent Mode
Turn on the Agent Mode button in the chat input area.
### Set the Working Directory
Set the working directory to your current project or the directory relevant to the task. This keeps the agent's operations focused.
### Decide on Auto Execute
Based on how risky the task is, decide whether to enable Auto Execute. For analysis-only or unfamiliar tasks, leave it off so you can confirm each step.
### Write a Clear Task
Describe the goal, scope, and any limits clearly. Constraints like "read only, do not modify" reduce the chance of unwanted actions.
### Good Prompt Examples
The clearer your prompt, the more reliable the result. State the scope, the goal, and any restrictions.
```text
Review the error-handling logic related to download failures in the
current project, and summarize possible improvements.
```
```text
Read the documents under the docs directory that relate to the chat
feature, and help me organize the duplicated and conflicting parts.
```
```text
Find the cause of the login failure in the current directory.
Only analyze — do not modify any files.
```
Constraints such as "read only", "do not run install commands", or "only check the docs directory" help the agent stay on task and avoid mistakes.
---
## Common Settings
These settings live in the Agent Mode config panel (hover the Agent Mode button) and are saved per agent.
### Agent Mode
When **off**, the agent is a normal chat assistant. When **on**, the agent can call tools to complete tasks.
### Auto Execute
- **Auto Execute off**: every tool call requires your confirmation before it runs.
- **Auto Execute on**: the agent runs tool calls directly by default.
The first time you enable Auto Execute, OllaMan shows a high-risk warning that you must acknowledge before it takes effect. Unless you clearly understand what you're doing, leaving Auto Execute on for long periods is not recommended.
### Working Directory
The working directory limits the main scope of Agent Mode operations. Set it to your current project or the directory relevant to the task.
The more precise the working directory, the less likely the agent is to read files or run commands in unrelated locations.
You can type the path by hand, or click the **folder button** next to the input to open your system's native directory picker and select the folder directly.
---
## Built-in Tools
Agent Mode ships with four built-in tools. Any argument error, execution failure, or security rejection is returned to the model as a tool error so it can adjust and continue.
Reads a local text file so the agent can gather context.
Writes to a file, supporting `overwrite`, `append`, and `create` modes.
Edits a file by exact text replacement. By default the old text must match exactly once — if it matches zero times or multiple times, the tool returns an error instead of silently changing the wrong place. Batch replacement requires explicitly enabling `replaceAll`.
Runs shell commands inside the configured working directory.
When [Web Search](/docs/features/web-search) is on for the agent, two more tools are available: `web_search` and `web_fetch`. In Agent Mode they follow the same approval rules as the other tools.
---
## Global Agent Settings
Open **Settings → Agent** to manage configuration shared by all agents. Unlike the per-agent toggle, Auto Execute, and Working Directory, these settings are global.
### Skills Paths
Skills are extra capability instructions for the assistant. You can add one or more Skills directories, and OllaMan loads the enabled Skills when Agent Mode is active. When Agent Mode starts, it scans the enabled Skills paths and reads each skill's `SKILL.md`.
By default, two paths are added and enabled:
- `~/.claude/skills/`
- `~/.agents/skills/`
If a path is invalid, disable or remove it — this does not affect the other paths. If a single skill fails to load, it is skipped without blocking the rest.
### MCP
Agent Mode does not use MCP directly at this time. You can convert MCP tools into Skills with [MCP2Skill](https://mcp2skill.com/) and then use them as Skills.
### Bash Execution
You can set the maximum runtime for a single command (default **300 seconds**). A Bash command that exceeds this time is terminated and returns a timeout result, preventing long-running or endlessly-outputting commands from blocking the session.
### Command Blacklist
The command blacklist intercepts high-risk commands. When a command matches an enabled blacklist pattern, it **always requires your confirmation — even when Auto Execute is on**.
By default, the following patterns are added and enabled:
- `rm -rf`
- `dd`
- `mkfs`
- `truncate`
- `sudo`
- `su`
You can add, remove, enable, or disable individual patterns. Plain text is matched by shell command position; entries written as `/pattern/` are matched as regular expressions.
The blacklist only lowers risk and cannot guarantee that every dangerous command is intercepted. Stay cautious when Auto Execute is enabled.
---
## Tool Approval
When an action needs confirmation, an approval panel appears **above the chat input**. You can review exactly what will run, then choose to approve or reject it.
Review carefully in cases like these:
- The command modifies, deletes, or overwrites files
- The command requires administrator privileges
- The operation involves system directories
- You're unsure what the command does
Rejecting an action does not end the conversation. The agent sees the rejection result and can continue with a different approach.
### Always-Confirmed Operations
Some operations force confirmation regardless of the Auto Execute setting — this protection cannot be bypassed:
- **Critical path protection**: writes or edits to system-critical paths always require a second confirmation. These include `/System`, `/usr`, `/bin`, `/sbin`, and `/etc` on macOS/Linux, and `C:\Windows`, `C:\Program Files`, `C:\Program Files (x86)`, and `C:\ProgramData` on Windows. Read-only access is not blocked.
- **Blacklist match**: any Bash command matching an enabled blacklist pattern always requires confirmation.
---
## Viewing Execution
Agent Mode shows its execution inline within the chat reply, in the same message flow as a normal AI response. You can follow what the agent intends to do, which actions are waiting for confirmation, what each tool returned, and the final conclusion.
- Tool calls appear as cards (tool name plus an argument summary) in the text flow.
- Tool results are inserted right after the corresponding call.
- Long commands or results are collapsed by default — click to expand.
- The whole reply scrolls naturally with the chat; there's no separate timeline panel.
Agent Mode has no automatic step limit or total-time cutoff, and it keeps running when you switch agents, sessions, or close the window. If you spot something wrong, use the chat's stop control to end the task manually.
---
## Best Practices
Configure the working directory before starting a task so the agent stays scoped to the right location.
For unfamiliar projects, ask the agent to analyze first instead of modifying files right away.
For operations that delete, overwrite, install, or escalate privileges, turn Auto Execute off and confirm each step.
Confirm that third-party Skills come from a trustworthy source before using them — a skill can run arbitrary high-risk flows.
If the agent is about to run a command you don't understand, reject it.
---
## FAQ
In Agent Mode, the assistant may first read files or run commands and then answer once it has the results. You can watch the execution process inline in the reply.
Some operations are high-risk — for example, a command that matches the command blacklist or a write to a system-critical path. OllaMan forces confirmation for these, and this protection cannot be bypassed by Auto Execute.
Make the task specific, set a clear working directory, and state what the agent may and may not do. For higher-risk tasks, keep Auto Execute off and confirm each step manually.
---
## Need Help?
- Learn the basics in the [Agents](/docs/features/agents) guide
- Check the [Quick Start](/docs/quick-start) guide for setup
- Browse [Features](/docs/features) for more capabilities
- Submit feedback on [GitHub Issues](https://github.com/jae-jae/ollaman-releases/issues)
---
# Web Search
URL: https://ollaman.com/docs/features/web-search
> Let agents search the web and read pages for up-to-date answers
## Overview
Local models only know what was in their training data. With **Web Search**, an agent can look things up online and read the pages it finds, so it can answer questions about recent events, current documentation, or anything it doesn't already know.
Web search gives the model two tools:
- **web_search**: searches the web and returns titles, links, and short snippets
- **web_fetch**: reads the main text of a web page, such as a result from a search
The model decides when to use them. For questions it can answer on its own, it replies directly without searching.
Web search does not require [Agent Mode](/docs/features/agent-mode). In a normal chat, the model gets only the two web tools: it cannot read or write files or run commands.
---
## Turning Web Search On or Off
### Find the Search Button
At the bottom of the chat input area, the **Search** button sits between the **Think** button and the **Agent Mode** button.
### Toggle It for This Agent
Click **Search** to turn web search on or off. The button is highlighted when it's on.
### Chat as Usual
Ask your question. When the model searches or reads a page, the step appears inline in the reply, showing the search query or page URL. Click a step to expand its results.
Web search is on by default. The switch is stored separately for each agent, so you can keep it on for a research assistant and turn it off for an agent that should never go online.
### Button Hints
An amber warning icon on the **Search** button means search is on but won't run:
- **Provider not set up**: the selected provider needs an API key or instance URL. Fill it in under **Settings → Agent → Web Search**.
- **Model doesn't support tool calling**: in a normal chat, web search needs a model with tool calling (the **Tools** capability). Other models answer without searching. Switch to a model that supports tools, or turn on Agent Mode.
---
## How It Works with Agent Mode
| | Agent Mode off | Agent Mode on |
|---|---|---|
| Available tools | `web_search`, `web_fetch` | Web tools plus `read`, `write`, `edit`, `bash` |
| Approval | Web tools run automatically | Follows Agent Mode's Auto Execute setting |
| Model requirement | Tool calling support | Any model (tool calling recommended) |
---
## Choosing a Search Provider
Open **Settings → Agent → Web Search** to pick the provider. The provider is shared by all agents.
Free and needs no setup. Uses DuckDuckGo web results and falls back to Brave. Heavy use may be rate limited.
Ollama's official web search and page fetch. Requires an API key from a free ollama.com account.
Your own SearXNG instance. Enter its URL and enable the `json` format under `search.formats` in its `settings.yml`.
A search API built for AI agents. Requires a Tavily API key; each search uses credits (Basic: 1, Advanced: 2).
### Other Settings
- **Results per search**: how many results each search returns, from 1 to 10 (default **10**). Fewer results keep the context smaller.
- **Test**: runs one search to check that the provider works.
### Open Web Search Settings
Go to **Settings → Agent** and find the **Web Search** section.
### Select a Provider
Choose Built-in, Ollama, SearXNG, or Tavily. Use **Get API key** to open the provider's key page when one is needed.
### Enter Credentials
Paste the API key or instance URL. It is saved when you leave the field.
### Test
Click **Test**. "Search works." means the provider is ready.
---
## Privacy and Safety
When web search is on, the search queries and page URLs that the model chooses are sent to the selected provider. Your conversation itself is not sent. API keys are stored locally on your device and are never shown in logs.
- Page content is treated as untrusted data. The model is told not to follow instructions found in web pages.
- With the Built-in provider, pages are fetched directly from your device. Local and private network addresses (such as `localhost`, `192.168.x.x`, or `.local` hosts) and non-standard ports are blocked, so a web page cannot trick the model into reaching services on your machine or network.
- Only text pages are read, up to 3 MB each.
---
## FAQ
The model decides whether a search is needed. Ask it explicitly, for example "Search the web for the latest Ollama release notes". Also check that the **Search** button has no amber warning icon.
DuckDuckGo and Brave limit automated traffic. Wait a few minutes, or switch to Ollama, SearXNG, or Tavily for heavy use.
Your instance has JSON output disabled. Add `json` to `search.formats` in the instance's `settings.yml` and restart it.
The switch is saved per agent. If an agent was set to off earlier, it stays off until you click **Search** again in that agent's chat.
---
## Next Steps
Combine web search with file and shell tools
Create agents with their own search setting
Search results take up context; keep an eye on it
---
# Model Factory
URL: https://ollaman.com/docs/features/model-factory
> Create customized model replicas by adjusting prompts and parameters
# Model Factory
**Model Factory** is a powerful feature in OllaMan that allows users to create customized model replicas based on existing local models by adjusting System Prompts and inference parameters.
## Features Overview
- **Customize Based on Existing Models**: Choose any local model pulled via Ollama as a base.
- **Custom System Prompts**: Set specific personas, rules, or task instructions for the model.
- **Micro-tuning Parameters**: Precisely control the model's creativity and stability (Temperature, Top P, Top K).
- **Preset Templates**: Built-in common prompt templates (Coding Assistant, Creative Writing, Data Analysis).
## Interface Guide
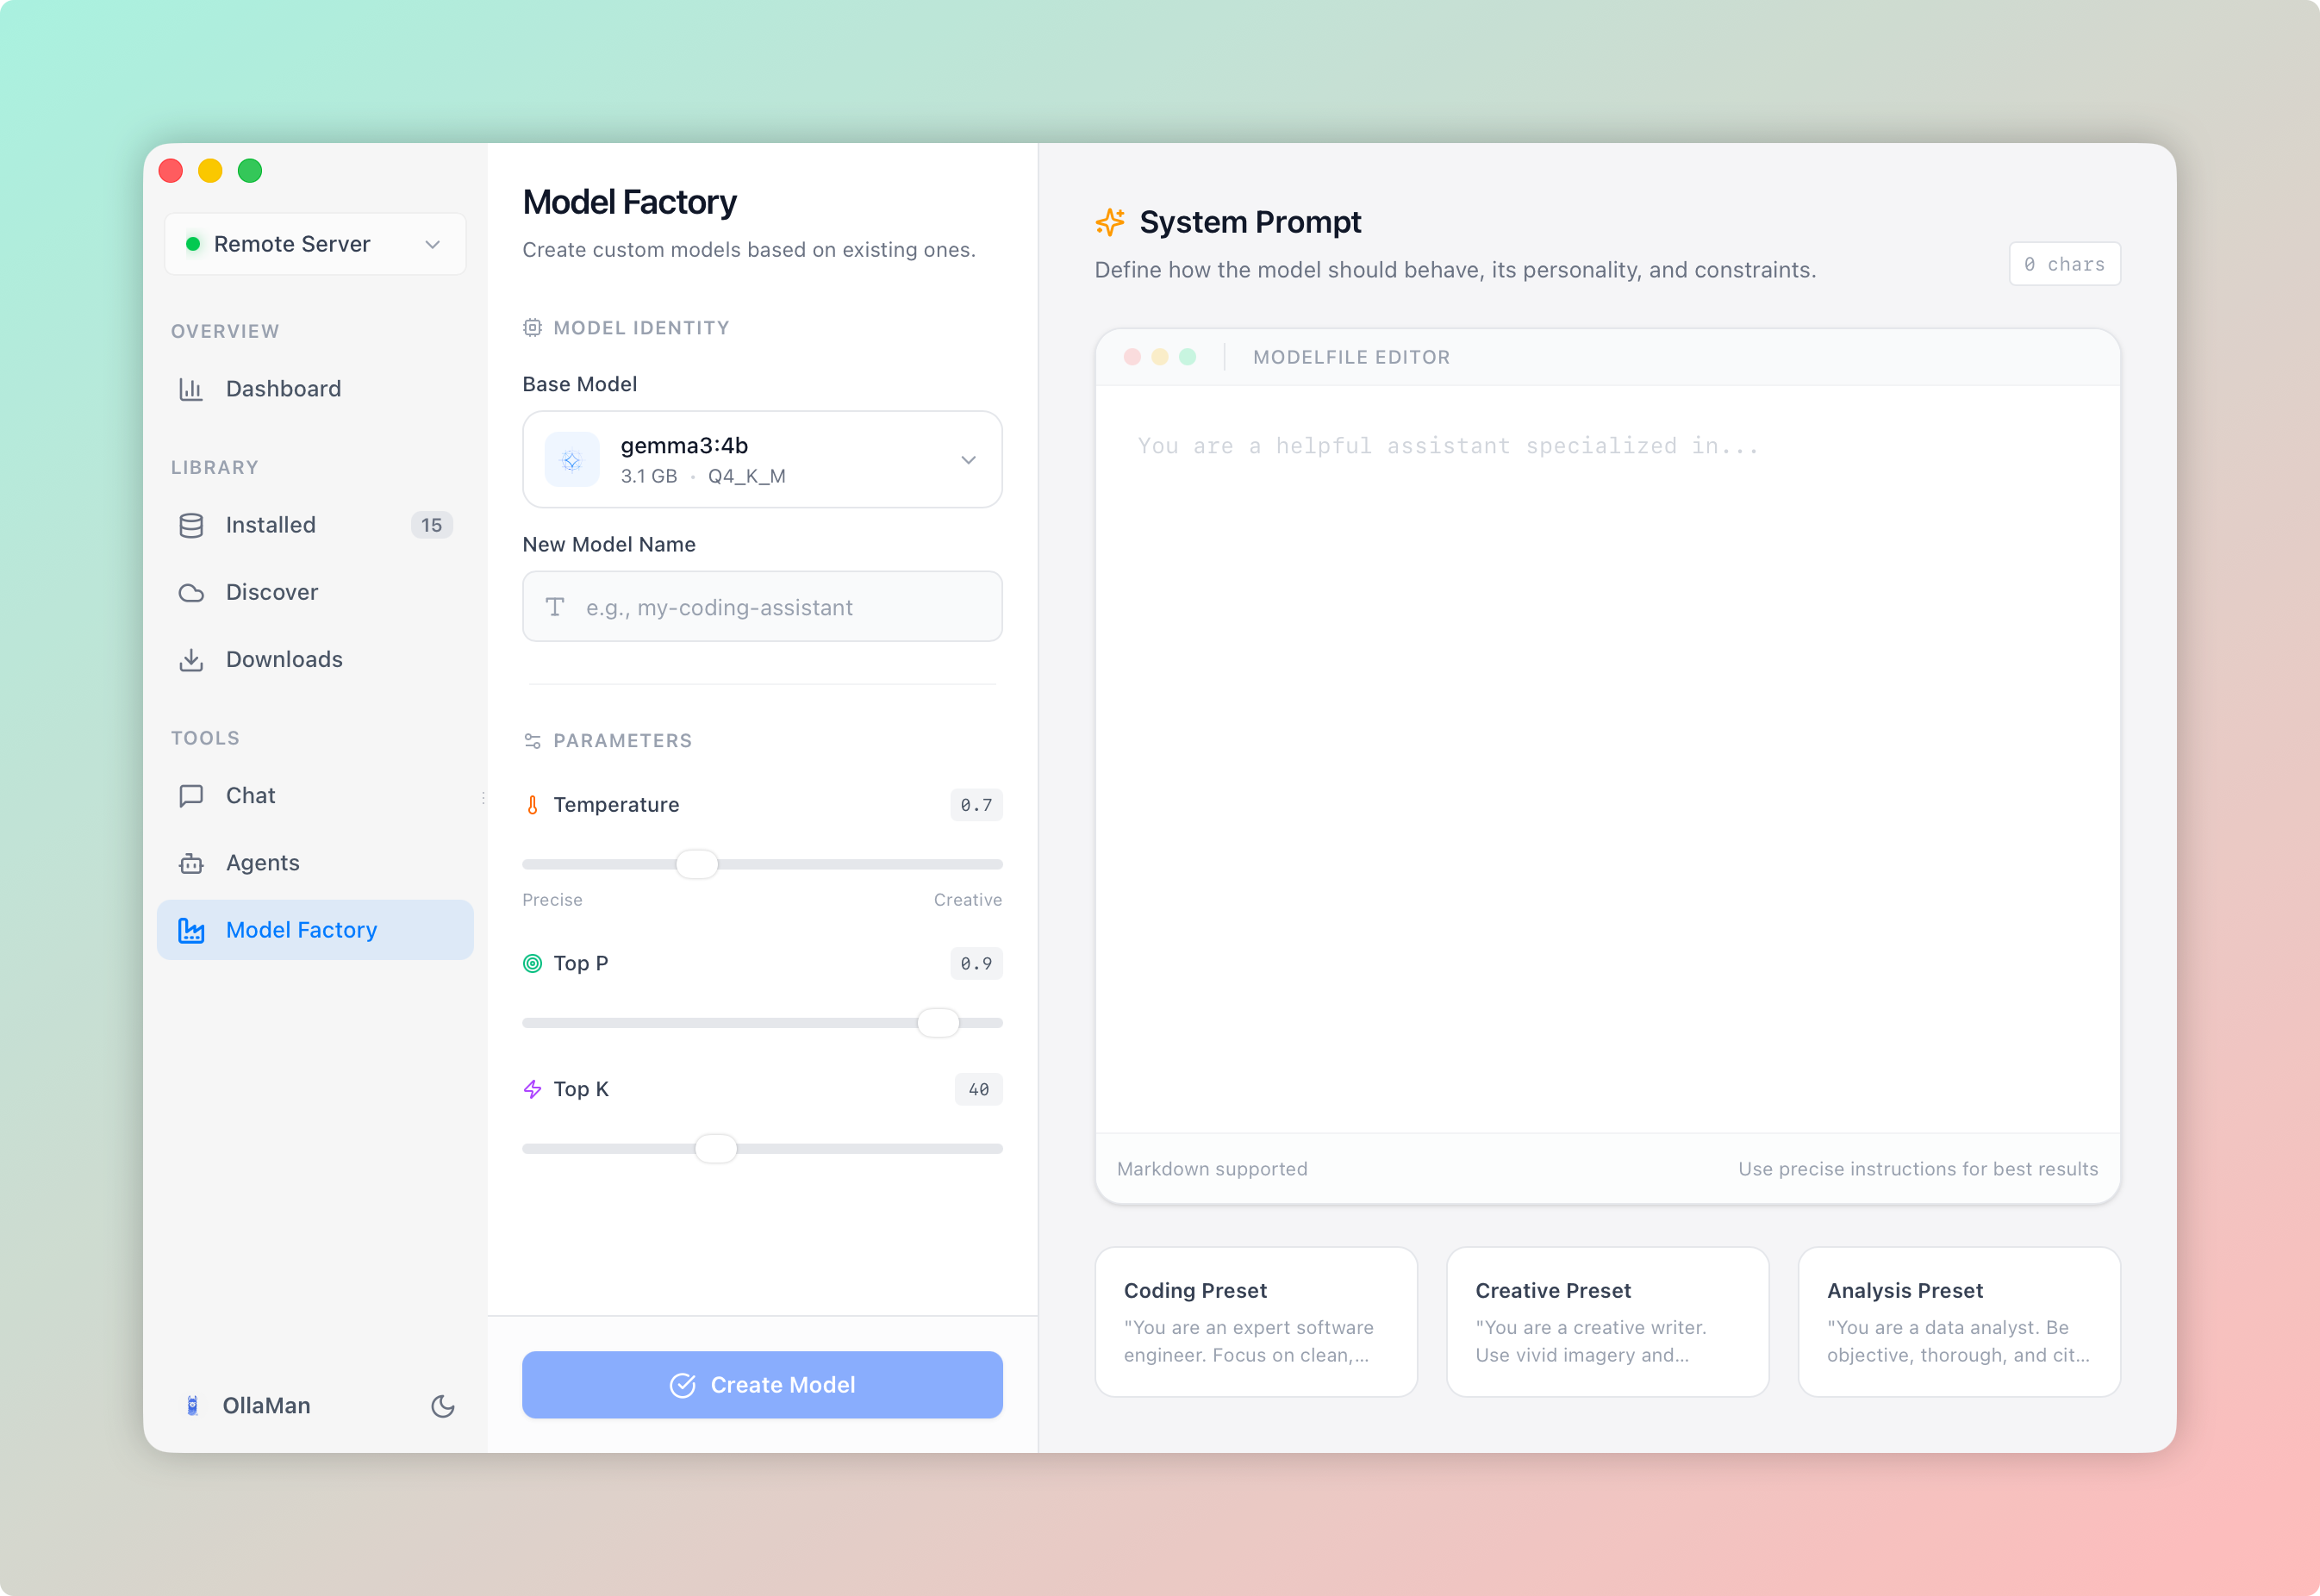
The Model Factory interface allows for configuration via a left panel and a prompt editor on the right.
### 1. Model Identity
- **Base Model**: Select an installed local model as the base. Note: Cloud models are not selectable.
- **New Model Name**: Give your custom model a unique name.
### 2. Parameters
Adjust the following parameters to control the output style of the model:
- **Temperature (0.0 - 2.0)**: Controls randomnes.
- Lower values make the output more focused and deterministic.
- Higher values make the output more random and creative.
- Default: 0.7
- **Top P (0.0 - 1.0)**: Nucleus Sampling.
- Controls the model to consider only the top tokens with cumulative probability P.
- Default: 0.9
- **Top K (1 - 100)**:
- Limits the model to select from the top K most probable tokens.
- Default: 40
### 3. System Prompt Editor
This is the core area for customizing the model. Enter instructions here to define the model's behavior.
- **Markdown Support**: The editor supports Markdown syntax highlighting.
- **Character Count**: Real-time display of prompt character count.
- **Quick Presets**: If empty, click the preset cards below to quickly fill:
- **Coding Assistant**: Focuses on code writing and explanation.
- **Creative Writing**: Suitable for story creation and brainstorming.
- **Data Analysis**: Focuses on logical reasoning and data processing.
## Creation Process
1. Select a **Base Model** in the left panel.
2. Enter a **New Model Name**.
3. (Optional) Write or select a **System Prompt** in the right editor.
4. (Optional) Adjust **Inference Parameters**.
5. Click the **Create** button at the bottom left.
6. Wait for completion; a green success message will appear.
Once created, you can find this new model in the "Local Models" list and immediately use it in the "Chat" feature.
Additionally, you can manage this model in the "Local Models" page, where you can push it to the remote Ollama repository to share with others or backup.
---
# Model Recommendation Guide
URL: https://ollaman.com/docs/models
> Find the perfect Ollama AI model for your needs
## Overview
Choosing the right AI model is crucial for the best user experience. This guide helps you select the most suitable Ollama model based on your needs, hardware configuration, and use cases.
Ollama supports over 40 mainstream open-source models, ranging from lightweight 1B parameter models to powerful 671B parameter models, covering general conversation, code generation, vision understanding, and more.
---
## Choose by Use Case
Based on your specific needs, we recommend the following models:
### General Conversation & Q&A
Suitable for chat assistants, knowledge Q&A, text generation, and other general scenarios.
**Rating**: ⭐⭐⭐⭐⭐
**Strengths**:
- Meta's latest generation, excellent overall capabilities
- Superior bilingual performance (English & Chinese)
- Outstanding reasoning and context understanding
**System Requirements**: At least 48GB RAM
**Best for**: Users seeking top quality
**Rating**: ⭐⭐⭐⭐
**Strengths**:
- Lightweight and efficient, fast execution
- Strong instruction-following ability
- Low resource consumption
**System Requirements**: At least 8GB RAM
**Best for**: Limited hardware but need efficiency
**Rating**: ⭐⭐⭐⭐
**Strengths**:
- Google's reliable quality
- Great performance-resource balance
- Excellent multilingual support
**System Requirements**: At least 16GB RAM
**Best for**: General use on mid-range hardware
### Code Programming Assistance
Specifically optimized for code generation, debugging, explanation, and refactoring.
**Rating**: ⭐⭐⭐⭐⭐
**Strengths**:
- Extremely high code generation accuracy
- Supports 80+ programming languages
- Strong algorithm implementation and optimization
**System Requirements**: At least 22GB RAM
**Best for**: Professional developers' top choice
**Rating**: ⭐⭐⭐⭐⭐
**Strengths**:
- Meta's official code model
- Excellent multi-file context understanding
- Strong code completion and debugging
**System Requirements**: At least 24GB RAM
**Best for**: Complex project development
**Rating**: ⭐⭐⭐⭐
**Strengths**:
- Strong multi-language code translation
- Excellent Chinese comments and documentation
- Great cross-language development support
**System Requirements**: At least 22GB RAM
**Best for**: Multi-language projects
**Rating**: ⭐⭐⭐
**Strengths**:
- Low resource consumption
- Fast code completion
- Suitable for real-time assistance
**System Requirements**: At least 8GB RAM
**Best for**: Beginner or lightweight assistance
### Vision & Multimodal Tasks
Support image understanding, description, analysis, and other vision-related tasks.
**Rating**: ⭐⭐⭐⭐⭐
**Strengths**:
- Powerful visual understanding
- Handles mixed text-image conversations
- Accurate image analysis and description
**System Requirements**: At least 56GB RAM
**Best for**: High-end vision tasks
**Rating**: ⭐⭐⭐⭐
**Strengths**:
- Lightweight multimodal model
- Good basic vision understanding
- Moderate resource requirements
**System Requirements**: At least 16GB RAM
**Best for**: Daily vision assistance
**Rating**: ⭐⭐⭐
**Strengths**:
- Open-source vision-language model
- Low resource consumption
- Suitable for experiments and learning
**System Requirements**: At least 8GB RAM
**Best for**: Entry-level vision tasks
### Reasoning & Chain-of-Thought
Suitable for complex reasoning, mathematical problems, and logical analysis.
**Rating**: ⭐⭐⭐⭐⭐
**Strengths**:
- Powerful reasoning capabilities
- Excellent at math and logic problems
- Cloud-based, no local hardware needed
**System Requirements**: Ollama account + internet connection
**Best for**: Tasks requiring top-tier reasoning
**Rating**: ⭐⭐⭐⭐
**Strengths**:
- Strong chain-of-thought reasoning
- Step-by-step complex problem solving
- Local execution, privacy-friendly
**System Requirements**: At least 22GB RAM
**Best for**: Complex reasoning and analysis
---
## Choose by Hardware Configuration
Select models that run smoothly on your computer configuration.
### Low-End (8GB RAM)
Suitable for entry-level users or laptops.
| Model | Parameters | Use Case | Speed |
|-------|------------|----------|-------|
| **Mistral 7B** | 7B | General conversation | ⚡⚡⚡⚡ |
| **Gemma 3 1B** | 1B | Quick Q&A | ⚡⚡⚡⚡⚡ |
| **Phi 4 Mini** | 3.8B | Lightweight assistance | ⚡⚡⚡⚡⚡ |
| **Llama 3.2 3B** | 3B | Basic conversation | ⚡⚡⚡⚡ |
| **Code Llama 7B** | 7B | Code assistance | ⚡⚡⚡⚡ |
| **LLaVA 7B** | 7B | Basic vision | ⚡⚡⚡ |
- Use quantized versions (Q4_K_M) to reduce memory usage
- Run only one model at a time
- Close unnecessary background programs
- Consider cloud models for complex tasks
### Mid-Range (16-32GB RAM)
Suitable for most users' daily use.
| Model | Parameters | Use Case | Speed |
|-------|------------|----------|-------|
| **Llama 3.2 Vision 11B** | 11B | Vision understanding | ⚡⚡⚡ |
| **Gemma 3 12B** | 12B | General conversation | ⚡⚡⚡ |
| **Phi 4** | 14B | Efficient reasoning | ⚡⚡⚡ |
| **QwQ 32B** | 32B | Complex reasoning | ⚡⚡ |
| **Qwen2.5-Coder 32B** | 32B | Multi-language code | ⚡⚡ |
- Enable GPU acceleration (if you have a dedicated GPU)
- Store model files on SSD
- Adjust `num_ctx` parameter to optimize context length
- Choose appropriate quantization level based on tasks
### High-End (48GB+ RAM)
Suitable for professional users and complex tasks.
| Model | Parameters | Use Case | Speed |
|-------|------------|----------|-------|
| **Llama 3.3 70B** | 70B | Top-tier conversation | ⚡⚡ |
| **Llama 3.1 70B** | 70B | System architecture | ⚡⚡ |
| **Llama 3.2 Vision 90B** | 90B | Advanced vision | ⚡ |
| **DeepSeek-Coder 33B** | 33B | Professional programming | ⚡⚡⚡ |
| **CodeLlama 34B** | 34B | Code generation | ⚡⚡⚡ |
- Use high-end GPU (RTX 4090/A100) for significant speed boost
- Enable multi-GPU support to distribute load
- Optimize VRAM allocation for better throughput
- Consider using professional inference servers
### Cloud Models (No Hardware Required)
Suitable for users needing massive models but limited hardware.
| Model | Parameters | Use Case | Requirements |
|-------|------------|----------|--------------|
| **DeepSeek-R1 671B** | 671B | Top-tier reasoning | Ollama account |
| **Llama 4 Maverick 400B** | 400B | Superior conversation | Ollama account |
| **Kimi K2 1T** | 1T | Ultra-long context | Ollama account |
Cloud models run via Ollama Cloud. You need to:
1. Register an account at [ollama.com](https://ollama.com)
2. Sign in through Ollama settings
3. Models automatically connect to cloud service
4. Requires stable internet connection for data transfer
---
## Model Family Overview
Understanding different model families helps you make better choices.
### Llama Series
**Developer**: Meta (Facebook)
**Characteristics**:
- Industry's most popular open-source model series
- Strong overall capabilities, broad adaptability
- Continuous updates, fast version iterations
**Version Comparison**:
| Version | Parameters | Features | Use Cases |
|---------|------------|----------|-----------|
| Llama 4 | 109B, 400B | Latest flagship, strongest capability | Professional applications |
| Llama 3.3 | 70B | Excellent performance, moderate cost | General use - top choice |
| Llama 3.2 | 1B, 3B | Lightweight and efficient | Mobile devices, edge computing |
| Llama 3.2 Vision | 11B, 90B | Multimodal capability | Vision understanding tasks |
| Llama 3.1 | 8B, 70B, 405B | Mature and stable | Production environments |
- **Entry**: Llama 3.2 3B
- **Daily**: Llama 3.3 70B (if hardware allows)
- **Professional**: Llama 4 Maverick 400B (cloud)
### Gemma Series
**Developer**: Google
**Characteristics**:
- Advanced technology, well-optimized
- Excellent multilingual support
- Open-source friendly license
**Version Comparison**:
| Version | Parameters | Features | Use Cases |
|---------|------------|----------|-----------|
| Gemma 3 | 1B, 4B, 12B, 27B | Latest version, comprehensive improvements | Various scenarios |
| Gemma 2 | 2B, 9B, 27B | Mature and stable | Production environments |
- **Low-end**: Gemma 3 1B
- **Mid-range**: Gemma 3 12B
- **High-end**: Gemma 3 27B
### Mistral Series
**Developer**: Mistral AI
**Characteristics**:
- Excellent performance-efficiency balance
- Strong instruction-following ability
- Fast inference speed
**Main Versions**:
- **Mistral 7B**: Lightweight and efficient general model
- **Mixtral**: Mixture-of-Experts architecture, more powerful
Mistral 7B is the best choice for resource-constrained environments, running smoothly on 8GB RAM machines.
### Phi Series
**Developer**: Microsoft
**Characteristics**:
- Small size, big capability
- High-quality training data
- Research-oriented, innovative
**Version Comparison**:
| Version | Parameters | Features | Use Cases |
|---------|------------|----------|-----------|
| Phi 4 | 14B | Latest version, strong reasoning | Mid-range configuration |
| Phi 4 Mini | 3.8B | Ultra-lightweight, excellent performance | Low-end devices |
Phi series is known for "small but powerful", providing excellent performance despite smaller parameter sizes, especially suitable for education and research.
### Qwen Series
**Developer**: Alibaba Cloud
**Characteristics**:
- Industry-leading Chinese capability
- Comprehensive multilingual support
- Rich specialized versions
**Main Versions**:
- **Qwen3**: Latest general model
- **Qwen2.5-Coder**: Professional code model, strong multi-language support
- **Qwen3-Coder**: Next-generation code model
Qwen series has extremely strong Chinese understanding and generation capabilities, an excellent choice for Chinese users.
### DeepSeek Series
**Developer**: DeepSeek
**Characteristics**:
- Outstanding reasoning ability
- Code generation specialization
- High cost-effectiveness
**Main Versions**:
- **DeepSeek-R1**: Chain-of-thought reasoning model, supports ultra-large 671B cloud version
- **DeepSeek-Coder**: Professional code model, developers' top choice
DeepSeek-Coder 33B excels in code generation accuracy, the top choice for professional developers.
---
## Performance Comparison Tables
Comprehensive comparison of mainstream models to help quick decision-making.
### General Conversation Models
| Model | Parameters | RAM Needed | Speed | Quality | Reasoning | Overall Score |
|-------|------------|------------|-------|---------|-----------|---------------|
| Llama 3.3 70B | 70B | 48GB | ⚡⚡ | ⭐⭐⭐⭐⭐ | ⭐⭐⭐⭐⭐ | 95/100 |
| Gemma 3 27B | 27B | 18GB | ⚡⚡⚡ | ⭐⭐⭐⭐ | ⭐⭐⭐⭐ | 88/100 |
| Mistral 7B | 7B | 8GB | ⚡⚡⚡⚡ | ⭐⭐⭐⭐ | ⭐⭐⭐⭐ | 85/100 |
| Gemma 3 12B | 12B | 16GB | ⚡⚡⚡ | ⭐⭐⭐⭐ | ⭐⭐⭐⭐ | 82/100 |
| Phi 4 | 14B | 16GB | ⚡⚡⚡ | ⭐⭐⭐ | ⭐⭐⭐⭐ | 78/100 |
| Llama 3.2 3B | 3B | 8GB | ⚡⚡⚡⚡⚡ | ⭐⭐⭐ | ⭐⭐⭐ | 70/100 |
### Code Generation Models
| Model | Parameters | RAM Needed | Speed | Code Quality | Language Support | Overall Score |
|-------|------------|------------|-------|--------------|------------------|---------------|
| DeepSeek-Coder 33B | 33B | 22GB | ⚡⚡ | ⭐⭐⭐⭐⭐ | 80+ | 95/100 |
| CodeLlama 34B | 34B | 24GB | ⚡⚡ | ⭐⭐⭐⭐⭐ | Mainstream | 92/100 |
| Qwen2.5-Coder 32B | 32B | 22GB | ⚡⚡ | ⭐⭐⭐⭐ | Multi-language | 90/100 |
| Code Llama 7B | 7B | 8GB | ⚡⚡⚡⚡ | ⭐⭐⭐ | Mainstream | 75/100 |
### Vision Models
| Model | Parameters | RAM Needed | Speed | Vision Understanding | Text Generation | Overall Score |
|-------|------------|------------|-------|----------------------|-----------------|---------------|
| Llama 3.2 Vision 90B | 90B | 56GB | ⚡ | ⭐⭐⭐⭐⭐ | ⭐⭐⭐⭐⭐ | 95/100 |
| Llama 3.2 Vision 11B | 11B | 16GB | ⚡⚡⚡ | ⭐⭐⭐⭐ | ⭐⭐⭐⭐ | 82/100 |
| LLaVA 7B | 7B | 8GB | ⚡⚡⚡ | ⭐⭐⭐ | ⭐⭐⭐ | 70/100 |
---
## Model Selection Decision Tree
Not sure which to choose? Follow this decision flow:
### Determine Primary Use
**What do you mainly want to do?**
- 📝 Daily conversation and Q&A → Go to Step 2
- 💻 Programming and code generation → Go to Step 3
- 🖼️ Image understanding and analysis → Go to Step 4
- 🧠 Complex reasoning and math → Go to Step 5
### Daily Conversation Scenario
**Check your hardware configuration:**
- **8GB RAM**: Choose **Mistral 7B** or **Gemma 3 1B**
- **16GB RAM**: Choose **Gemma 3 12B** or **Phi 4**
- **32GB+ RAM**: Choose **Gemma 3 27B**
- **48GB+ RAM**: Choose **Llama 3.3 70B**
### Code Programming Scenario
**Based on your needs:**
- **Quick code completion** (8GB RAM): **Code Llama 7B**
- **Professional development** (22GB+ RAM): **DeepSeek-Coder 33B** or **CodeLlama 34B**
- **Multi-language projects** (22GB+ RAM): **Qwen2.5-Coder 32B**
### Vision Understanding Scenario
**Based on task complexity:**
- **Basic image description** (8GB RAM): **LLaVA 7B**
- **Daily vision assistance** (16GB RAM): **Llama 3.2 Vision 11B**
- **Professional vision analysis** (56GB+ RAM): **Llama 3.2 Vision 90B**
### Complex Reasoning Scenario
**Based on reasoning complexity:**
- **Medium reasoning tasks** (22GB RAM): **QwQ 32B**
- **Top reasoning capability** (internet required): **DeepSeek-R1 671B Cloud**
---
## Frequently Asked Questions
**Not necessarily**. Model selection requires comprehensive consideration:
1. **Hardware limitations**: Ensure sufficient RAM, otherwise crashes or extreme slowness
2. **Task requirements**: Simple tasks work fine with small models, large models are wasteful
3. **Speed requirements**: Large models are slower, real-time apps need balance
4. **Quantization strategy**: Proper quantization balances quality and speed
**Recommendation**: Start with the largest model your hardware supports, adjust based on actual performance.
**Quantization** is a compression technique that uses fewer bits to represent parameters, reducing memory usage and improving speed.
**Common quantization levels**:
- **Q8**: 8-bit, quality close to original, large size
- **Q6_K**: 6-bit, good quality, medium size
- **Q4_K_M**: 4-bit medium, best cost-performance (recommended)
- **Q4_K_S**: 4-bit small, smallest size, slightly lower quality
- **Q2_K**: 2-bit, extremely small, noticeable quality loss
**Selection guide**:
- **Sufficient memory**: Q6_K or Q8
- **General use**: Q4_K_M (default recommendation)
- **Memory constrained**: Q4_K_S
- **Not recommended**: Q2_K (unless extreme cases)
| Feature | Local Models | Cloud Models |
|---------|--------------|--------------|
| **Privacy** | ⭐⭐⭐⭐⭐ Fully local | ⭐⭐ Data uploaded to cloud |
| **Speed** | Depends on hardware | Depends on network |
| **Cost** | One-time download, free forever | May charge per use |
| **Hardware** | High requirements | Low (almost none) |
| **Offline** | ✅ Supported | ❌ Requires internet |
| **Model Size** | Limited by hardware | Supports ultra-large models |
**Recommended strategy**:
- Prioritize local models for daily use
- Use cloud models occasionally for top capabilities
- Must use local models for sensitive data
**Quick judgment method**:
1. **Check system RAM**:
- Windows: Task Manager → Performance → Memory
- macOS: Activity Monitor → Memory
- Linux: `free -h` command
2. **Compare requirements**:
- 7B model ≈ 8GB RAM
- 13B model ≈ 16GB RAM
- 33B model ≈ 32GB RAM
- 70B model ≈ 48GB RAM
3. **Leave margin**: Reserve 20-30% RAM for system
4. **Actual testing**: Download and try in OllaMan, observe:
- Load speed (too slow means struggling)
- Generation speed (< 5 tokens/s poor experience)
- System response (lag means insufficient memory)
**GPU acceleration**:
If you have a dedicated GPU (NVIDIA/AMD):
- Check VRAM size
- Enable GPU acceleration
- Monitor GPU utilization
**Models with strong Chinese capability**:
1. **Qwen Series** (Alibaba Cloud) - Strongest Chinese
- Qwen3 4B/12B/27B
- Qwen2.5-Coder 32B (code scenarios)
2. **Llama Series** - Also very good Chinese
- Llama 3.3 70B
- Llama 3.2 Vision (multimodal)
3. **DeepSeek Series** - Excellent Chinese
- DeepSeek-R1 (reasoning)
- DeepSeek-Coder (code)
4. **Gemma Series** - Balanced multilingual
- Gemma 3 12B/27B
**Recommended combinations**:
- **Daily**: Qwen3 12B
- **Code**: DeepSeek-Coder 33B
- **High-end**: Llama 3.3 70B
**Performance optimization tips**:
1. **Hardware optimization**:
- Enable GPU acceleration (NVIDIA/AMD/Apple Silicon)
- Store model files on SSD
- Close unnecessary background programs
- Increase system RAM (if possible)
2. **Software optimization**:
- Choose appropriate quantization level
- Adjust context length (`num_ctx`)
- Use batch processing mode
- Regularly clear cache
3. **Parameter tuning**:
- `temperature`: Lower improves consistency and speed
- `top_p` / `top_k`: Limit sampling range
- `num_predict`: Limit max generation length
4. **Scenario optimization**:
- Use small models for simple tasks
- Automate batch tasks with scripts
- Regularly clear history in long conversations
**Technically yes, but be careful**:
1. **Memory stacking**: Each model independently occupies RAM/VRAM
2. **Performance degradation**: Multiple models significantly slow individual speeds
3. **System stability**: May cause out-of-memory crashes
**Recommended strategy**:
- **Serial use**: Load when needed, unload when done
- **Dedicated machines**: Different servers run different models
- **GPU separation**: Allocate on multi-GPU setups
**OllaMan management**:
- Dashboard shows running models
- One-click unload to free memory
- Set automatic expiration time
---
## Model Usage Best Practices
### Pre-Download Checklist
### Confirm Sufficient Hardware
Use the RAM requirement tables above to ensure your system has enough memory.
### Choose Appropriate Quantization
Unless hardware is ample, recommend downloading `Q4_K_M` quantized versions.
### Estimate Disk Space
- 7B model: ~4-8GB
- 13B model: ~8-16GB
- 33B model: ~18-25GB
- 70B model: ~40-50GB
### Network Stability
Large models may take hours to download, ensure stable network or resume support.
### First-Time Use Recommendations
### Start with Small Models
When uncertain, try Mistral 7B or Gemma 3 1B first to familiarize with the process.
### Test Performance
Run simple conversations, observe:
- Load time (should be within 1 minute)
- Generation speed (at least 10 tokens/s)
- System response (shouldn't lag)
### Adjust Parameters
Based on actual performance, adjust:
- Lower `temperature` for stability
- Reduce `num_ctx` to lower memory usage
- Limit `num_predict` to control output length
### Evaluate Quality
Test with your actual tasks to judge if it meets needs.
### Long-Term Use Recommendations
1. **Regular updates**: Ollama models continuously improve, watch for new versions
2. **Clean unused models**: Delete unused models promptly to free space
3. **Backup configs**: Save your preferred model parameter settings
4. **Monitor resources**: Watch memory and disk usage
5. **Community participation**: Share experiences in forums, learn from others
---
## Recommended Combinations
Complete model combination suggestions for different user types.
### Students/Beginners
**Hardware assumption**: 8-16GB RAM
**Recommended combination**:
1. **Mistral 7B** - Daily conversation and learning assistance
2. **Code Llama 7B** - Programming homework help
3. **Gemma 3 1B** - Quick queries and Q&A
**Total usage**: ~15-20GB disk
### Professional Developers
**Hardware assumption**: 32GB RAM + GPU
**Recommended combination**:
1. **DeepSeek-Coder 33B** - Primary code generation tool
2. **Llama 3.3 70B** (if RAM sufficient) - Technical discussion and architecture design
3. **Qwen2.5-Coder 32B** - Multi-language and code translation
**Total usage**: ~90-100GB disk
### Content Creators
**Hardware assumption**: 16-32GB RAM
**Recommended combination**:
1. **Gemma 3 12B** - Text creation and polish
2. **Llama 3.2 Vision 11B** - Image analysis and description
3. **Qwen3 12B** - Chinese content generation
**Total usage**: ~40-50GB disk
### Researchers
**Hardware assumption**: 48GB+ RAM or cloud
**Recommended combination**:
1. **Llama 3.3 70B** - Deep analysis and reasoning
2. **DeepSeek-R1 671B Cloud** - Complex reasoning and math
3. **QwQ 32B** - Chain-of-thought reasoning
4. **Llama 3.2 Vision 90B** - Multimodal research
**Total usage**: Local ~120GB + cloud models
### Enterprise Teams
**Hardware assumption**: Dedicated server 128GB+ RAM
**Recommended combination**:
1. **Llama 3.3 70B** - General business consultation
2. **DeepSeek-Coder 33B** - Code review and generation
3. **Qwen3 27B** - Chinese business processing
4. **Llama 3.2 Vision 90B** - Document and image analysis
**Total usage**: ~200GB disk
- Use dedicated inference servers
- Configure load balancing
- Enable multi-GPU acceleration
- Consider using high-performance frameworks like vLLM
- Establish model evaluation and update processes
---
## Summary & Recommendations
### Quick Selection Guide
**If you just want one versatile model**:
- 8GB RAM: **Mistral 7B**
- 16GB RAM: **Gemma 3 12B**
- 32GB+ RAM: **Llama 3.3 70B**
**If you're a developer**:
- **DeepSeek-Coder 33B** (requires 22GB RAM)
**If you value Chinese support**:
- **Qwen3 12B** or **Qwen3 27B**
**If you need vision capability**:
- **Llama 3.2 Vision 11B** (requires 16GB RAM)
**If hardware limited but need powerful capability**:
- **DeepSeek-R1 671B Cloud** or **Llama 4 Cloud**
### Important Reminders
1. **Hardware First**: Never choose models beyond hardware capability
2. **Scenario Match**: Specialized models (code, vision) outperform general ones
3. **Iterative Optimization**: Start with small models, upgrade based on needs
### Continuous Learning
The Ollama ecosystem evolves rapidly, with new models constantly emerging:
- Subscribe to [Ollama Blog](https://ollama.com/blog)
- Follow [Ollama Model Library](https://ollama.com/library)
- Join OllaMan community discussions
- Regularly check for model updates
---
## Next Steps
Learn how to maximize model functionality
Start using OllaMan from scratch
Browse all available models (official)
If you still have questions about model selection:
- Ask in GitHub Discussions
- Join Discord community discussions
- Consult full documentation for more information
- Contact technical support for personalized recommendations
---
*This guide was last updated in November 2025. Model information and recommendations are based on current latest versions and may change in the future.*
---
# OllaMan v3.7: Your Ollama Workstation Can Now Work on Its Own
URL: https://ollaman.com/blog/2026-ollaman-v3-7-release-highlights
> Six releases in one month took OllaMan from v3.5.0 to v3.7.0. Agent Mode, local GGUF import, drag-and-drop attachments, and Bearer token authentication for gateway-protected servers.
Between June 26 and July 27, OllaMan went from v3.5.0 to v3.7.0 across six releases. Four of them changed how you work day to day: the chat window learned to execute tasks, GGUF files import without a Modelfile, files attach by dragging them in, and remote servers behind an auth gateway connect without a proxy.
## Agent Mode: chat that executes
v3.5.0 added Agent Mode to the chat window. Turn it on and the model stops describing what you should do and does it: reads files, runs shell commands, chains steps, then reports back.
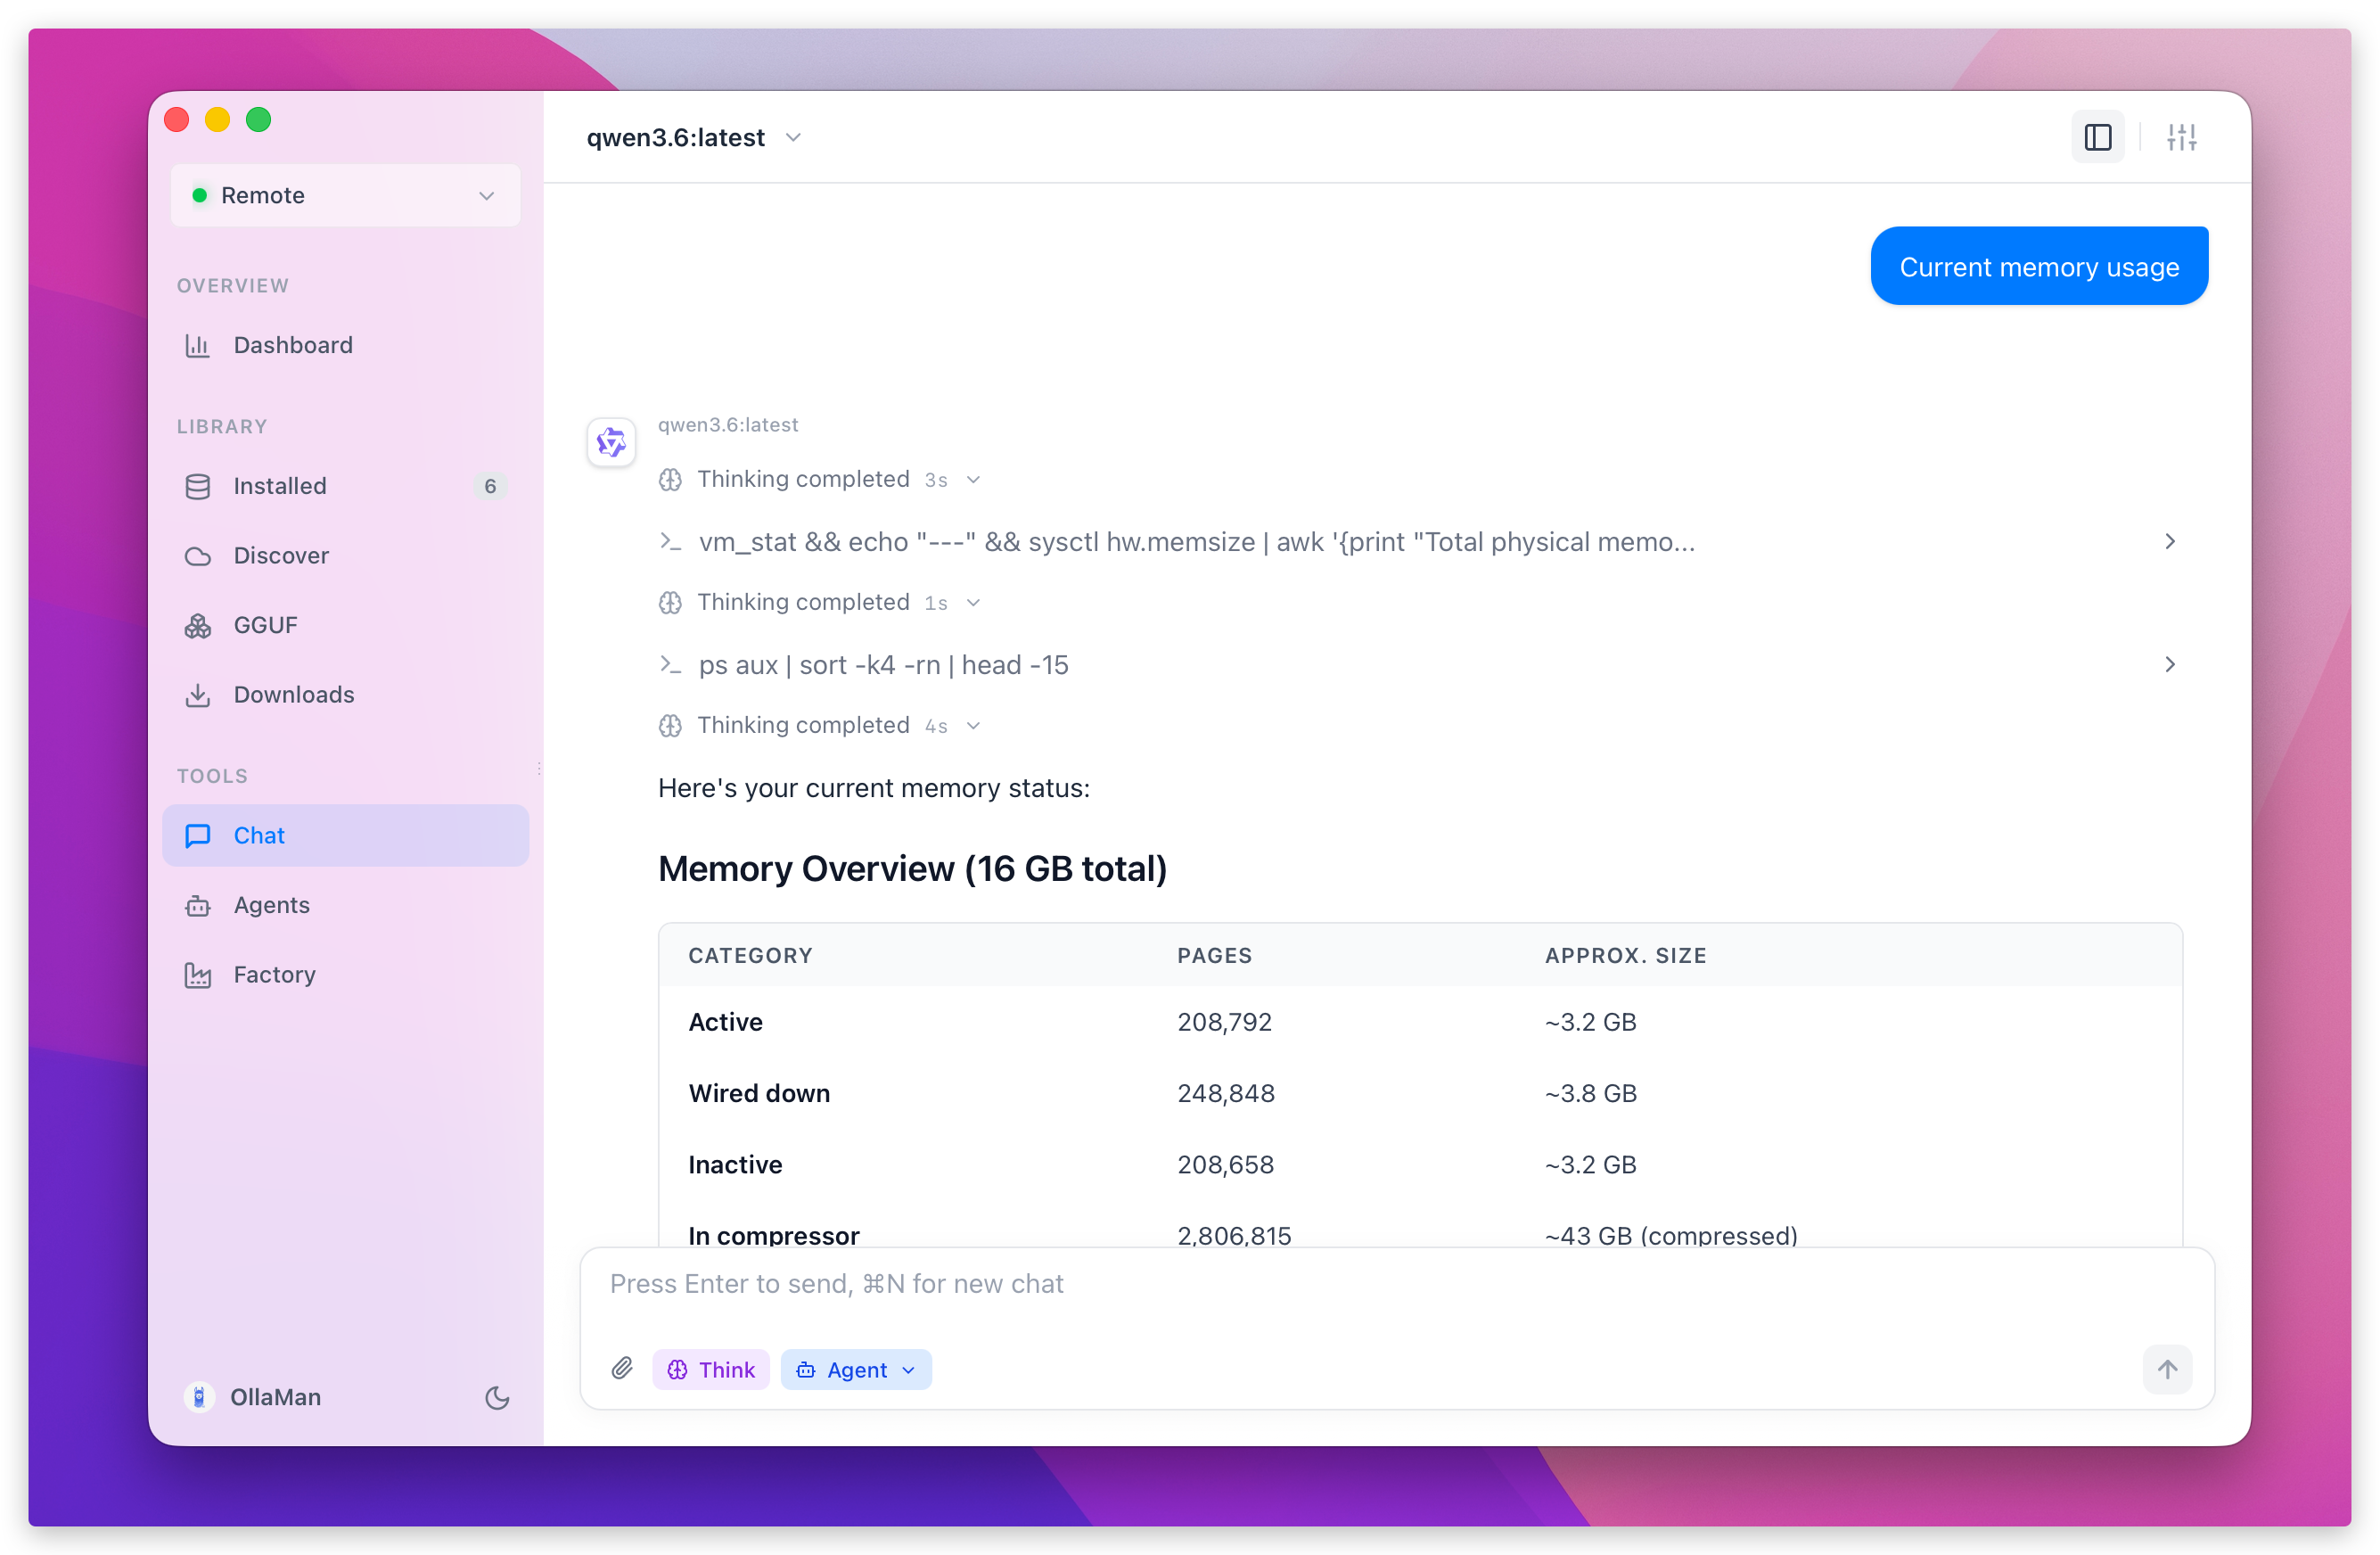
In this screenshot the prompt was three words, "Current memory usage". The model ran `vm_stat && sysctl hw.memsize`, thought about the output, ran `ps aux | sort -k4 -rn | head -15` to find the heaviest processes, and returned a formatted memory table. No copy-paste relay.
Two things keep this safe. You pick a working directory, and the agent operates inside it. Before every command or file write, it asks for approval and shows you the exact command first. v3.5.1 fixed a bug in that authorization flow where some permission prompts failed to register your answer.
The [Agent Mode guide](/docs/features/agent-mode) covers the built-in tools and how Skills extend them.
## Import a local .gguf file, no Modelfile
Before v3.6.0, running a `.gguf` file you already had on disk meant writing a Modelfile and calling `ollama create`. Now it takes a dialog: open **GGUF** in the sidebar, choose the file, give the model a name, click Import.
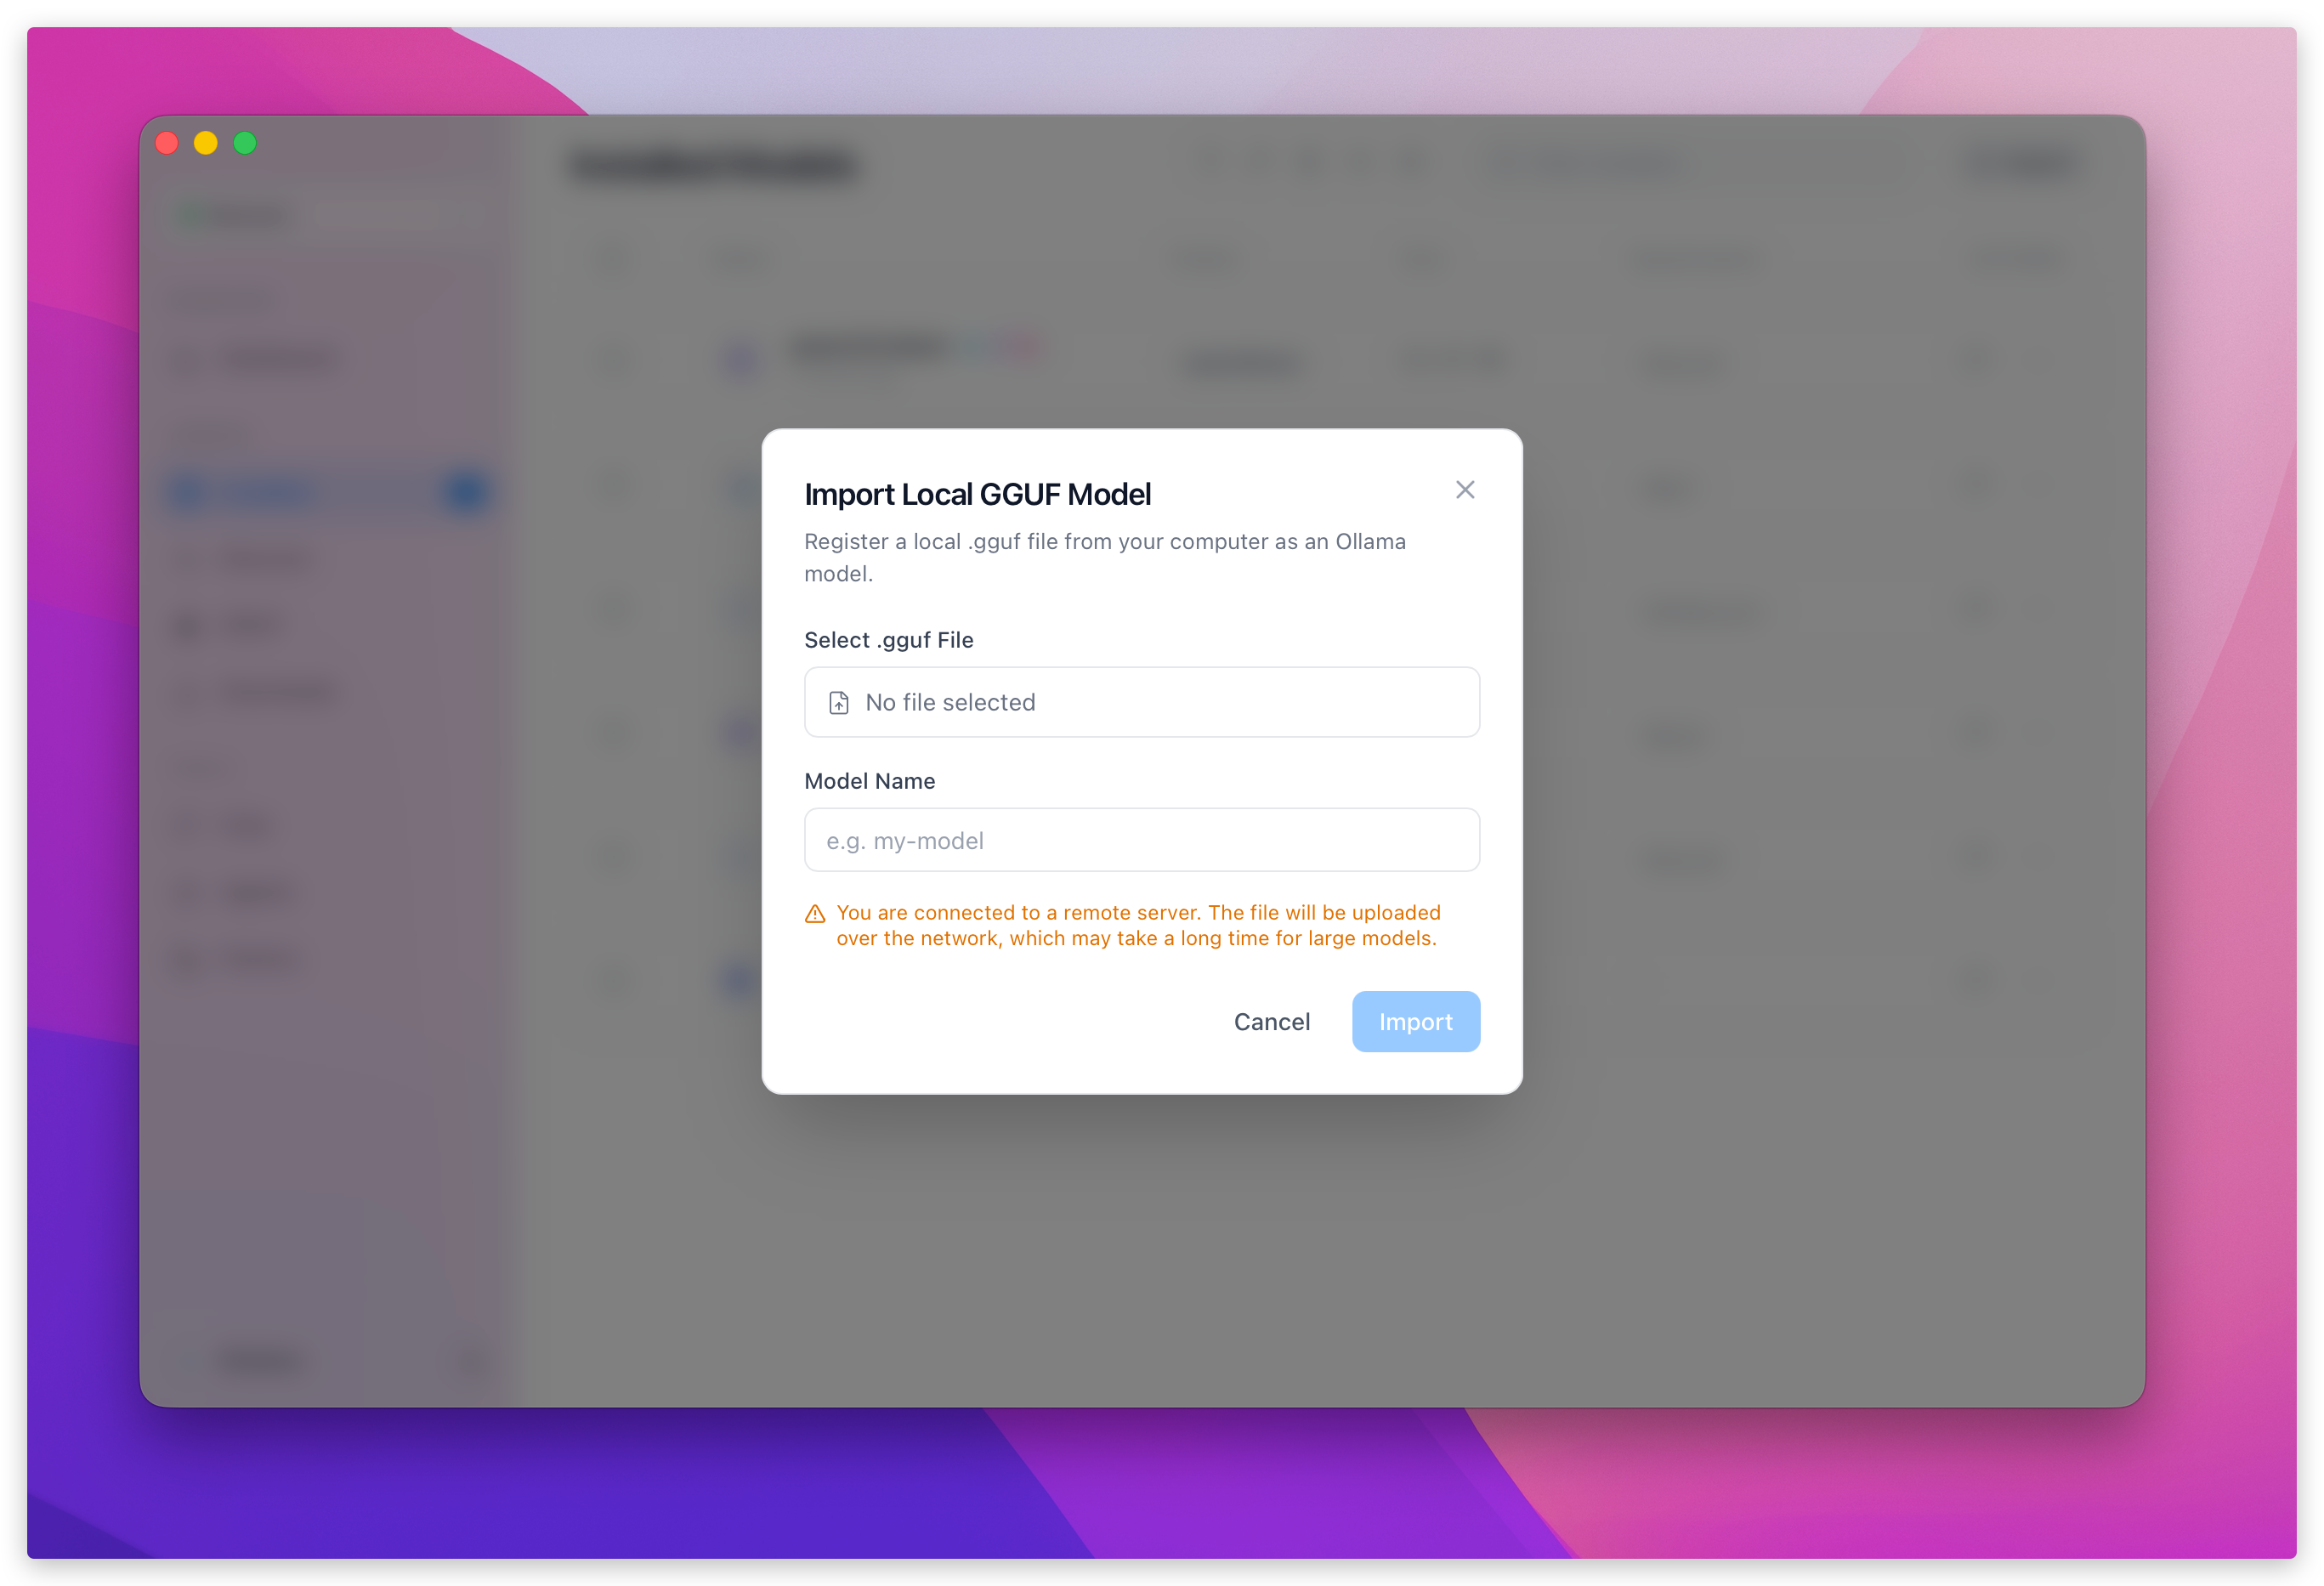
This matters for models that never came from a registry. Offline downloads, air-gapped or intranet machines, a quantization a colleague handed you on a drive.
One caveat the dialog warns about: if you are connected to a remote Ollama server rather than a local one, the file uploads over the network. A 20GB quant on a home uplink will take a long time. For details, see [Import Local GGUF Files](/docs/features/local-gguf-import).
## Drag files onto the composer
v3.5.4 made the chat composer a drop target. Drag images, documents, or source files onto it and they attach directly.
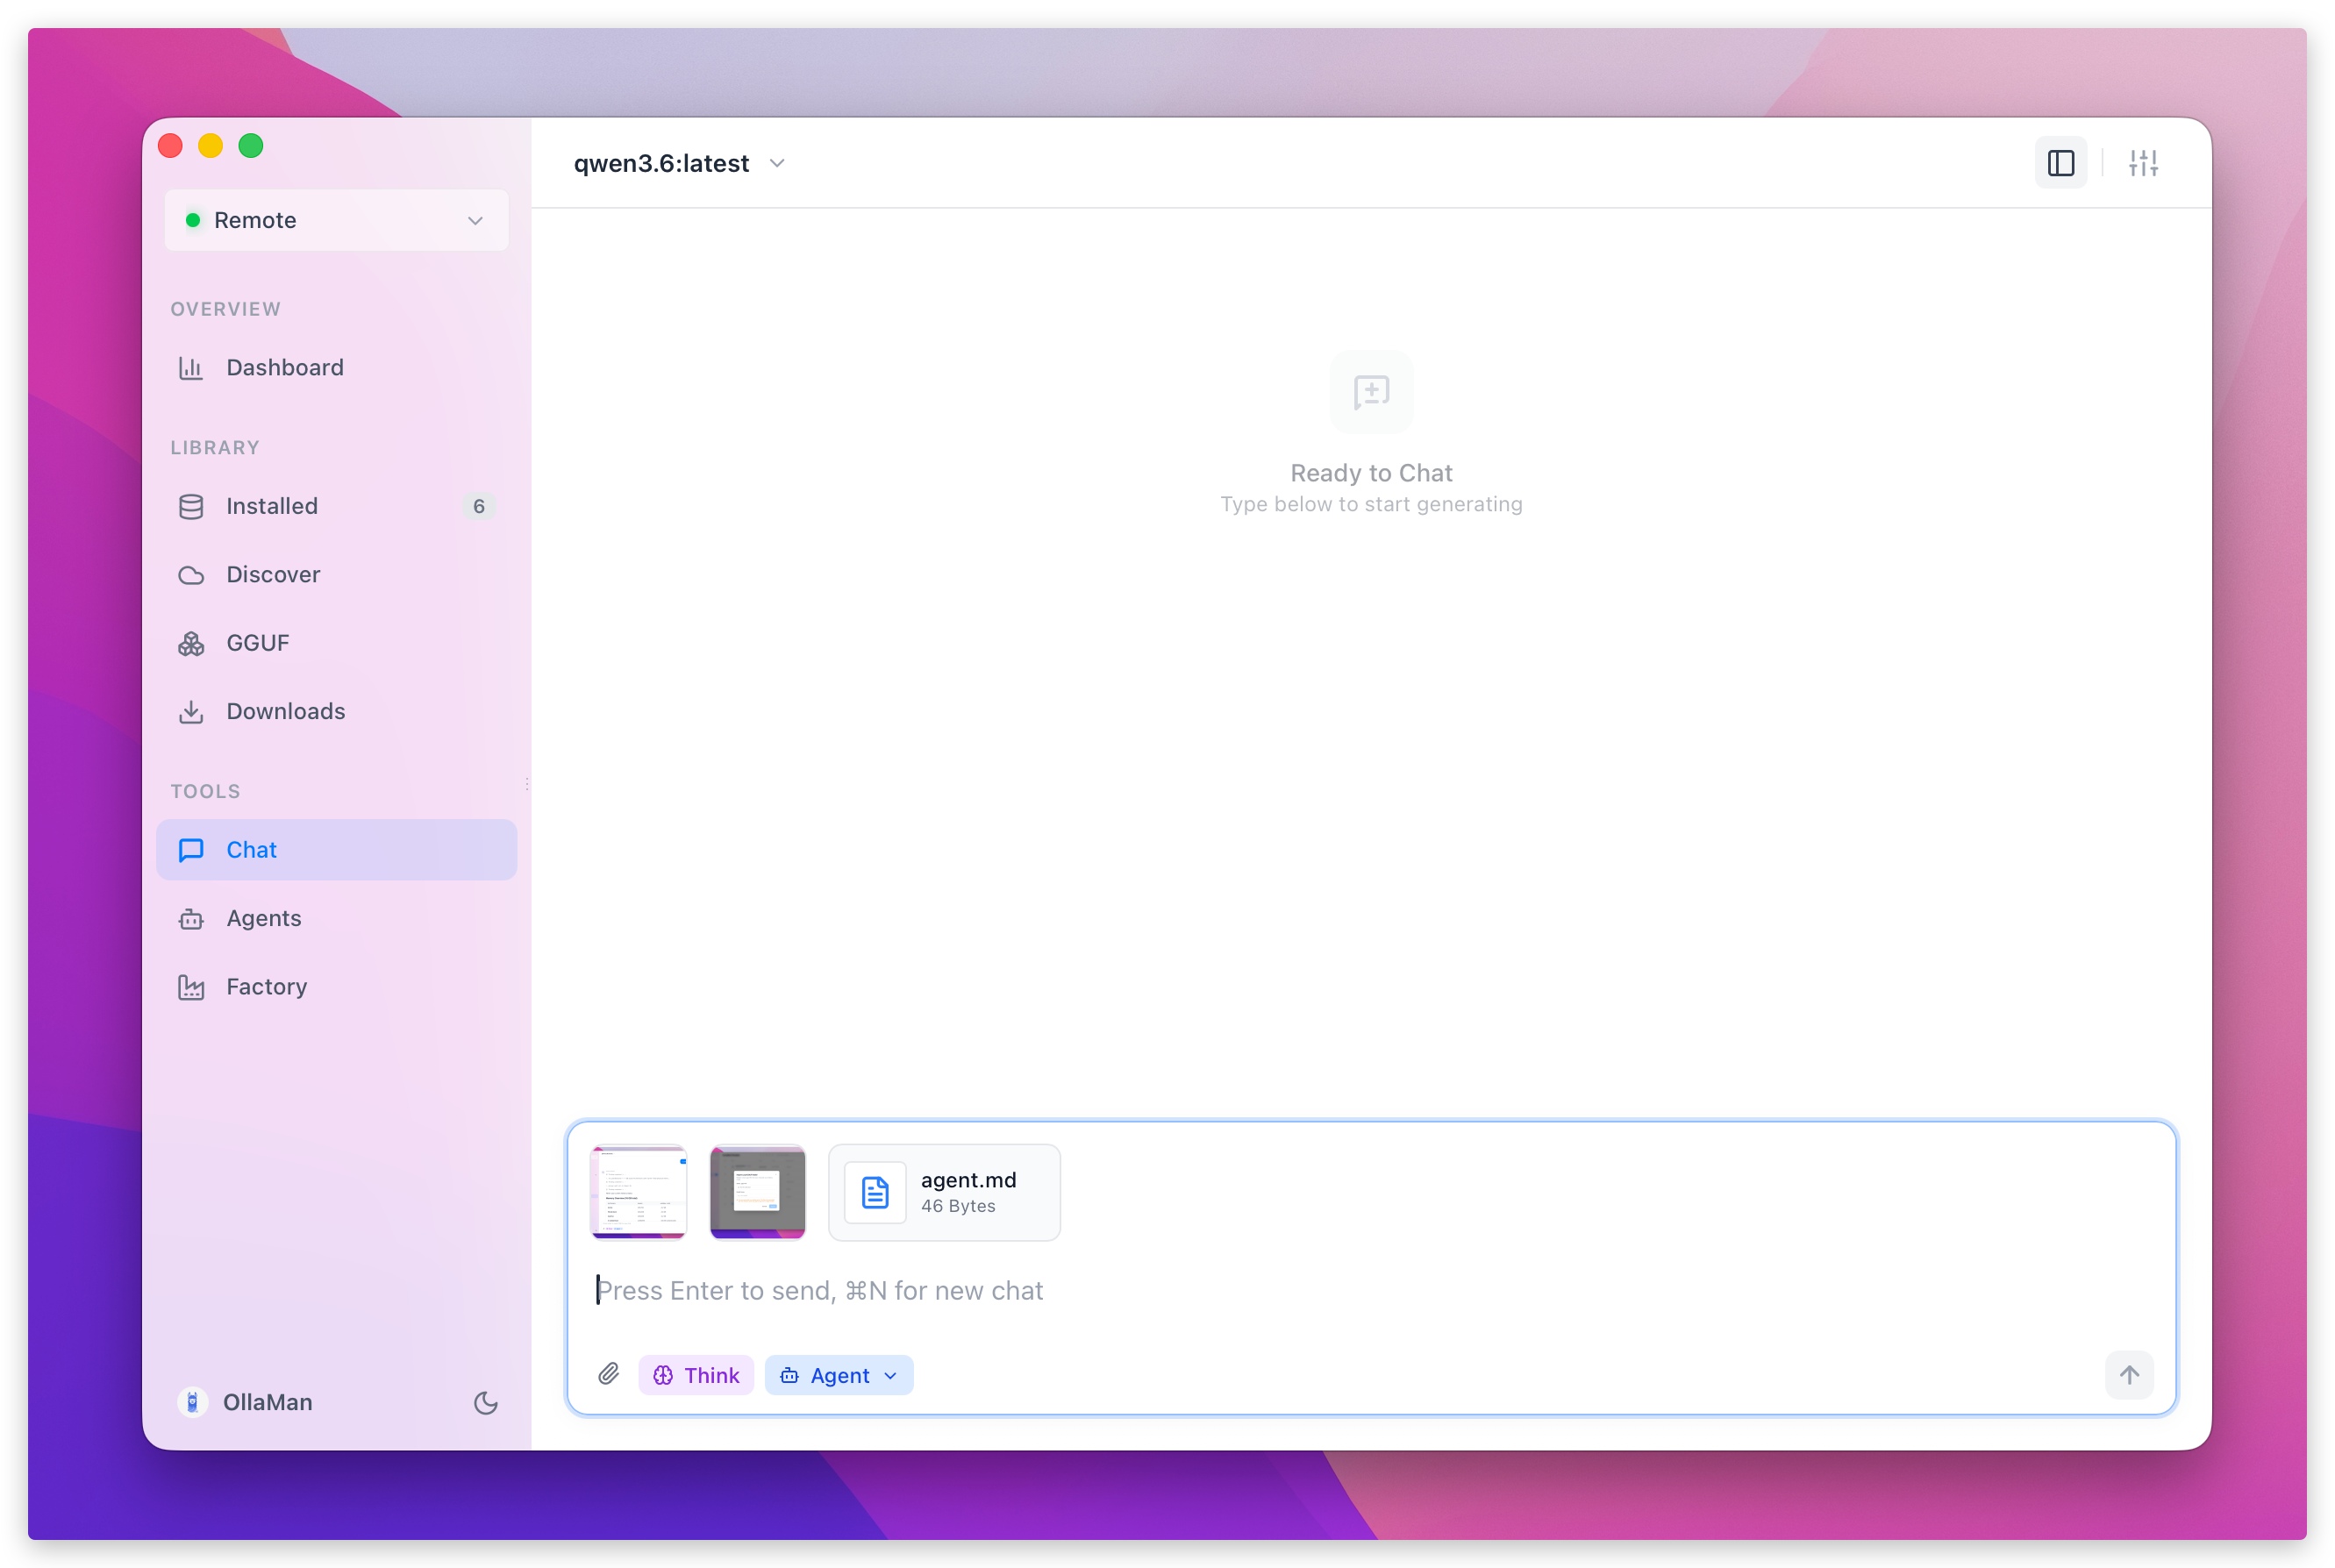
The text attachment limit also went from 1MB to 5MB, which covers most source files and long markdown notes that used to get rejected. The same release added a folder picker for the agent working directory, so you browse to it instead of typing a path, and fixed the Online Models page failing to load its model list.
## Bearer tokens and custom headers for remote servers
If your Ollama sits behind Cloudflare Access or a similar gateway, older versions of OllaMan left you two options: run `cloudflared access` alongside it, or stand up a local proxy that injected the headers. v3.7.0 handles the auth itself. Open **Settings → Servers** and the authentication picker now offers four modes.
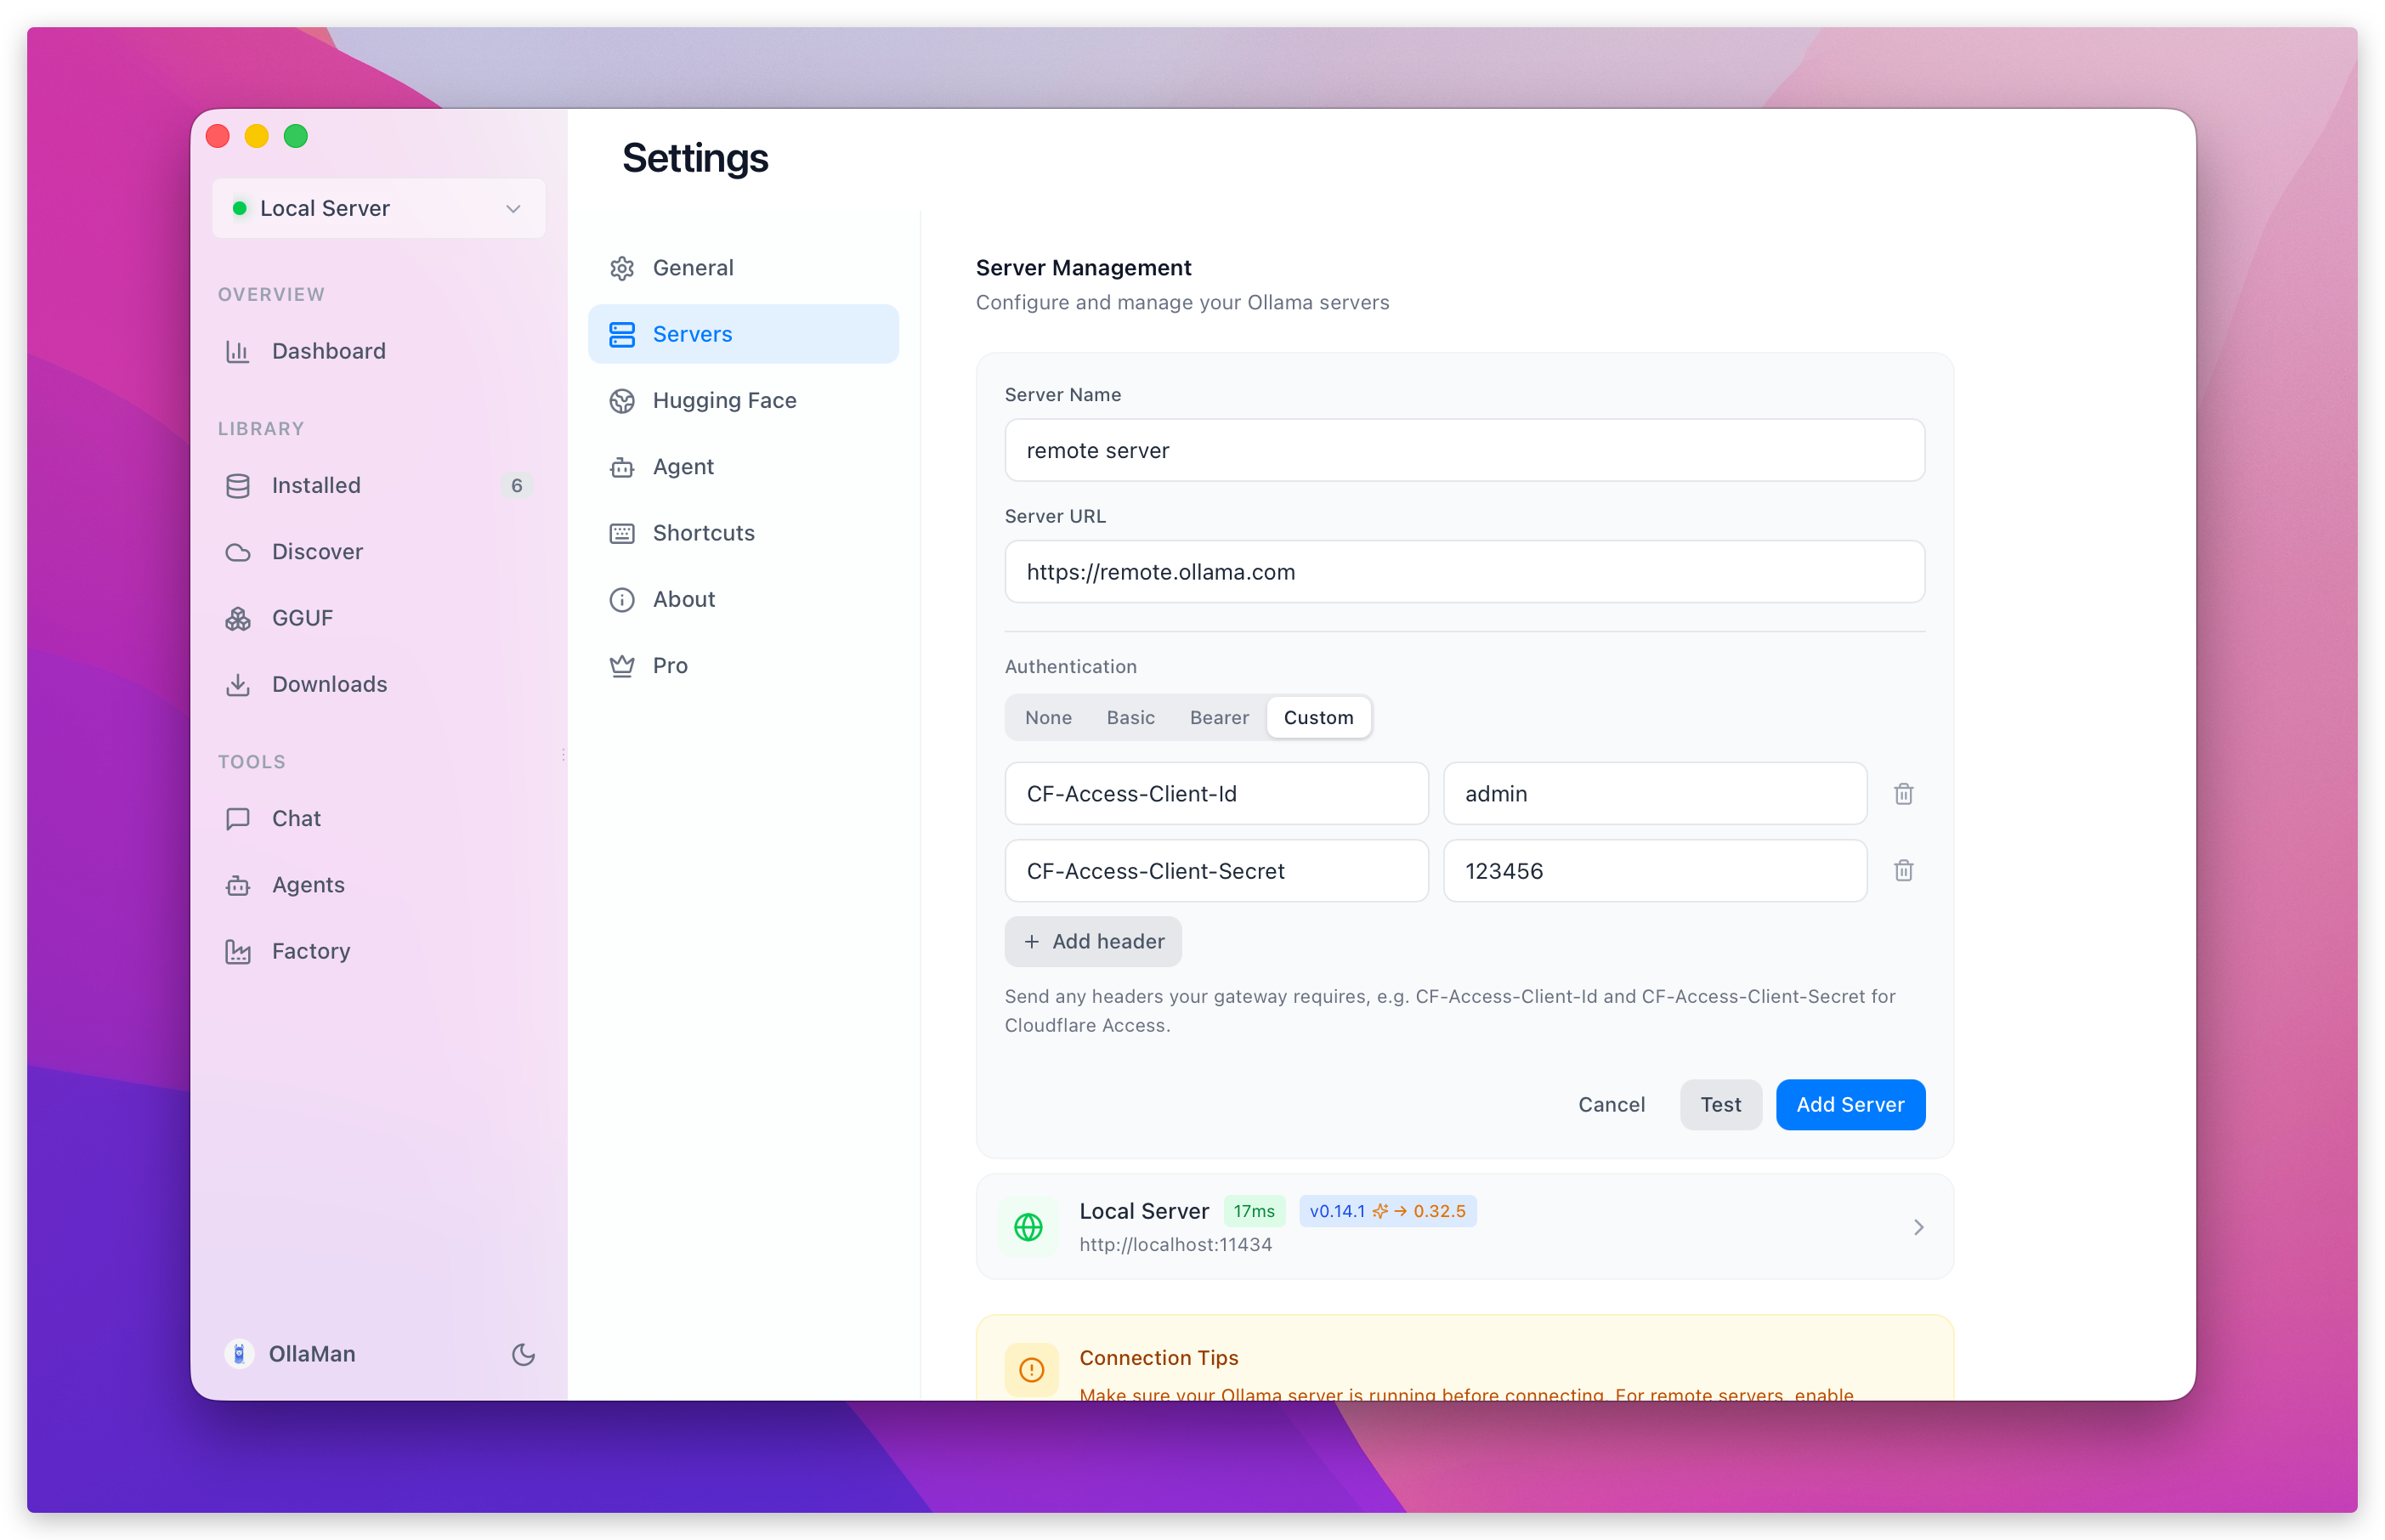
Bearer takes a token and sends it as `Authorization: Bearer `. Custom takes arbitrary header name and value pairs, which is what Cloudflare Access needs: `CF-Access-Client-Id` and `CF-Access-Client-Secret`, as shown above. Add as many pairs as your gateway requires.
Basic and None are still there, and existing configurations keep working untouched. OllaMan detects your current setup and maps it to the right mode, so nothing to migrate.
v3.7.0 also fixed a bug where passwords containing special characters broke the connection. If Basic Auth failed for you because of an `@` or a `:` in the password, it works now.
Use the **Test** button before saving. It sends a real request through the gateway and tells you whether the credentials pass, which beats saving a broken config and wondering why the model list is empty. The [authentication guide](/docs/features/authentication) walks through each mode.
## From the same team: MCP2Skill
Once you start wiring MCP servers into a local agent workflow, you run into the tool-count problem. Every connected server loads its whole tool list into context before the model reads your first message.
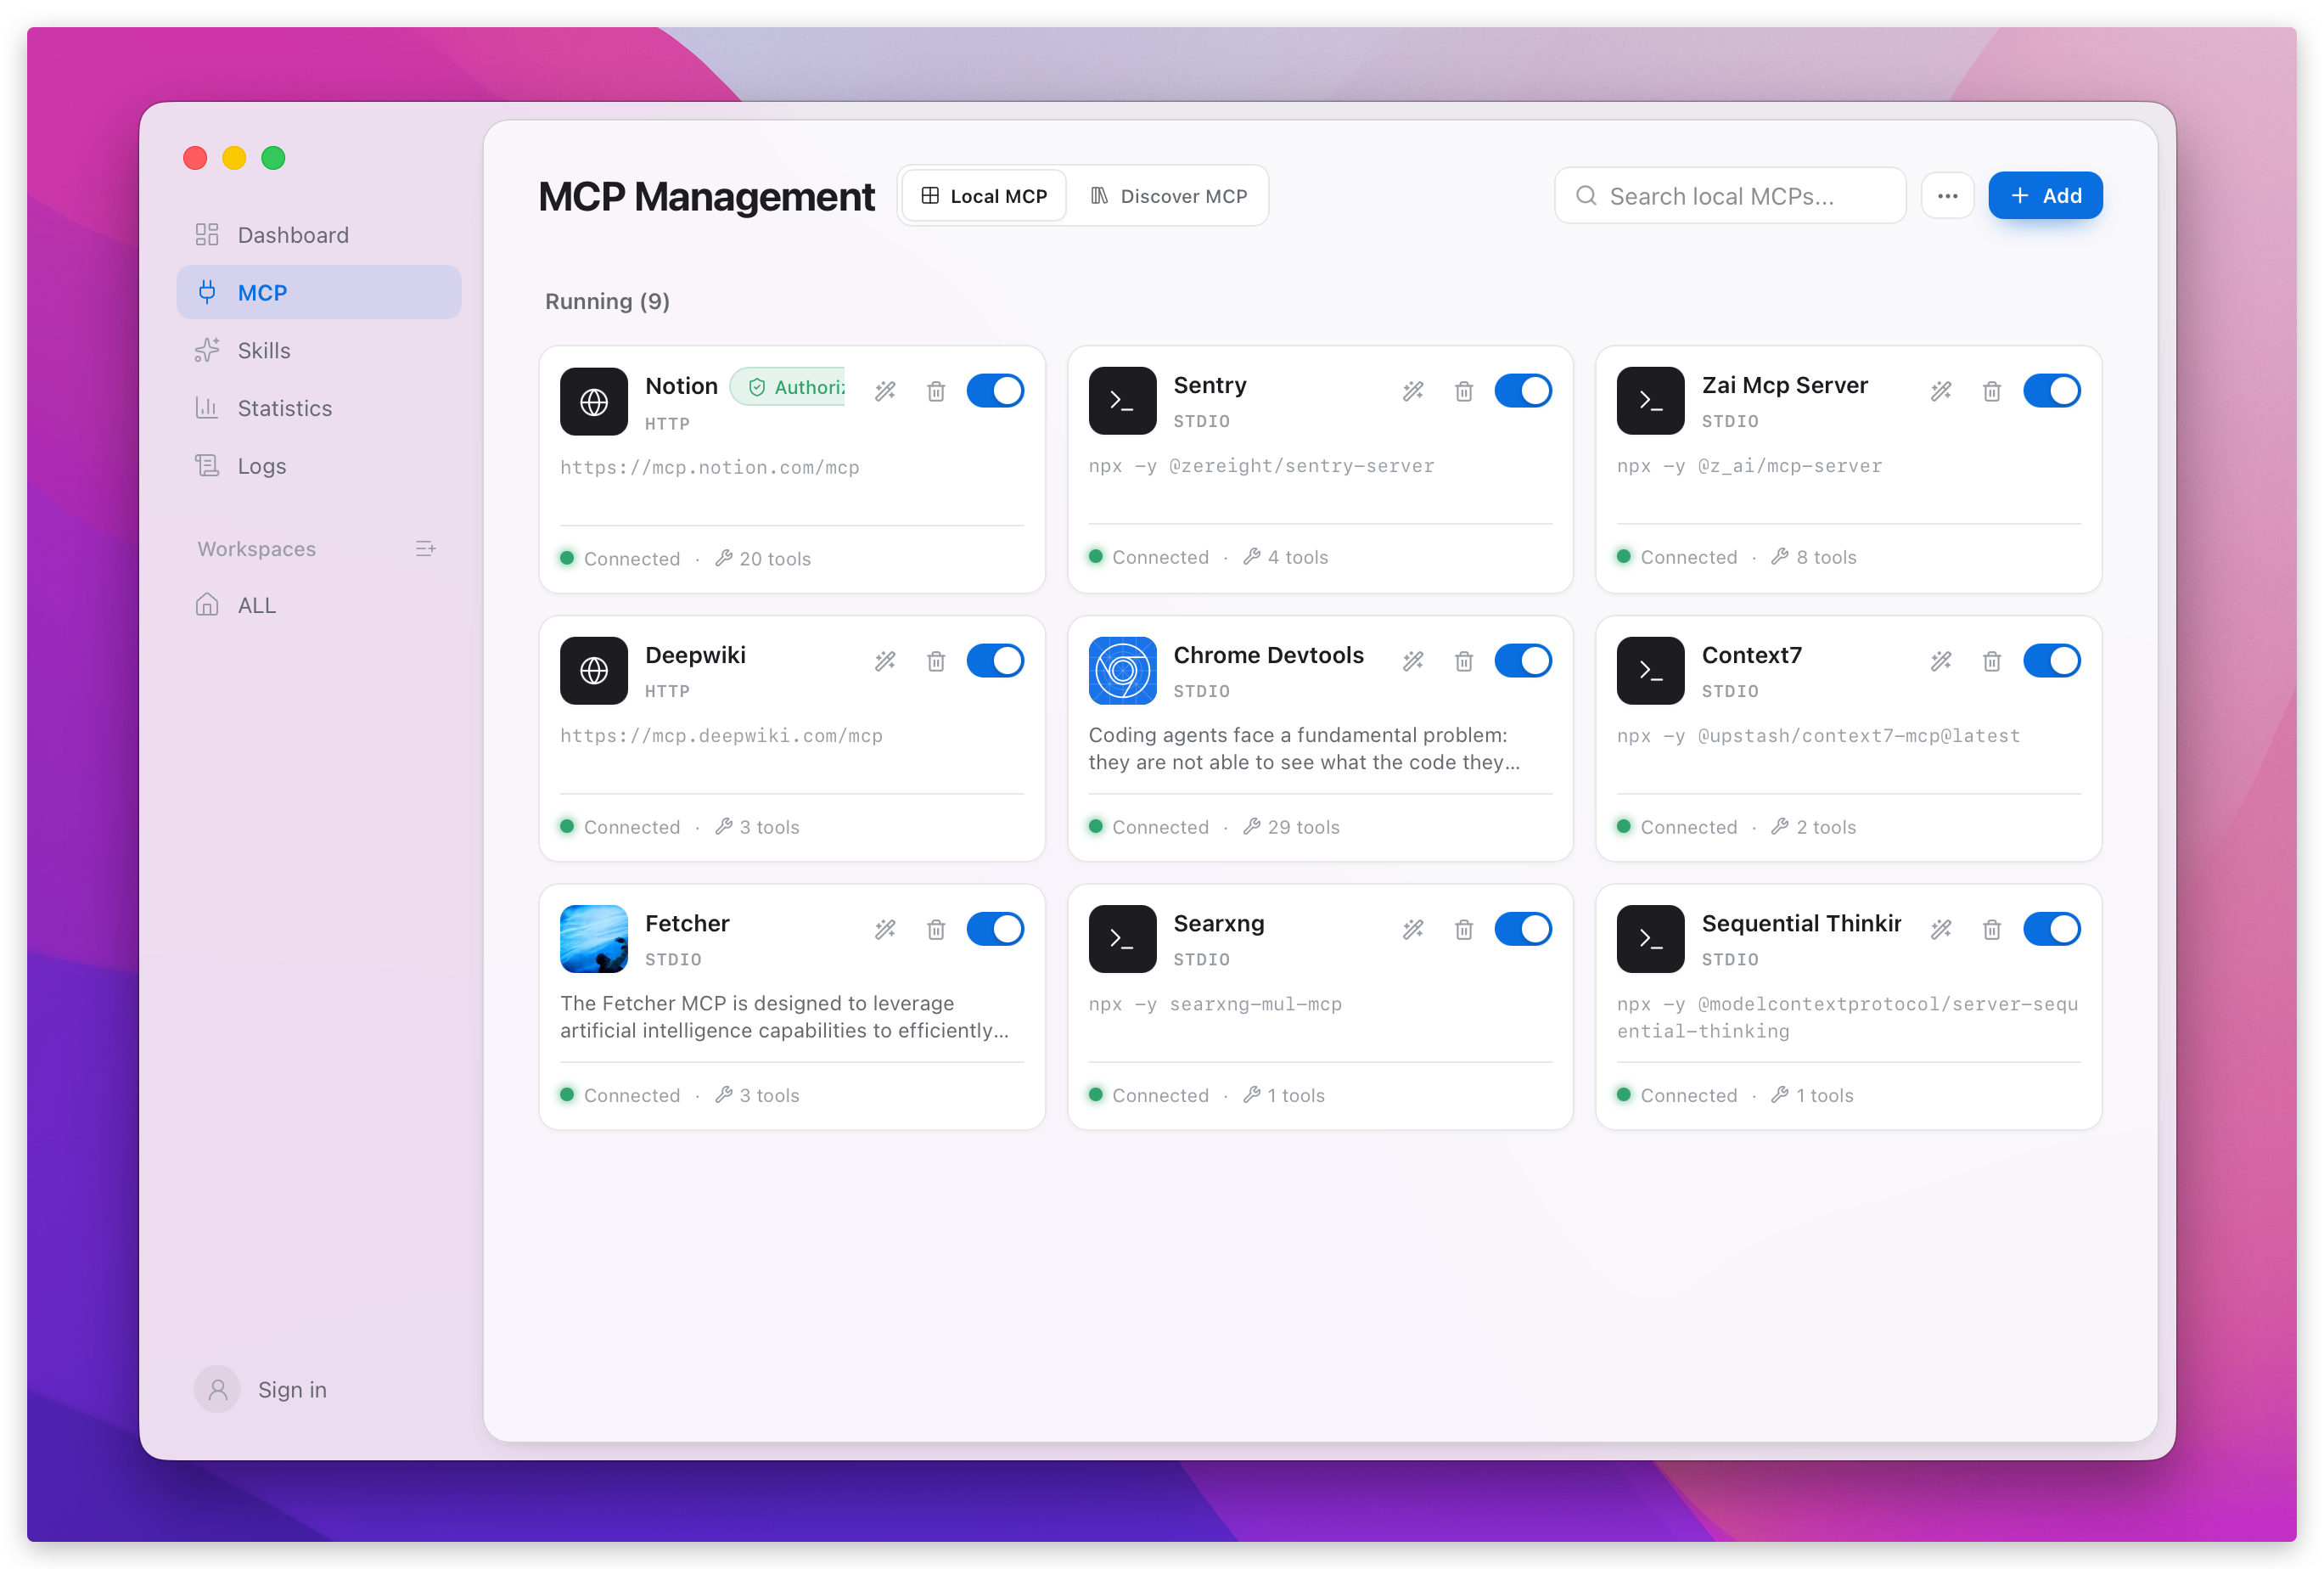
The nine servers in this screenshot come to 71 tools. On a local model with a 32K window, that is a large slice of your budget spent on descriptions of tools the model will not call.
MCP2Skill converts MCP tools into Skills that load on demand. The tool definition stays out of context until the task needs it. It also gives you one config that every client reuses instead of repeating server setup per app, plus a statistics and log view so you can see which tools actually get called.
OllaMan lets local models get work done. MCP2Skill makes their tool use cheaper and easier to inspect. Details at [mcp2skill.com](https://mcp2skill.com).
## Updating
Existing installs get an auto-update prompt. To grab it now, download from [ollaman.com](https://ollaman.com).
---
> **Download OllaMan**: [ollaman.com](https://ollaman.com)
>
> **Documentation**: [ollaman.com/docs](https://ollaman.com/docs)
>
> **Full changelog**: [ollaman.com/changelog](https://ollaman.com/changelog)
>
> **Feedback**: [GitHub Issues](https://github.com/jae-jae/ollaman-releases/issues)
---
# How to Run Local GGUF Models with Ollama — No Command Line Required
URL: https://ollaman.com/blog/2026-import-local-gguf-run-ollama
> Learn how to import and run any local .gguf file in Ollama without touching the terminal. A step-by-step guide using OllaMan — the desktop GUI that turns a GGUF file into a working AI chat in one click.
Here's a familiar story. Someone hands you a `.gguf` file — maybe a colleague downloaded a model for a project, maybe you grabbed one from a forum, maybe it's sitting on a USB stick from an offline machine. You know what it is: a ready-to-run local AI model. The hard part — quantizing it, packaging it — is already done. The file *is* the model.
So you open a terminal and try to run it in Ollama. And that's where it falls apart.
```bash
# Which command was it again?
ollama create mymodel -f Modelfile
# Wait, I need a Modelfile?
echo 'FROM ./model.gguf' > Modelfile
ollama create mymodel -f Modelfile
# Error: model not found? But it's right there...
```
A file that should "just work" suddenly needs a Modelfile, the right syntax, a server running in the background, and enough command-line literacy to debug when something goes sideways. For a file that was *already* finished.
**It doesn't have to be this way.**
## The Fast Way: Import a GGUF File in One Click
If you'd rather skip the story and just get it done, here's the entire process using [OllaMan](https://ollaman.com) — a free desktop app for managing and chatting with local Ollama models:
1. Open the app.
2. Go to **Installed**.
3. Click **Import**.
4. Pick your `.gguf` file.
5. Chat.
That's it. No Modelfile, no terminal, no syntax to remember. The file you already have becomes a working model the moment you select it.

## Why Running a Local GGUF File Doesn't Need the Command Line
The old way of running a local `.gguf` file in Ollama assumes you're a developer who enjoys reading documentation at midnight. The steps go something like:
1. **Find out Ollama needs a Modelfile** — a tiny text file that points to your `.gguf` with a `FROM` line.
2. **Create that file by hand** in a text editor, making sure the path is right.
3. **Run `ollama create`** with the right name and flags.
4. **Hope the server is running** and reachable.
5. **Switch to a chat interface** to actually talk to it — assuming you have one installed.
Each step is small. But stack five "small" steps together, each with its own way to fail, and you've built a wall — one that keeps out everyone who isn't comfortable in a terminal.
OllaMan removes the wall. The import button doesn't ask you to write a Modelfile. It doesn't ask you to remember a command. It reads the file, hands it to your local Ollama server, registers the model, and shows it in your list — ready to chat. The five-step ritual collapses into one click.
## When to Import a Local GGUF File Instead of Downloading
When does importing a local file actually matter? More often than you'd think.
**The offline machine.** You're on an air-gapped network, or somewhere with metered internet. You can't `ollama pull` a model because there's no connection. But someone can hand you the `.gguf` file on a USB stick or drop it on a shared drive. With local import, that file runs the moment it lands on your disk — no download, no internet check.
**The hand-me-down.** A teammate spent hours finding the right quantization for your hardware and wants to share the exact file. Instead of explaining "go pull `hf.co/user/repo:Q4_K_M`," they just send you the file. You import it. Done.
**The curated collection.** You've been collecting models for months — different sizes, different quants, different families. They're sitting in a folder. Browsing and importing them one by one through a GUI is infinitely nicer than writing a shell script to batch-create them.
**The "I already downloaded this" moment.** You downloaded a model with another tool, or pulled it from Hugging Face directly, and now it's a `.gguf` on your desktop. You don't want to re-download it. Import it as-is.
## What Is a GGUF File?
A `.gguf` file (GPT-Generated Unified Format) is a single, self-contained model file — weights, tokenizer, and config all packed into one file. That's why it's so easy to move around: copy it to a USB stick, email it (if it's small enough), sync it via cloud storage. **The file is the model.**
When you import it, OllaMan hands the raw file to your local Ollama server, which creates a model from it. The file doesn't get re-downloaded, modified, or re-uploaded anywhere. What's on your disk is exactly what runs.
One thing to keep in mind: if your Ollama server is running on a *remote* machine, the file gets uploaded over the network to that server before it can run. For a multi-gigabyte file over a slow connection, that can take a while. For the fastest experience, run it against a local Ollama server.
## Which GGUF Quantization Should You Use?
Sometimes you're choosing between several `.gguf` files for the same model — different quantization levels, trading file size for quality. If you're not sure which one you have or which to pick:
- **Q4_K_M** is the sweet spot for most people — small enough to run anywhere, good enough quality that you won't notice the difference.
- **Q8_0** is for when you have RAM to spare and want maximum fidelity.
- **Q3 / Q2** are the smallest, for older machines where you just need it to fit.
If someone handed you a file and you don't know the quant, just import it and try it. If it's too slow or won't load, grab a smaller one. There's no wrong answer — you can always delete and try another.
## Frequently Asked Questions
Yes. With [OllaMan](https://ollaman.com), open the **Installed** page, click **Import**, and select your `.gguf` file. The app handles the Modelfile and model creation automatically — no terminal needed.
No. If you already have a `.gguf` file on disk — from a USB stick, a colleague, or a previous download — import it directly. OllaMan reads the local file and registers it with your Ollama server without re-downloading anything.
`ollama pull` downloads a model from the Ollama registry or Hugging Face over the internet. Importing a local `.gguf` file uses a file that's already on your disk — no internet connection required. Both end up as usable models in Ollama; the difference is where the file comes from.
For most users, **Q4_K_M** is the best balance of size and quality — it runs on most laptops and the output quality is nearly indistinguishable from the original. Choose **Q8_0** if you have plenty of RAM and want maximum fidelity, or **Q3/Q2** if you're on an older machine and just need the model to fit.
Yes, but the file is uploaded over the network to the remote server first. For multi-gigabyte models on a slow connection, this can take a while. For the fastest experience, connect to a local Ollama server before importing.
## The Bottom Line
The open-source AI community has done something remarkable: frontier-grade models, free, that anyone can download and run. The `.gguf` format made the *models* accessible. The missing piece was making the *tools* accessible — turning "I have a file" into "I'm chatting with an AI" without a command-line tutorial.
That's the gap OllaMan fills. You have the model. Now run it.
---
> 📥 **Download OllaMan**: [ollaman.com](https://ollaman.com) — browse models, import local files, and chat with local AI, no terminal required.
>
> 📖 **Full guide**: [Import Local GGUF Files](/docs/features/local-gguf-import)
>
> 📖 **New to local AI?** Read our [beginner's guide](/blog/2026-ollaman-for-beginners) first.
---
# The Most Popular Ollama Models in 2026
URL: https://ollaman.com/blog/2026-ollama-trending-models
> GLM 5.2, Gemma 4 12B, DiffusionGemma — the most talked-about local AI models of 2026. Discover how to run them locally with ease.
The local AI landscape in 2026 has welcomed some heavyweight newcomers: **GLM 5.2, Gemma 4 12B, and DiffusionGemma**.
Why? Because these models represent the latest breakthroughs in local AI for 2026:
- **GLM 5.2**: Zhipu AI's flagship model with exceptional Chinese language capabilities
- **Gemma 4 12B**: Google's latest open-source release, balancing performance and efficiency
- **DiffusionGemma**: Bringing image generation to your local machine
The question is: how do you run these new models locally? If you're still typing `ollama pull ...` in your terminal, you're missing out.
**OllaMan makes this as easy as browsing an app store.**
## Why These Models Matter
### GLM 5.2: The New Standard for Chinese AI
If you primarily work with Chinese content, GLM 5.2 is a must-have.
As Zhipu AI's flagship product, the GLM series has always been known for outstanding Chinese language capabilities. GLM 5.2 pushes this even further:
- **Chinese Writing**: From business documents to creative writing, output quality approaches professional standards
- **Logical Reasoning**: Dramatically improved analysis of complex problems
- **Code Generation**: Supports major programming languages with excellent documentation generation
Best of all, **GLM 5.2 is fully open-source**. Run it locally for free — no API costs.
### Gemma 4 12B: Google's Thoughtful Release
Gemma is Google's lightweight open-source model series, and Gemma 4 12B is the latest version.
Why 12B? It hits the sweet spot:
- **Sufficient Performance**: Excels at daily conversations, Q&A, and text processing
- **Resource-Friendly**: Runs smoothly on mid-range hardware
- **Fast Response**: Quicker inference compared to larger models
If you're looking for a "good enough" all-purpose model, Gemma 4 12B is an ideal choice.
### DiffusionGemma: Local AI Art, Simplified
DiffusionGemma is an exciting breakthrough — it brings image generation capabilities into the Ollama ecosystem.
Previously, local AI art required installing complex tools like Stable Diffusion or ComfyUI. Now, **DiffusionGemma makes image generation as simple as a conversation**:
- Describe the image you want in natural language
- Supports various styles and sizes
- Runs entirely locally — your prompts stay private
## Experience These Models with OllaMan
The traditional approach to trying these models involves:
1. Opening a terminal
2. Typing `ollama pull glm-5.2`
3. Waiting for download
4. Running `ollama run glm-5.2`
5. Chatting in a command line interface
**That's too complicated!**
With OllaMan, the entire process becomes:
### Step 1: Open the Discover Page
Launch OllaMan and click **"Discover"** in the sidebar. You'll see a beautifully designed model marketplace.

### Step 2: Search for Your Model
Type the model name in the search box, such as "glm" or "gemma". Relevant models appear instantly.
### Step 3: One-Click Download
Click on a model card, select a version suitable for your hardware, and hit the **"Pull"** button. Download progress displays in real-time.
### Step 4: Start Chatting
Once downloaded, click **"Chat"**, select your model from the dropdown, and start your conversation!
## Which Model Should You Choose?
Different models suit different needs. Here's a quick guide:
| Your Need | Recommended Model | Reason |
|----------|------------------|--------|
| Chinese writing, office work | GLM 5.2 | Best Chinese capabilities |
| Daily chat, Q&A | Gemma 4 12B | Balanced performance and resource use |
| AI art, creative design | DiffusionGemma | Image generation capability |
| Coding assistance | GLM 5.2 / DeepSeek | Excellent code understanding and generation |
| Lightweight usage | Smaller Gemma 4 variants | Lower hardware requirements |
## Hardware Requirements
To run these models, your computer should have:
- **GLM 5.2**: 16GB RAM recommended, dedicated GPU preferred
- **Gemma 4 12B**: 8GB RAM for smooth operation
- **DiffusionGemma**: 12GB+ RAM recommended, GPU significantly improves speed
If your specs are lower, consider quantized versions (Q4, Q5) that maintain good performance while reducing resource needs.
## Closing Thoughts
2026 is the year local AI goes mainstream. GLM 5.2, Gemma 4 12B, and DiffusionGemma make running top-tier AI on your own computer a reality.
OllaMan's mission is to make this process simple, intuitive, and enjoyable.
**Don't let the command line be a barrier to experiencing AI.** Download OllaMan and start your local AI journey with a graphical interface today.
---
> 💡 **Note**: OllaMan supports macOS, Windows, and Linux. It's completely free and open-source. Visit [ollaman.com](https://ollaman.com) to get the latest version.
---
# The Elegant Way to Run Ollama Models as AI Agents
URL: https://ollaman.com/blog/2026-simplest-local-ai-agent-with-ollaman
> Ollama runs great models. The hard part has always been using them inside an AI agent — until now. A walkthrough of the simplest, most elegant local agent setup we've found.
Be honest: how do you use your local LLM?
If you're like most people, the answer is "I chat with it." You ask Llama 3 to explain a concept, ask DeepSeek to refactor a snippet you pasted in, maybe have Qwen draft an email. It's basically a private, offline ChatGPT — which is genuinely useful.
But here's the thing. Chatting is the *least* interesting thing a modern model can do.
The real magic is **Agent mode** — where the AI doesn't just talk about your files, it actually reads them, edits them, runs commands, and reports back. Instead of you copy-pasting code into a chat box and copy-pasting the answer back, the AI just... does the task.

So why isn't everyone using Agent mode already?
## The Problem: Agents Have Always Been a Developer Thing
If you've ever tried to set up a local AI agent, you know the drill. The popular solutions are all CLI tools — Claude Code, OpenClaw, and friends. They're powerful, but getting started looks something like this:
```bash
# Hope you have the right Node version...
node --version
# Install the CLI globally
npm install -g some-agent@latest
# Run an onboarding wizard
some-agent onboard --install-daemon
# Export an API key into your shell
# Edit a JSON config file by hand
vim ~/.some-agent/config.json
# Start a background gateway
some-agent gateway
```
Every line here is a small cliff to fall off:
- **Wrong Node version?** Cryptic error, go google it.
- **Forgot to export the key?** It silently fails to find your models.
- **Typo in the JSON config?** The whole thing won't start, and the error message points at line 14 of a file you've never seen.
- **Daemon didn't launch?** Now you're learning about background processes.
None of this is hard *for a developer*. But it's a wall of terminal commands, environment variables, and config files. For the vast majority of people who'd love an AI assistant that can touch their files — writers, researchers, students, analysts — this is a hard stop.
The tragedy is that these people are running Ollama *just fine*. They have the engine. They have great models downloaded. They're just locked out of the best feature because the on-ramp was built for people who live in a terminal.
## The Contrast: 10 Minutes vs. 30 Seconds
Let's put the two paths side by side.
| | CLI Agent (traditional) | OllaMan Agent Mode |
|---|---|---|
| Prerequisites | Node.js 22+, package manager | Just OllaMan |
| Install | `npm install -g`, global packages | Already in the app |
| Config | Edit JSON, set env vars | None |
| Connect to Ollama | API key + manual model config | Auto-detected |
| Time to first task | ~10 minutes (if nothing breaks) | ~30 seconds |
| When something goes wrong | Read logs, google errors | ...it usually doesn't |
The CLI path isn't *bad* — it's genuinely powerful, and if you live in a terminal you might even prefer it. But it asks you to become a sysadmin before you can ask the AI a single question.
OllaMan takes a different stance: **the agent should already be there.** You've installed the app to manage and chat with your models. Agent mode is just another button in the same window. No second tool, no second setup.
## How It Works (The Short Version)
OllaMan's Agent Mode lives right inside the chat interface you already use. Flip it on, and your model gains a set of hands. A few things worth knowing:
**Built-in tools.** The agent comes with the essentials out of the box — it can **read** files, **write** new ones, **edit** existing ones, and run **bash** commands. That covers the vast majority of real tasks without any plugin hunting.
**Working directory.** Before you let an agent loose, you point it at a folder. This is the AI's sandbox — it sees and acts within that directory. Want it to work on a project? Set the working directory to that project. Done.
**Approval system.** This is the part that makes it safe to use. Before the agent runs a command or modifies a file, it asks for your approval. You see exactly what it wants to do — *"run `grep` in src/"*, *"edit auth.ts"* — and you click yes or no. Nothing happens behind your back. (You can loosen this once you trust a workflow, but the safe default is on.)
**Skills.** For repeatable workflows, you can load Skills — packaged instructions that teach the agent how to do a specific kind of task well. Think of them as reusable playbooks the agent can pull in when relevant.
That's the whole mental model: **a folder, some tools, and a permission prompt.** No gateway, no daemon, no JSON.
## Three Things to Try First
Setup talk is cheap. Here's where Agent mode actually earns its keep.
### 1. "Summarize what's in my docs folder"
Point the working directory at a folder full of notes, specs, or markdown files and ask:
> "Read through the files in this folder and give me a one-paragraph summary of each, plus an overall theme."
The agent reads each file itself — you don't paste anything — and comes back with a structured digest. This is shockingly useful when you've inherited a messy project or come back to your own notes after three months and have no idea what's in there.
### 2. "Find out why login is failing in src/auth.ts"
Set the working directory to your project and ask:
> "The login flow is broken. Read `src/auth.ts`, trace how the session is created, and tell me where it might be failing."
The agent opens the file, follows the logic, and often spots the issue — a missing `await`, a token that's checked before it's set, an early return that skips validation. Because it can read *related* files too (with your approval), it sees the actual context, not a snippet you guessed was relevant.
### 3. "Review the changes I just made"
Before you commit, ask:
> "Run `git diff`, then review my changes for bugs and anything I might have forgotten."
The agent runs the command (you approve it), reads the diff, and gives you a focused review. It's like a patient colleague looking over your shoulder — except this one runs entirely on your machine and never sends a line of your code to the cloud.
Notice the pattern in all three: **you describe the goal in plain language, and the AI does the file-fiddling.** No copy-paste relay. No "let me find the right lines to show you." That's the difference between chatting *about* your work and having an assistant that actually does it.
## The Bigger Picture
For the last couple of years, "local AI agent" came with an invisible asterisk: *for developers only.* Not because the idea was hard, but because the door was locked behind a terminal.
That asterisk is what OllaMan quietly removes. The engine (Ollama) was already approachable. The models are free and private. The only missing piece was a way to use Agent mode without first becoming a command-line user — and that's now a single toggle.
Your AI has been waiting in the chat box this whole time, perfectly capable of doing real work. It just needed hands, a folder to work in, and your permission.
Local AI used to be *chatty*. Now it can be *useful*. And for the first time, that upgrade doesn't require reading a single line of documentation.
---
> 📥 **Download OllaMan**: [ollaman.com](https://ollaman.com)
>
> 📖 **Documentation**: [ollaman.com/docs](https://ollaman.com/docs)
>
> 💬 **Feedback**: [GitHub Issues](https://github.com/jae-jae/ollaman-releases/issues)
---
# Run Any Hugging Face Model Locally: The GGUF Guide
URL: https://ollaman.com/blog/2026-run-huggingface-models-locally-gguf
> Hugging Face hosts tens of thousands of GGUF models, but running them used to mean fighting with Python scripts. Here's how to run any of them on your own machine — no code required.
The open-source AI world moves fast. Every week there's a new model on Hugging Face — a smarter small Llama, a faster Qwen, a sharper vision model. They're free to download and run yourself. The promise is incredible: frontier-grade AI, running on *your* laptop, with no API bill and no data leaving your machine.
So why isn't everyone doing it?
Because for a long time, "running it yourself" meant wading through Python environments, quantization scripts, and documentation written for researchers. If you weren't comfortable in a terminal, you were stuck with whatever a cloud provider decided to serve you.
**That's finally changed.** In this guide we'll cover what GGUF actually is, how to pick the right quantized version for your hardware, and how to get from a Hugging Face model page to a working local chat in minutes — no code, no command line.

## What Is GGUF, and Why Should You Care?
Most open models are released in their full, uncompressed form. A 7-billion-parameter model in its native format can be 14 GB or more, and it needs a GPU with enough VRAM to even load. That's fine for a research lab, but useless for a MacBook.
**GGUF** (GPT-Generated Unified Format) solves this. It's a single-file format designed for running models on consumer hardware:
- **Quantized** — the model's weights are compressed (e.g. from 16-bit down to 4-bit), shrinking files dramatically with almost no loss in quality.
- **Self-contained** — one `.gguf` file contains everything: weights, tokenizer, config. No external files to chase down.
- **CPU and GPU friendly** — GGUF runs on CPU by default, and can offload to a GPU when one is available.
The result: a model that once needed a $2,000 GPU can now run on a mid-range laptop. Hugging Face hosts tens of thousands of these `.gguf` files, covering everything from Llama and Mistral to specialized code and vision models.
## Quantization: Choosing the Right File
Here's the part that trips people up. When you open a model on Hugging Face, you'll often find *many* `.gguf` files in the "Files" tab, each ending in a cryptic code: `Q8_0`, `Q5_K_M`, `Q4_K_S`, `IQ3_XS`... These are **quantization levels**, and the code tells you how aggressively the model was compressed.
The trade-off is always the same: **smaller files use less memory, but lose a little accuracy.** Here's a practical breakdown:

| Level | Quality | Size (vs. original) | Good for |
|-------|---------|---------------------|----------|
| **Q8_0** | Near-perfect | ~50% | Workstations, maximum fidelity |
| **Q6_K** | Excellent | ~40% | High-end laptops |
| **Q5_K_M** | Very good | ~35% | Great quality/size balance |
| **Q4_K_M** | Solid | ~30% | **The sweet spot for most people** |
| **Q3** | Noticeable drop | ~25% | Older or low-RAM machines |
| **IQ2 / Q2** | Degraded | ~20% | Last-resort, just to make it fit |
### A Simple Rule of Thumb
1. **Start with `Q4_K_M`.** It's the unofficial standard — nearly all model maintainers ship it, and the quality is good enough that you won't notice a difference in casual use.
2. **If it runs well and you have RAM to spare**, bump up to `Q6_K` or `Q8_0` for crisper reasoning.
3. **If it's sluggish or won't load**, drop to `Q3` or `IQ3`.
> 💡 The letter codes (`_K`, `_S`, `_M`) are sub-variants of the same level — "_M" (medium) is usually the balanced pick within a tier. Don't overthink it; if you see `Q4_K_M`, just grab it.
## How Much Hardware Do You Actually Need?
You don't need an AI workstation. For most conversational models, a recent laptop is enough:
| Model size | Recommended quant | RAM needed | Notes |
|------------|-------------------|------------|-------|
| 1B–3B | Q4–Q8 | 8 GB | Runs on practically anything |
| 7B–8B | Q4_K_M | 8–16 GB | The comfortable default |
| 13B–14B | Q4_K_M | 16–32 GB | Great for serious work |
| 30B+ | Q3–Q4 | 32 GB+ or a GPU | Patience required |
The model needs to fit in memory *plus* leave room for the context (the conversation). If a file is 4.5 GB, expect to need roughly 6–8 GB of available RAM to chat comfortably.
## From Hugging Face to a Local Chat
This is where most guides start listing Python commands. We'll skip that.
### The Old Way
```
git lfs install
git clone https://huggingface.co/user/model
pip install llama-cpp-python
python -m llama_cpp ... --model_path ... --n_gpu_layers ...
```
If that means nothing to you — good. You don't need it anymore.
### The Better Way
A good desktop client handles the entire pipeline: it understands Hugging Face URLs, picks the right format, downloads the file, and hands it to a local engine like Ollama. You just browse, click, and chat.
With a tool like **OllaMan**, the flow is:
1. **Find a model** — either browse the built-in GGUF catalog (thousands of models, searchable and filterable), or copy a model path straight from Hugging Face.
2. **Import it** — paste something like `hf.co/user/model` (or a full link to a specific `.gguf` file), and the app converts it into the format Ollama understands.
3. **Download & chat** — the model downloads through the normal download manager, then shows up ready to use. No scripts, no terminal.

The key realization: **Hugging Face is just a file host.** The `.gguf` files there are no different from the models in the official Ollama registry — they're the same format, running on the same engine. The only barrier was the tooling, and that barrier is now gone.
## What If Hugging Face Is Slow?
A common pain point: in some regions, `huggingface.co` is slow or unreliable. You have two practical options:

- **Use a mirror.** Mirrors like `hf-mirror.com` serve the same files. In a good client, you can either paste a mirror link directly for a one-off import, or set the mirror as your default source for browsing and downloads.
- **Point a single download at a mirror.** If you only need one model, just swap `huggingface.co` for `hf-mirror.com` in the link — the file is identical.
Either way, once the file is on your machine, it runs locally with no further network access.
## Tips for Getting the Most Out of Local Models
**Keep a small "utility" model around.** A 1B–3B model loads instantly and is great for quick questions, summarizing text, or drafting. Save the big models for when you need deep reasoning.
**Mind your context.** Long conversations and large pasted documents eat memory. If a model starts to slow down, start a fresh chat rather than letting the context balloon.
**Try thinking models for hard problems.** Newer reasoning models (think along the lines of R1-style architectures) show their step-by-step thinking before answering. For math, coding, or analysis, the visible reasoning is genuinely useful — and it all happens locally.
**Delete what you don't use.** GGUF files are large. Periodically clean out models you've stopped using to reclaim disk space. A good client makes this a one-click action.
## Why This Matters
For most of the last decade, "using AI" meant renting it from a handful of companies. The model lived on their servers, your prompts traveled across the internet, and you paid by the token.
The GGUF ecosystem flips that. The same open models that power commercial products are available to anyone, for free, to run at home. The quality keeps climbing — a 4-bit quantized model you download today can outperform a frontier model from two years ago.
The tools have finally caught up. You no longer need to be a developer to participate.
So pick a model, pick a quant, and give it a try. The moment you realize you're chatting with a frontier-grade AI — entirely offline, on a laptop, for free — is the moment the open-source AI promise finally feels real.
---
> 📥 **Want to try it without the command line?** [OllaMan](https://ollaman.com) is a desktop app that makes running local models as simple as installing any other app — browse Hugging Face's GGUF catalog, download with one click, and chat.
>
> 📖 **New to local AI?** Read our [beginner's guide to running LLMs](/blog/2026-ollaman-for-beginners) first.
---
# Advanced Local AI: Building Digital Employees with Ollama + OpenClaw
URL: https://ollaman.com/blog/2026-local-ai-agent-workflow-ollama-openclaw
> Chatting is not enough. Learn how to combine Ollama's powerful reasoning capabilities with OpenClaw's execution abilities to build a local Agent system that can truly handle complex tasks.
2025 was called the "Year of Local Large Models," and we've gotten used to running Llama 3 or DeepSeek with Ollama to chat and ask about code. But by 2026, simple "conversation" no longer satisfies the appetites of tech enthusiasts.
We want **Agents**—not just capable of speaking, but truly able to **work** for us.
Today let's talk about the most hardcore combination in the local AI space right now: **Ollama** (reasoning engine) + **OpenClaw** (autonomous execution framework). Under this architecture, AI is no longer just a text generator in a chat box, but a "digital employee" that can operate browsers, read and write files, and run code.
## Step 1: Build the Reasoning Foundation (Ollama)
Any Agent needs a smart "brain," and in a local environment, **Ollama** remains the most robust choice.
If you haven't installed it yet, just go to [ollama.ai](https://ollama.ai) to download the appropriate version. Once installed, we typically open a terminal and enter commands to download models.
### Recommended Models
For Agent applications, choose models that support **Tool Calling**:
```bash
# General reasoning model
ollama pull llama3.3
# Code-specialized model
ollama pull qwen2.5-coder:32b
# Strong reasoning model
ollama pull deepseek-r1:32b
# Lightweight option
ollama pull gpt-oss:20b
```
But this actually brings a small annoyance: **terminal downloading is a "black box."**
When you want to try different models (like comparing Qwen 2.5 and Llama 3 effects), or when model files are very large (tens of GB), looking at the monotonous progress bar in the terminal makes it difficult to intuitively manage these behemoths. Moreover, once you have many models installed, deciding which to delete and how much video memory each occupies becomes a headache.
### Add a Visual Panel to Ollama: OllaMan
To solve this problem and also make subsequent model scheduling more relaxed, I recommend using it in conjunction with **OllaMan** for this step.
It can directly read your local Ollama service and provide an App Store-like graphical interface. You can visually browse the online model library on it, click on images to download, and see clear download rates and progress in real time.

More importantly, before handing the model to the Agent, you can first test the model's reasoning ability in OllaMan's conversation interface. After all, if a model can't even handle basic conversation logically, there's no need to waste time configuring it into the Agent.
Once the model environment is ready, the foundation is solid. Now for the main event.
## Step 2: Deploy the Execution Hub (OpenClaw)
**OpenClaw** is currently one of the best local Agent frameworks in terms of experience. Its core capability lies in **execution**—it has system-level permissions, can execute Shell commands, read and write files, and even control browsers.
### Prerequisites
Before installing OpenClaw, make sure your system meets the following requirements:
- **Node.js 22 or higher**
You can check your Node version with:
```bash
node --version
```
### One-Click Installation (Recommended)
OpenClaw officially provides the most convenient **one-click installer script**, which automatically handles Node.js detection, CLI installation, and the onboarding wizard:
#### macOS / Linux / WSL2
```bash
curl -fsSL https://openclaw.ai/install.sh | bash
```
#### Windows (PowerShell)
```powershell
iwr -useb https://openclaw.ai/install.ps1 | iex
```
> 💡 The installer script automatically detects and installs Node.js 22+ (if missing), then launches the onboarding wizard.
If you only want to install the CLI without running the onboarding wizard:
```bash
# macOS / Linux / WSL2
curl -fsSL https://openclaw.ai/install.sh | bash -s -- --no-onboard
```
### Other Installation Methods
If you already have Node.js 22+ installed, you can also install manually:
#### npm Installation
```bash
npm install -g openclaw@latest
openclaw onboard --install-daemon
```
#### pnpm Installation
```bash
pnpm add -g openclaw@latest
pnpm approve-builds -g
openclaw onboard --install-daemon
```
#### macOS Application
If you're on macOS, you can also download the **OpenClaw.app** desktop application:
1. Download the latest `.dmg` file from [OpenClaw Releases](https://github.com/openclaw/openclaw/releases)
2. Install and launch the app
3. Complete system permissions setup (TCC prompts)
### Configuring Ollama Integration
After installation, you need to connect OpenClaw with your Ollama service.
#### 1. Enable Ollama API Key
OpenClaw requires an API Key to identify the Ollama service (any value works; Ollama itself doesn't need a real key):
```bash
# Set environment variable
# Or via OpenClaw config command
openclaw config set models.providers.ollama.apiKey "ollama-local"
```
#### 2. Verify Ollama Service
Ensure Ollama is running:
```bash
# Check if Ollama is running
curl http://localhost:11434/api/tags
# Start Ollama service if not running
ollama serve
```
#### 3. Run Configuration Wizard
OpenClaw provides an interactive configuration wizard that automatically detects your Ollama models:
```bash
openclaw onboard
```
The wizard will automatically:
- Scan your local Ollama service (`http://127.0.0.1:11434`)
- Discover all models that support tool calling
- Configure default model settings
#### 4. Manual Configuration (Optional)
If you want to manually specify models, edit the config file `~/.openclaw/openclaw.json`:
```json
{
"agents": {
"defaults": {
"model": {
"primary": "ollama/llama3.3",
"fallbacks": ["ollama/qwen2.5-coder:32b"]
}
}
}
}
```
#### 5. Verify Configuration
Check if OpenClaw has successfully recognized your Ollama models:
```bash
# List all models recognized by OpenClaw
openclaw models list
# List installed Ollama models
ollama list
```
### Start the Gateway
Once configured, start the OpenClaw Gateway:
```bash
openclaw gateway
```
The Gateway runs on `ws://127.0.0.1:18789` by default. It's OpenClaw's core service, responsible for coordinating model calls and skill execution.
## Step 3: Practical Tips and Scenarios
Environment setup is just the beginning. OpenClaw's true power lies in its rich **Skills** ecosystem.
### Scenario 1: Automated Code Review
OpenClaw can directly read your local project files. You can give it commands like:
> "Traverse all `.tsx` files in `src/components` under the current directory, check if there are any `useEffect` missing dependencies, and summarize the risk points into `review_report.md`."
During this process:
1. OpenClaw calls file system skills to traverse directories.
2. Ollama (Llama 3) reads the code and performs logical reasoning.
3. OpenClaw organizes the reasoning results and writes them to a new file.
This is far more efficient than copying code segments to ChatGPT, and the data never leaves your local machine.
### Scenario 2: Remote Commander (IM Integration)
OpenClaw supports integration with chat platforms like Slack, Discord, and Telegram. This means you can turn your home computer into a server that's always on standby.
**Usage Example:**
After configuring the Telegram bot integration, when you're out and about, you just need to send a message on your phone:
*"Hey Claw, help me check the remaining disk space on my home NAS. If it's below 10%, send me an alert."*
OpenClaw will run the Shell command `df -h` on your home computer, analyze the results, and send the report back to your phone.
## Summary
By using **Ollama** to provide intelligence, **OllaMan** to manage model assets, and **OpenClaw** to execute specific tasks, we've built a complete local AI productivity loop.
The biggest charm of this combination is: **completely private, completely free, completely under your control.**
If you're tired of just chatting, try installing it on your computer and see how your workflow can evolve with the help of this AI assistant.
---
# With OllaMan, Even Beginners Can Run LLMs
URL: https://ollaman.com/blog/2026-ollaman-for-beginners
> A beginner-friendly guide to running AI models on your own computer. Get from zero to chatting with a local LLM in under 5 minutes using OllaMan's beautiful GUI.
You've probably heard of ChatGPT, Claude, and Gemini. They're powerful, but they all run in the cloud — meaning your conversations travel through someone else's servers.
What if you could run AI models entirely on your own machine? **Local LLMs** make this possible: complete privacy, no internet required, and zero API costs.
The catch? Setting up local models usually involves command lines, environment variables, and technical know-how that scares off most people.
**That's where OllaMan comes in.**

## What's Ollama? What's OllaMan?
Let's clear up these two terms first:
### Ollama: The Engine
[Ollama](https://ollama.ai) is the open-source project that actually runs AI models on your computer. It supports all the popular open-source models:
- **Llama 3** — Meta's flagship open model
- **Mistral** — The lightweight European alternative
- **DeepSeek** — Exceptional reasoning capabilities
- **Gemma** — Google's efficient open model
Ollama is fantastic, but it only offers a command-line interface. Great for developers, intimidating for everyone else.
### OllaMan: The Dashboard
Think of Ollama as the kitchen, and **OllaMan** as the restaurant's beautiful front-of-house.
OllaMan is a desktop app that wraps Ollama in a modern graphical interface. With it, you can:
- 👀 **Browse** all your installed models at a glance
- 🖱️ **Download** new models with a single click
- 💬 **Chat** with models like you would with ChatGPT
- 🎨 **Enjoy** polished dark and light themes
**Ollama runs the models. OllaMan makes it delightful.**
## Getting Started: 5 Minutes to Your First Chat
### Step 1: Install Ollama
First, get Ollama running on your machine:
1. Visit [ollama.ai](https://ollama.ai)
2. Download the installer for your OS (macOS / Windows / Linux)
3. Run the installer — it's a standard "Next, Next, Finish" setup
Once installed, Ollama runs silently in the background.
> 💡 **Note**: Don't expect a window to pop up — Ollama runs as a background service. That's normal.
### Step 2: Install OllaMan
Next, grab OllaMan:
1. Head to [ollaman.com](https://ollaman.com)
2. Download the app for your platform
3. Install and launch OllaMan
OllaMan automatically detects your local Ollama service. If everything's working, you'll land on the dashboard.
## Your First Conversation
### Download a Model
A fresh Ollama installation has no models yet. Let's fix that:
1. Click **"Discover"** in the left sidebar
2. Browse the model library — you'll see dozens of options
3. Pick something like **Llama 3** or **Mistral**
4. Click into the model details page
5. Choose a size (we recommend 7B or 8B for beginners — lower hardware requirements)
6. Hit the **"Pull"** button to start downloading

While downloading, you can:
- Watch real-time progress on the Downloads page
- See download speed and completion percentage
- Queue up multiple models simultaneously
> ⏰ **Download time**: Depends on your internet speed and model size. A 4GB model takes roughly 5 minutes on a 100Mbps connection.
### Start Chatting
Once downloaded, getting to your first conversation is straightforward:
1. Click **"Chat"** in the sidebar
2. Select your newly downloaded model from the top bar
3. Type a message and hit Enter
That's it. You're now chatting with a local AI.

### Create an Agent for Repeated Tasks
After using OllaMan for a while, you might notice you're typing the same instructions repeatedly: "Act as a coding assistant" or "Always respond in a friendly tone."
**Agents** solve this. An Agent is a pre-configured AI persona with:
- A system prompt (the AI's role)
- A default model
- Custom generation parameters
To create one:
1. Go to the Chat page
2. Click the current Agent card in the left sidebar
3. Click the **"+"** button
4. Set a name, icon, and system prompt
5. Save

Here are some Agent ideas:
| Agent Name | Use Case | System Prompt Snippet |
|------------|----------|----------------------|
| Code Buddy | Programming help | "You're a patient coding mentor who explains concepts clearly..." |
| Writing Coach | Content creation | "You're a creative writing assistant who helps brainstorm and polish text..." |
| Study Helper | Learning | "You're a friendly tutor who breaks down complex topics into simple terms..." |
Once created, switching Agents instantly changes your AI's personality and defaults.
## Power User Tips
### Tip 1: Attach Files Instead of Pasting
Need the AI to analyze code or a document? Skip the copy-paste.
Click the 📎 attachment button in the input area and select files directly. OllaMan supports:
- **Code files**: .py, .js, .ts, .java, and more
- **Documents**: .txt, .md, .json
- **Images** (with vision models): .png, .jpg
### Tip 2: Enable Thinking Mode
Some models (like DeepSeek R1 or QwQ) support "thinking mode" — they'll show their reasoning process before giving an answer.
If your model supports this, you'll see a **"Think"** toggle near the input. When enabled:
- Responses split into "thinking" and "answer" sections
- The thinking section is collapsible
- Great for complex reasoning tasks
### Tip 3: Tune Generation Parameters
The settings panel on the right side of each chat lets you adjust:
| Parameter | What It Does | Recommendations |
|-----------|--------------|-----------------|
| Temperature | Controls creativity | Code/factual: 0.1-0.3
Creative writing: 0.8-1.2 |
| Top P | Sampling range | Usually keep at 0.9 |
| Top K | Candidate token count | Usually keep at 40 |
Changes apply only to the current session — your Agent's defaults stay untouched.
### Tip 4: Connect Multiple Servers
Got a beefy desktop at home and a thin laptop on the go? Great setup:
1. Run Ollama on your powerful machine
2. Connect to it remotely from OllaMan on any device
Just add the remote server address in **Settings → Servers**.
## FAQ
### Q: What specs do I need?
Quick reference:
| Model Size | Recommended Setup |
|------------|-------------------|
| 1B-3B | 8GB RAM — entry level |
| 7B-8B | 16GB RAM — sweet spot |
| 13B | 32GB RAM or 8GB VRAM |
| 70B+ | Dedicated GPU required |
> 💡 If unsure, start with a 7B model. It's the best balance of performance and quality.
### Q: Where are models stored?
Ollama keeps models in:
- macOS: `~/.ollama/models`
- Windows: `C:\Users\\.ollama\models`
- Linux: `~/.ollama/models`
### Q: Does it work offline?
Absolutely — that's the whole point!
- **Needs internet**: Downloading models, browsing the model library
- **Works offline**: Chatting with downloaded models
Once a model is on your machine, conversations happen entirely locally.
## Wrapping Up
Running AI locally isn't just for power users anymore.
With Ollama + OllaMan:
- No coding skills required
- Your data never leaves your machine
- Works without an internet connection
If you've been curious about local LLMs but intimidated by the terminal, now's the time.
**5 minutes to install. An AI assistant that's truly yours.**
---
> 📥 **Download OllaMan**: [ollaman.com](https://ollaman.com)
>
> 📖 **Documentation**: [ollaman.com/docs](https://ollaman.com/docs)
---
# This Might Be the Best Ollama Chat Client: OllaMan
URL: https://ollaman.com/blog/2025-ollaman-best-ollama-chat-client
> Connect OllaMan to local or remote Ollama, then chat with multi-agents, multi-sessions, attachments (files/images), Thinking Mode, and real-time performance stats.
If you're already running local models with Ollama, you've probably hit a few friction points:
- **CLI isn’t always ergonomic**: as your model list grows, switching models and remembering parameters becomes tedious.
- **Conversations get messy**: different tasks end up in one thread and context becomes hard to reuse.
- **Advanced capabilities feel fragmented**: vision, file context, and reasoning (Thinking/Chain-of-Thought) often require extra setup.
**OllaMan** is built to remove that friction: a desktop chat client for Ollama that makes "connect a model and start chatting" feel effortless, stable, and fast.
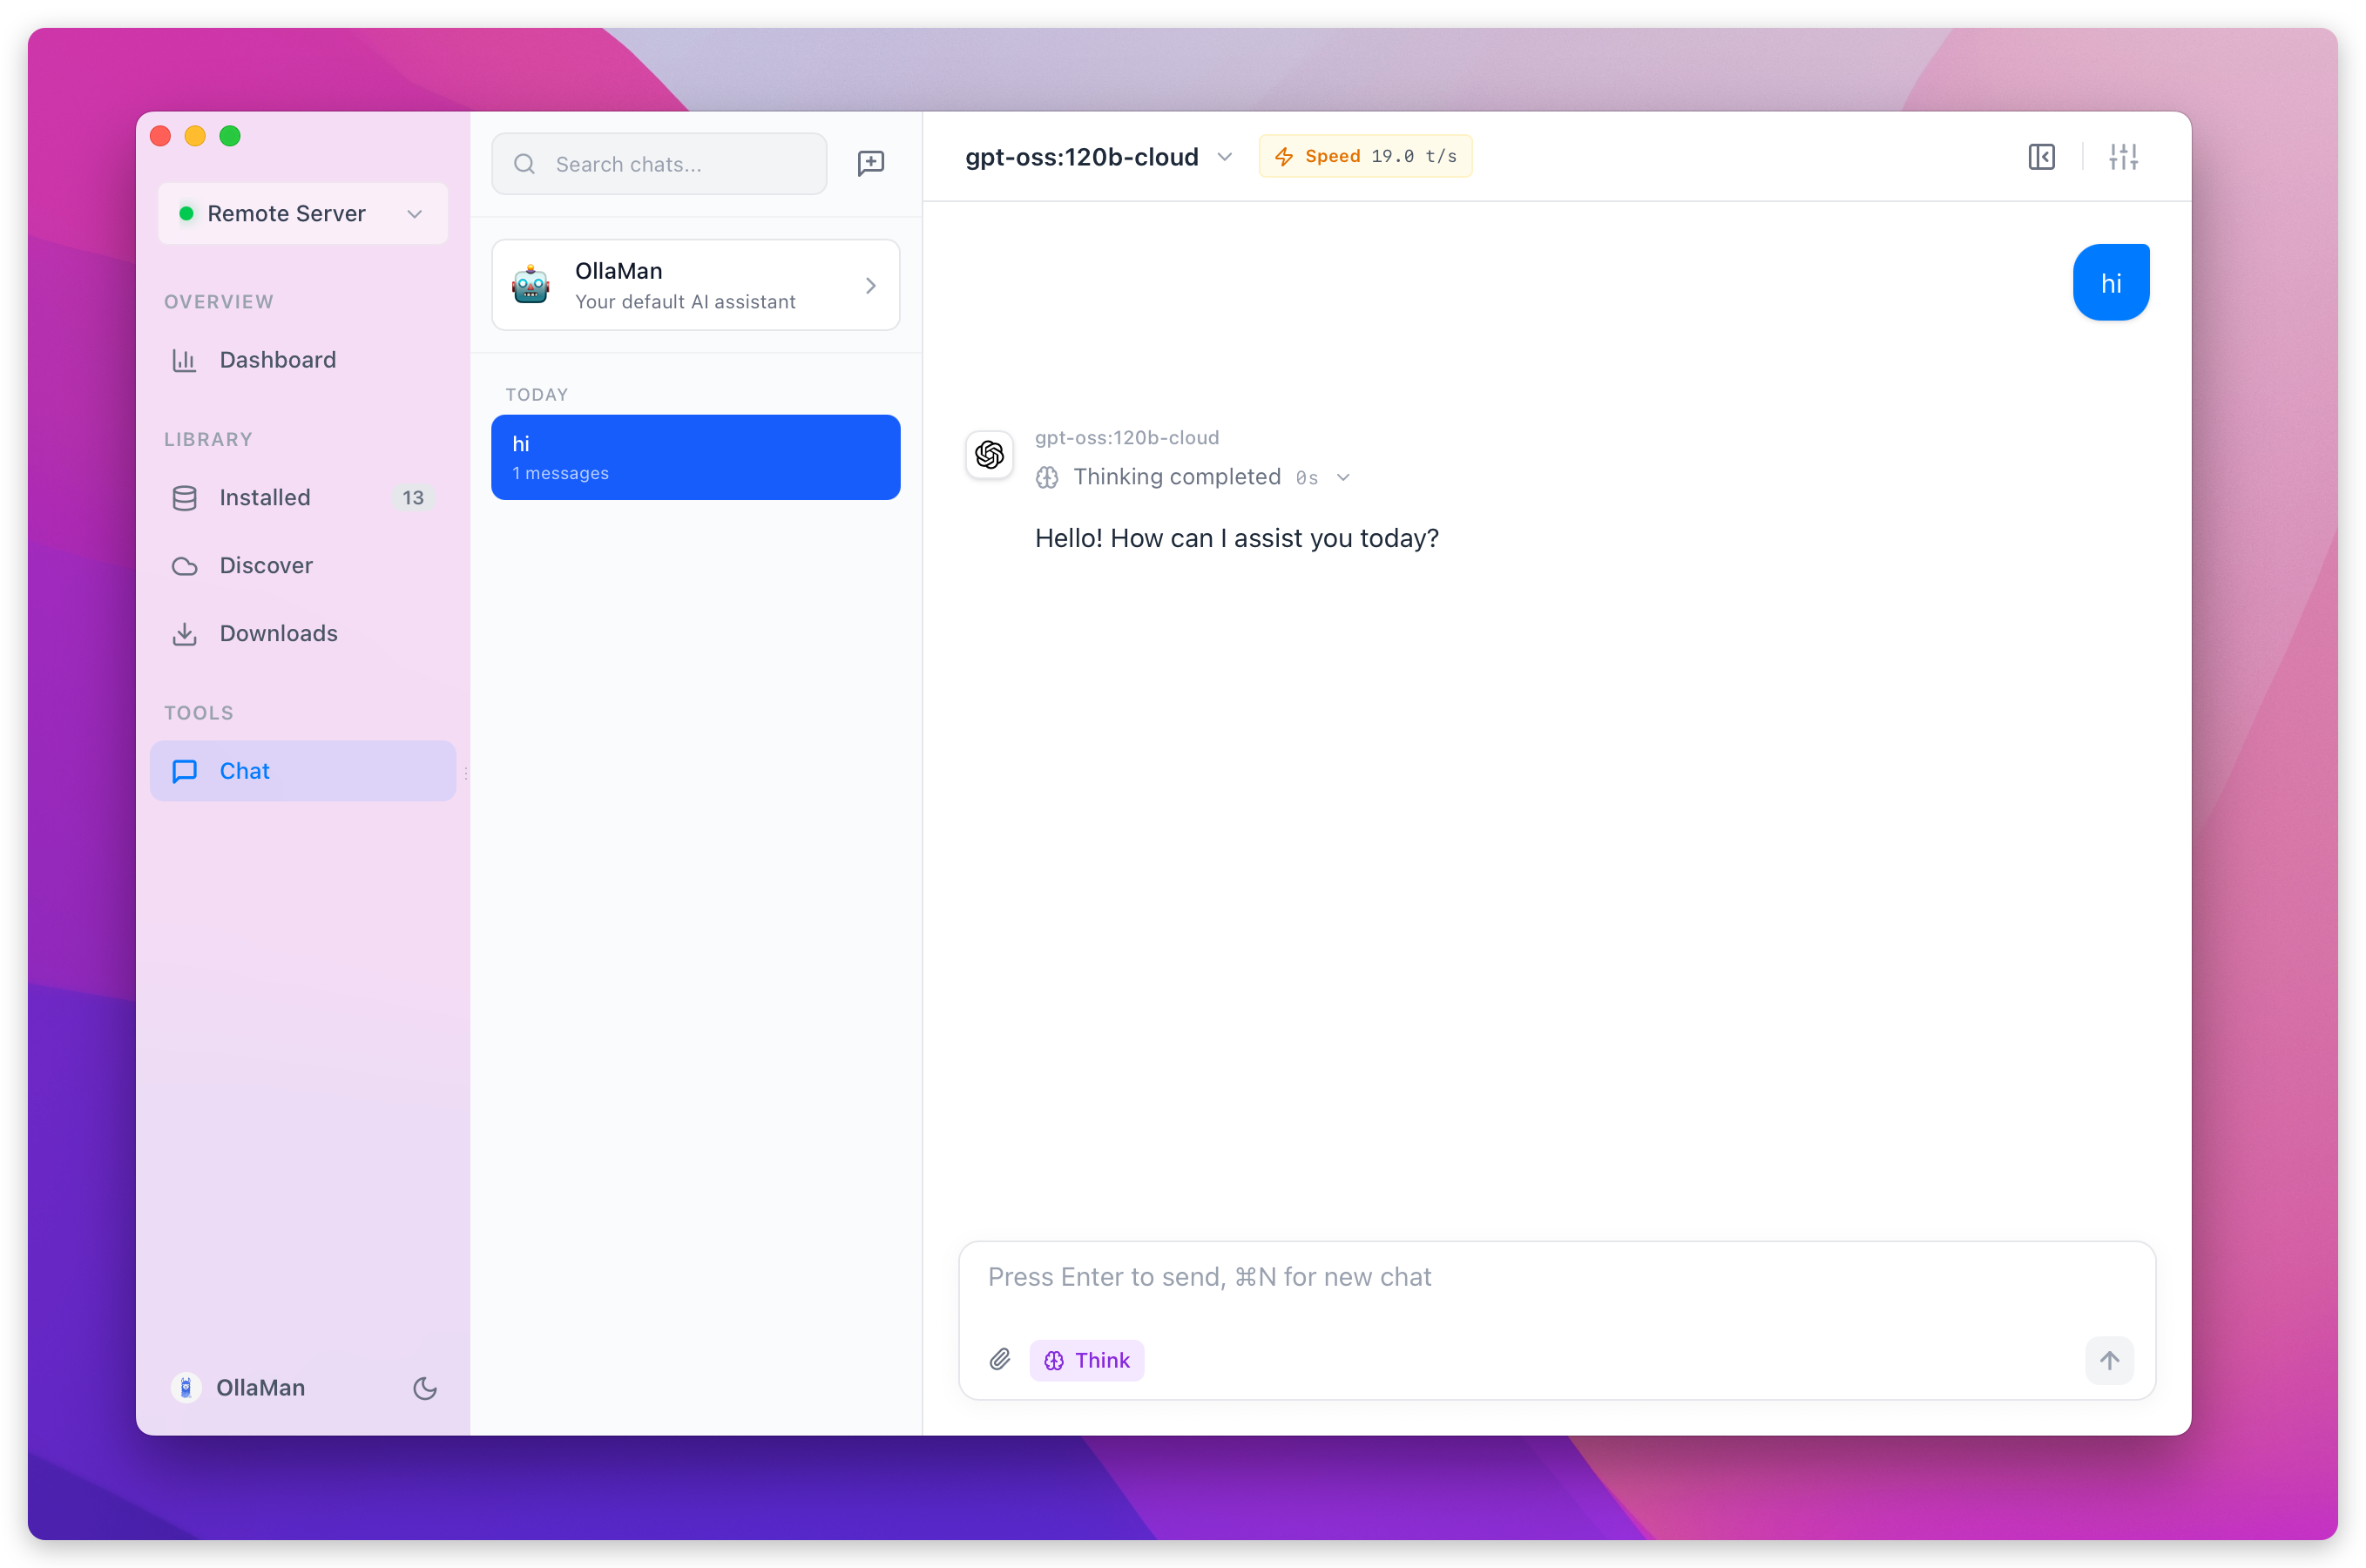
## What is OllaMan?
OllaMan is a desktop client made specifically for Ollama users. It provides a clean GUI to manage local models, chat with them in real time, and connect to multiple Ollama servers (macOS / Windows / Linux).
Chat is a first-class feature:
- **Multi-agent (roles)**: create agents for different workflows
- **Multi-session**: keep context organized per agent
- **Attachments**: send files/images as context
- **Thinking Mode**: show collapsible reasoning for supported models
- **Message operations**: edit messages, regenerate AI responses, copy with one click
- **Performance stats**: live tokens/s, duration, total tokens, and shareable cards
## 1) Connect to Ollama: local or multi-server
OllaMan can connect to multiple Ollama instances, which is useful when:
- **You run small models locally** (offline-first)
- **You host larger models on a stronger machine** (LAN/remote)
- **You want to separate environments** (work vs personal)
Recommended flow:
1. Make sure your Ollama service is running (local or remote).
2. Open OllaMan and go to **Settings → Servers**.
3. Add server details (name, URL; optionally username/password).
4. Run a **connection test** to verify latency and health.
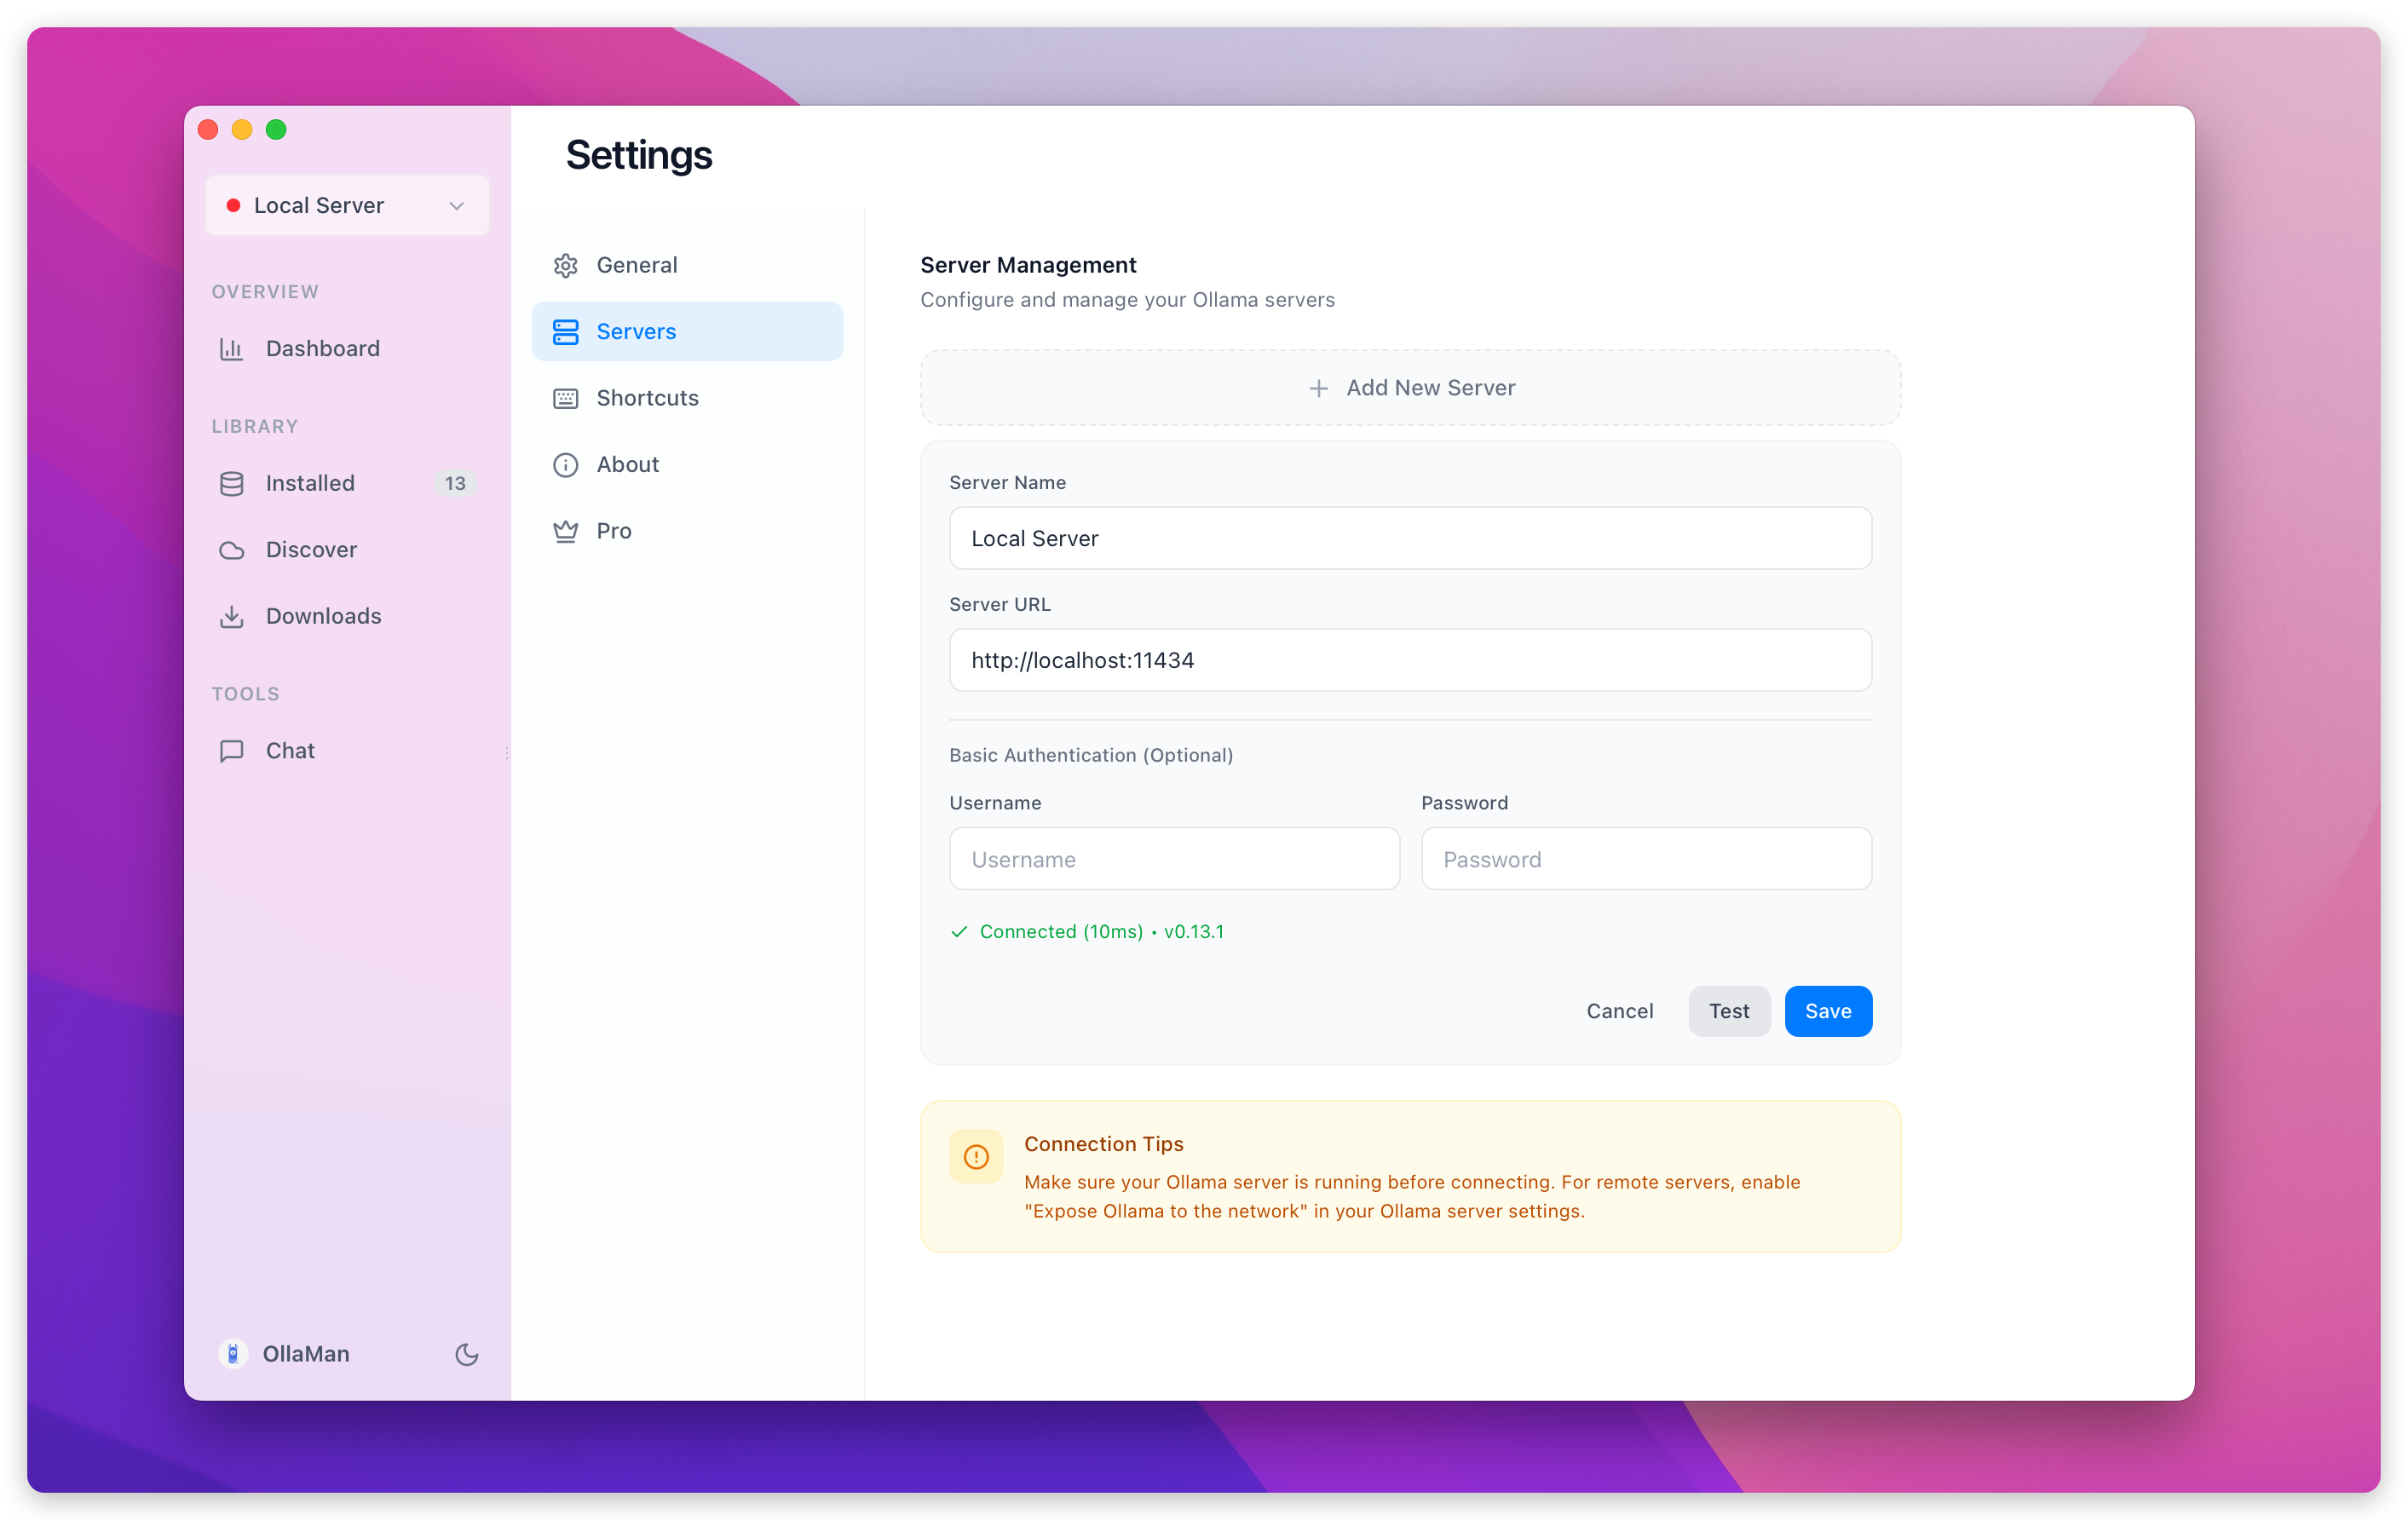
## 2) Pick a model and start chatting
On the Chat page, you can switch models from the **top toolbar**:
1. Open the model dropdown
2. Choose from your locally installed models
3. The selection applies immediately to subsequent messages
OllaMan also detects capabilities automatically:
- **Vision**: shows the image attachment button
- **Thinking**: shows the Think toggle
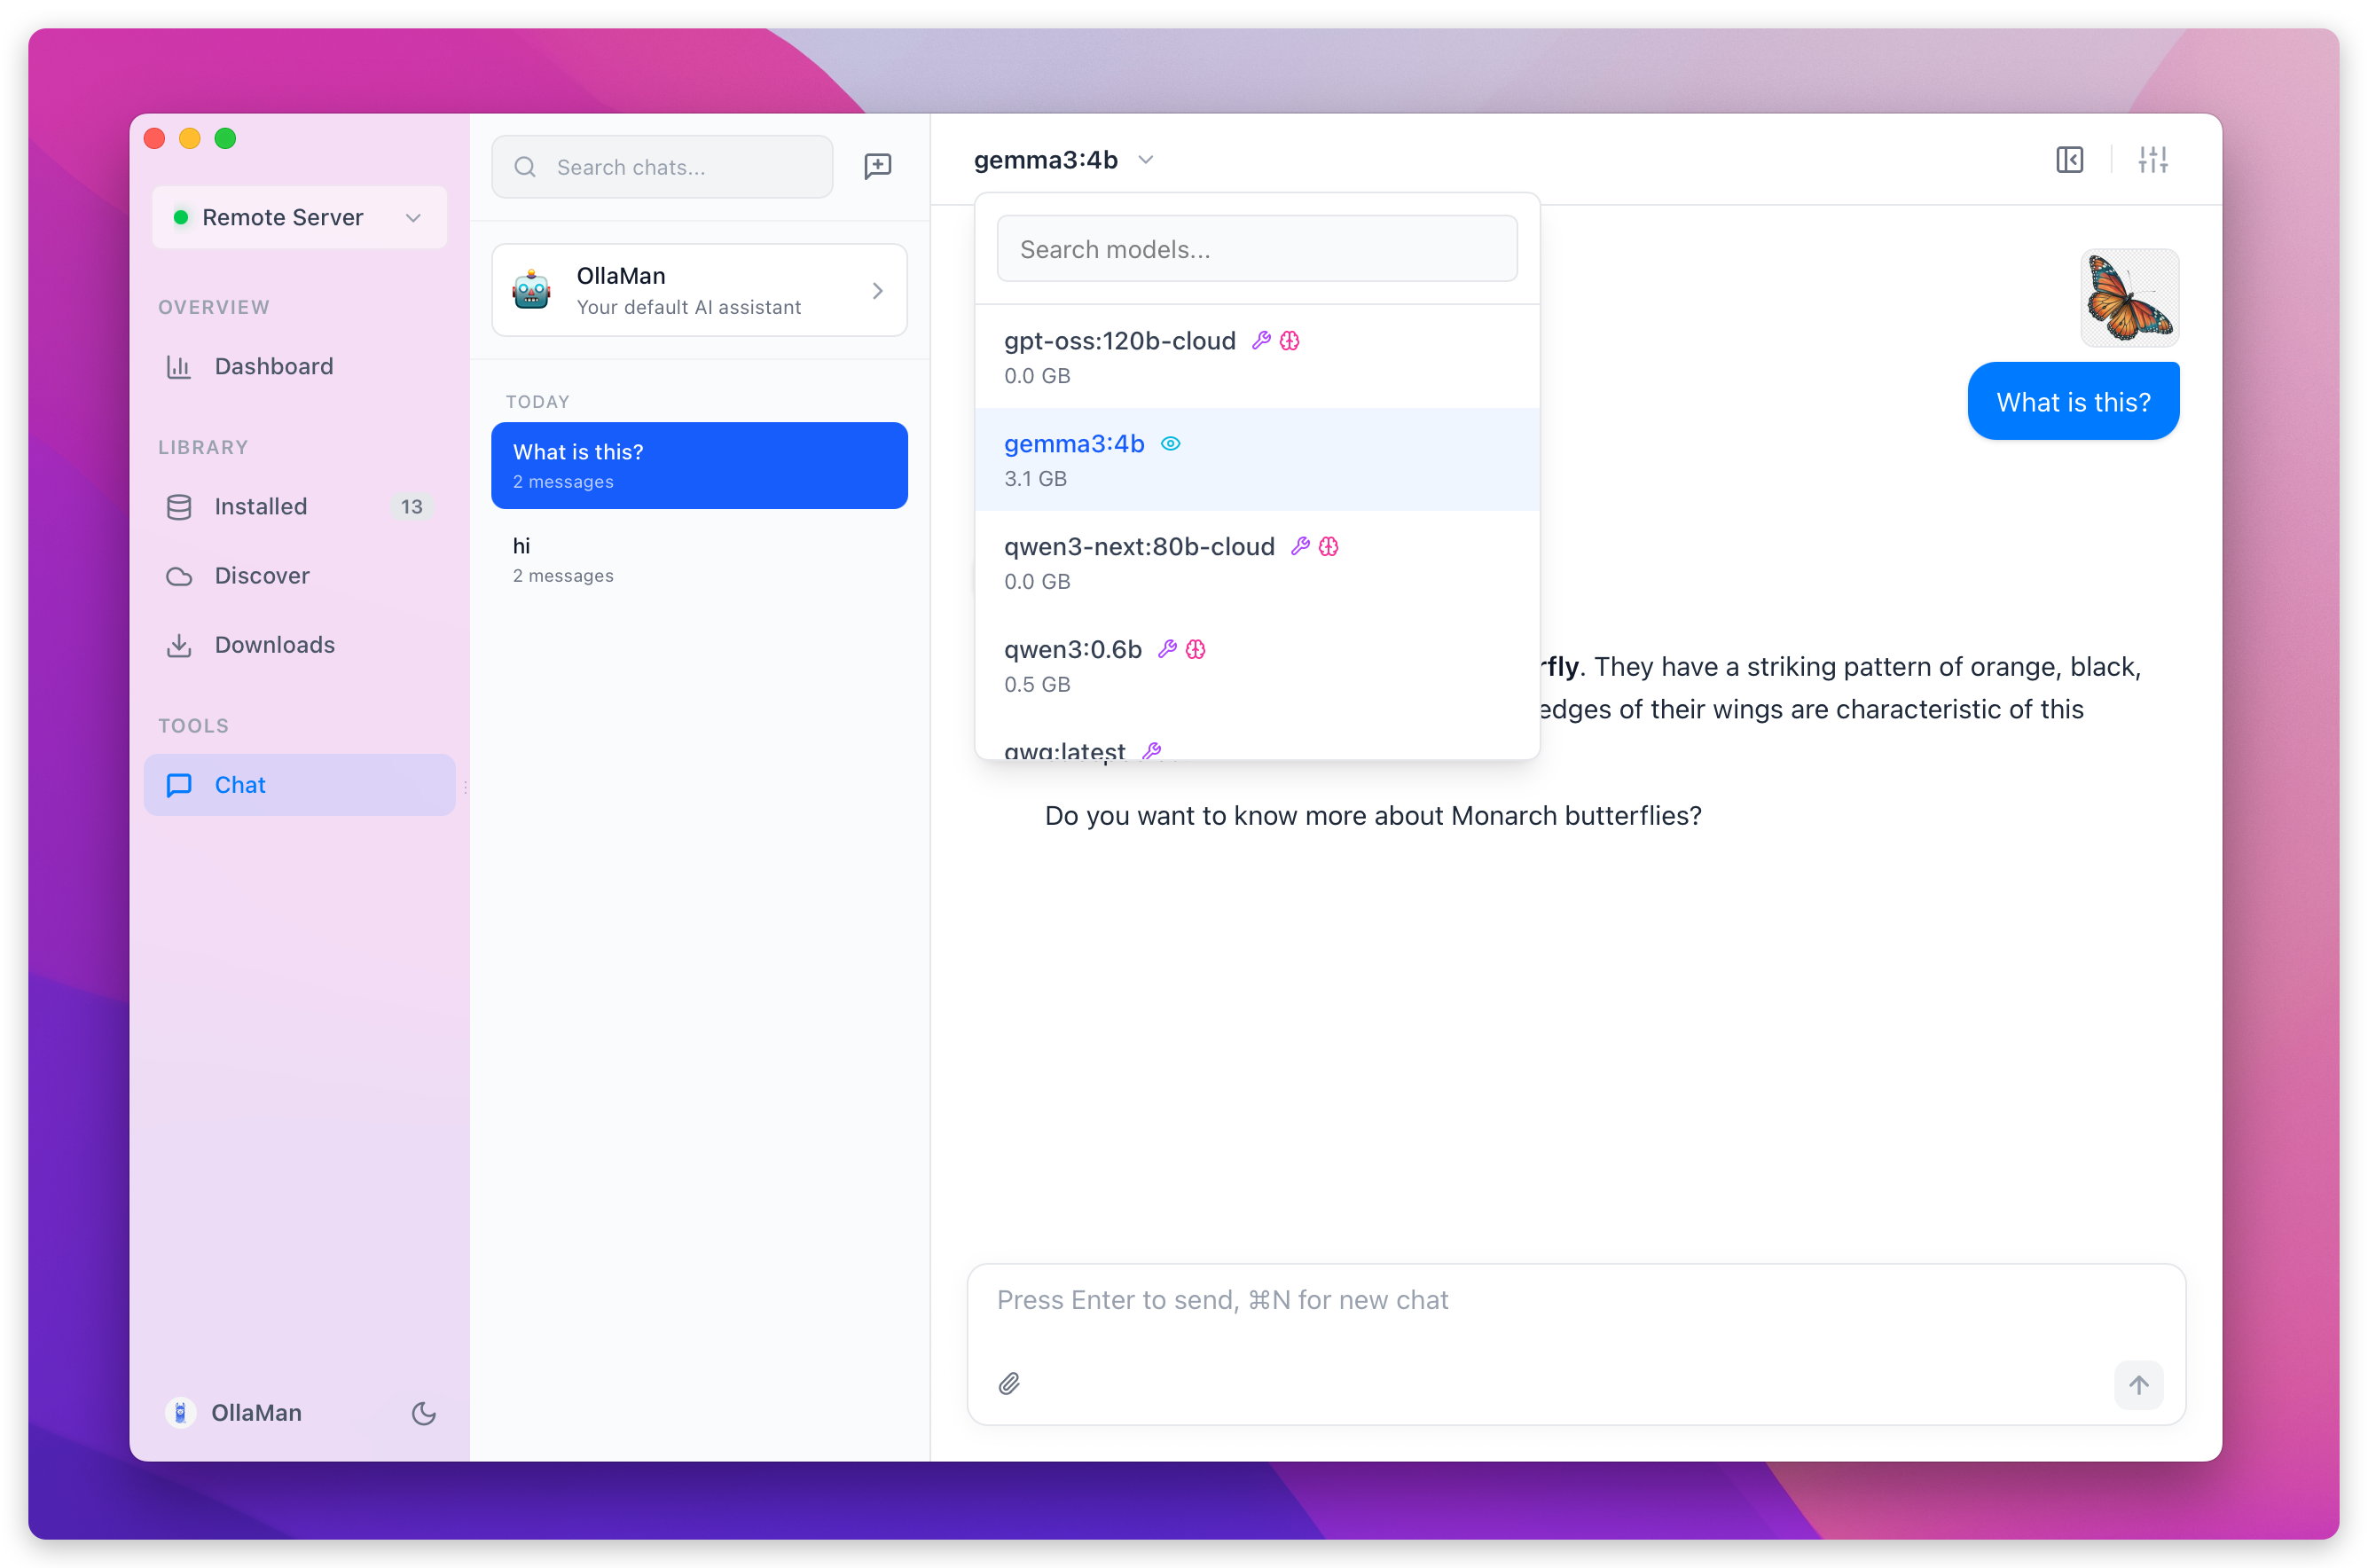
## 3) Use Agents to turn workflows into one-click presets
An Agent is a pre-configured assistant role. Think of it as a reusable card with its own default model, system prompt, and generation parameters.
Built-in agents include:
- **OllaMan**: pinned default agent (cannot be removed)
- **Frontend Dev**: a pre-tuned agent for frontend development
To create your own agent:
1. Click **“+”** in the left sidebar
2. Set name, icon, and description
3. Configure default model, system prompt, and parameters (Temperature / Top P / Top K)
4. Drag to reorder
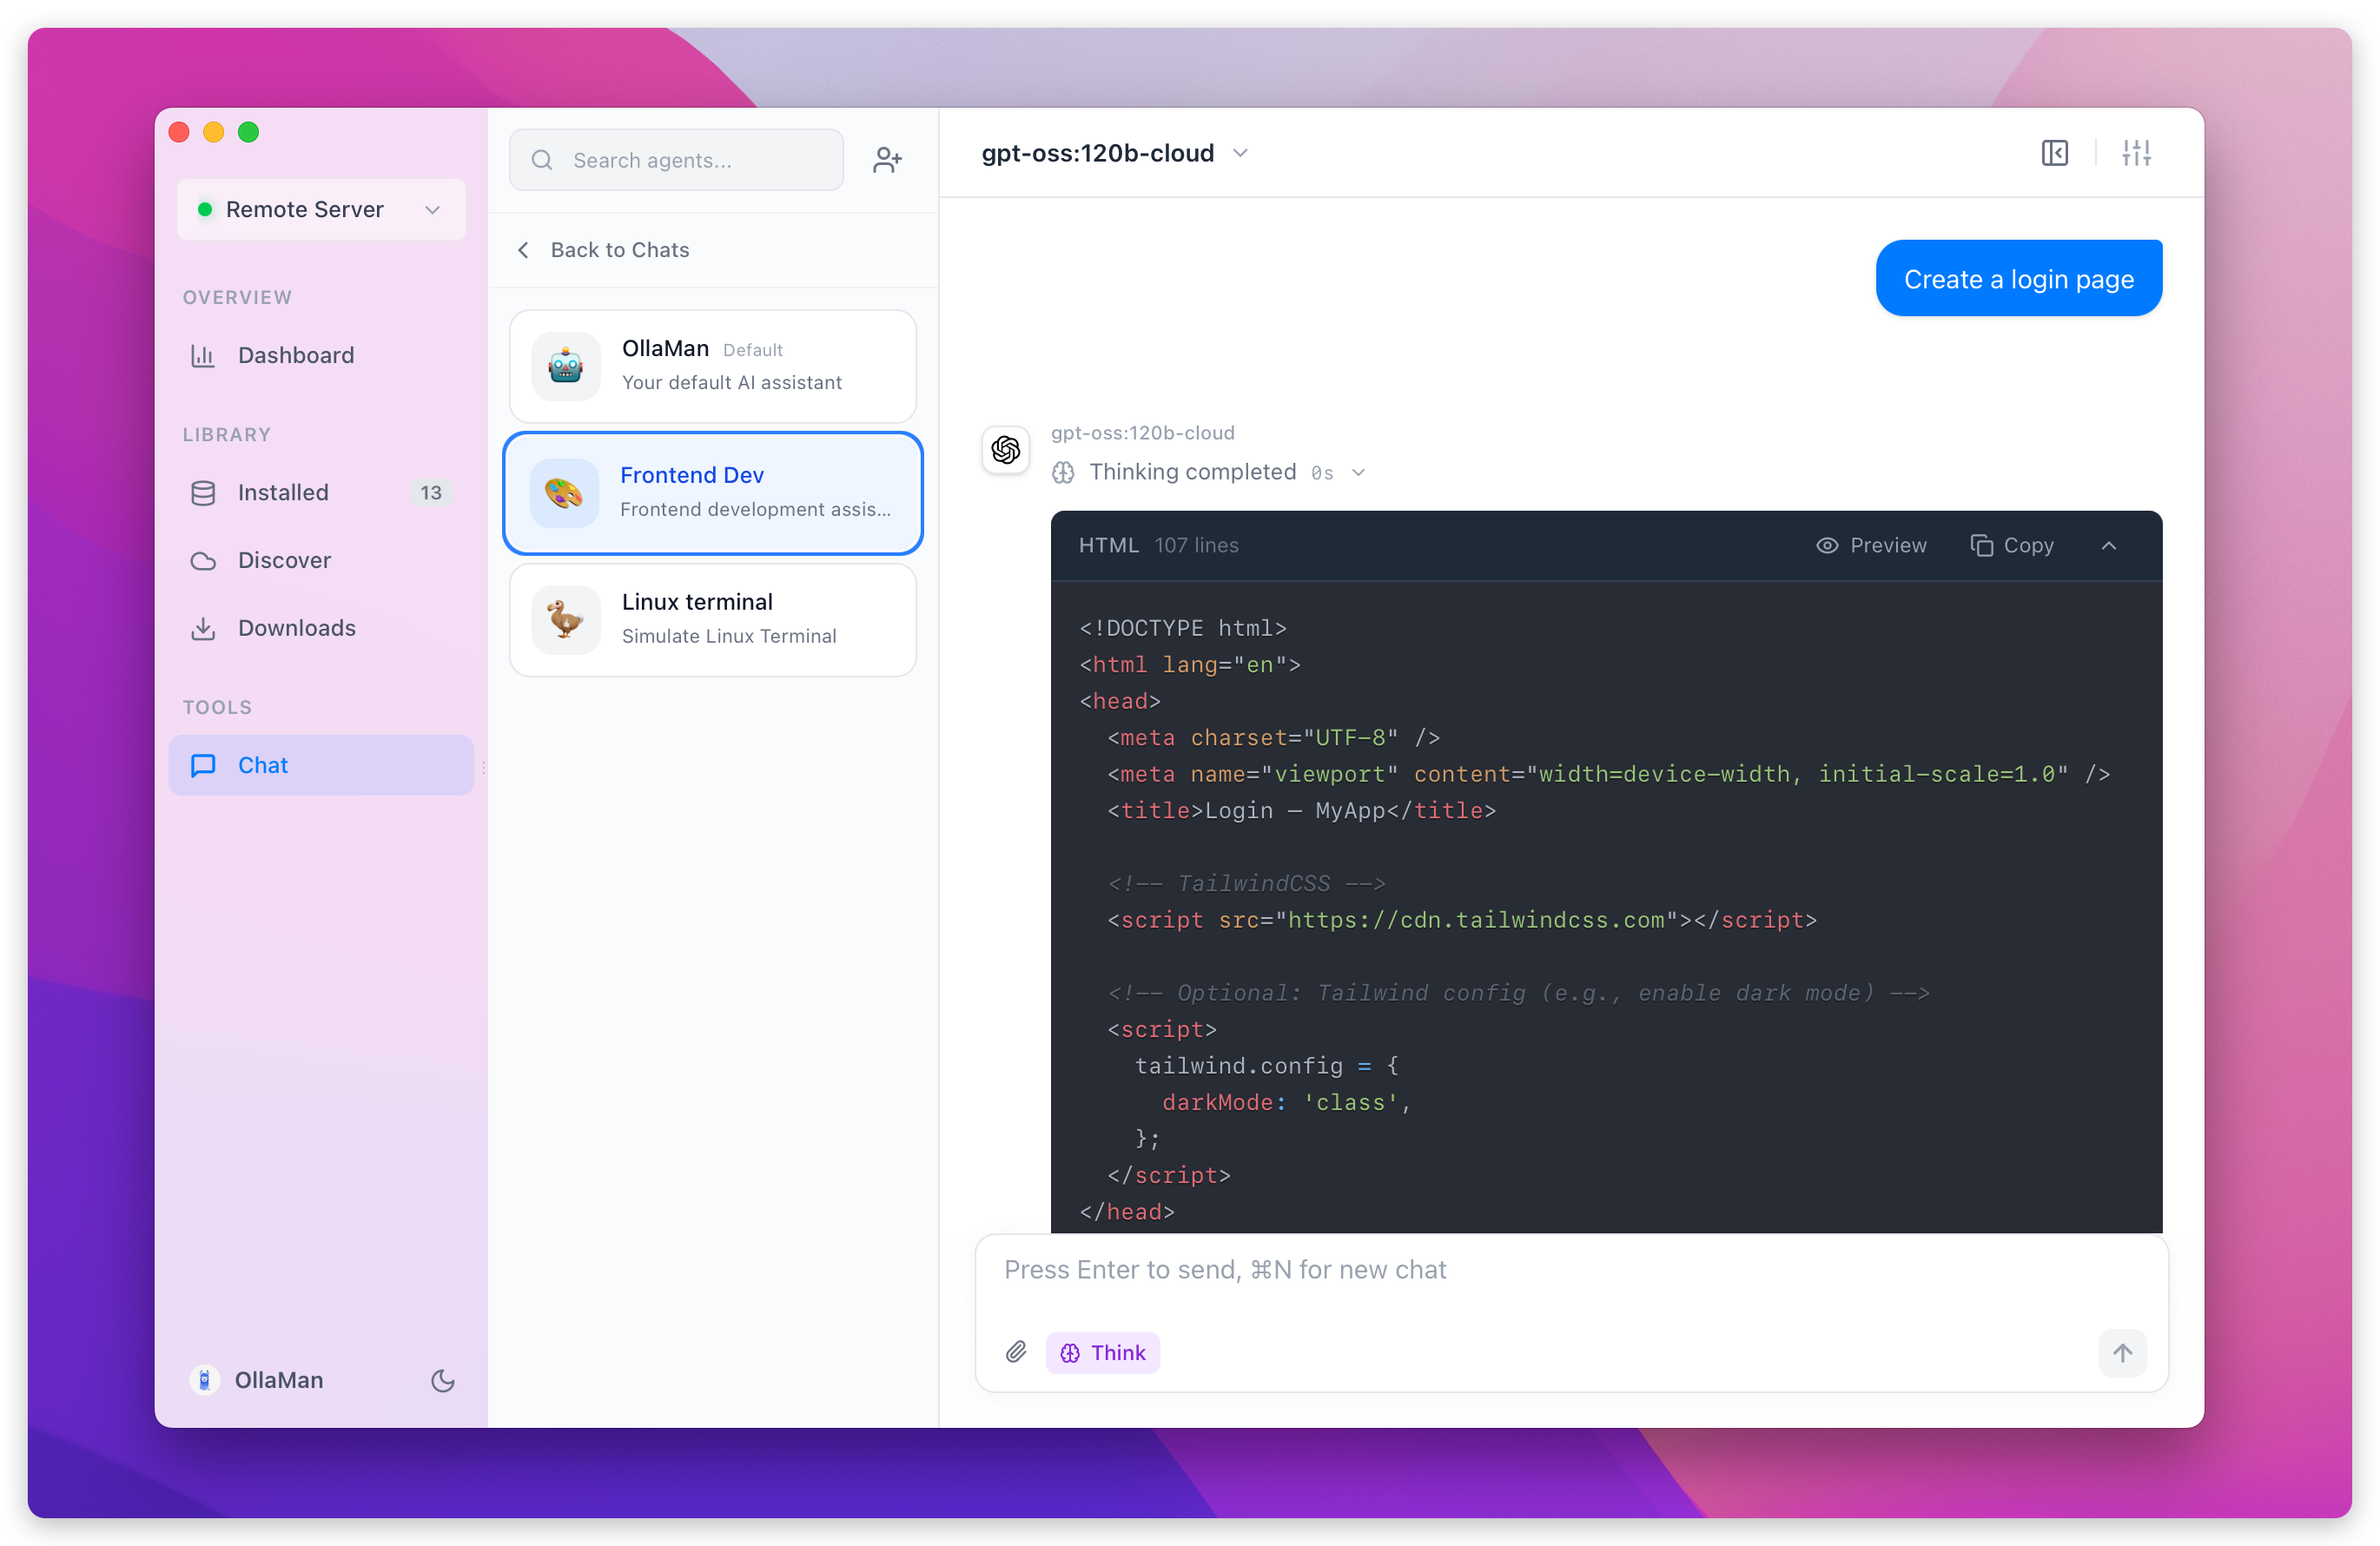
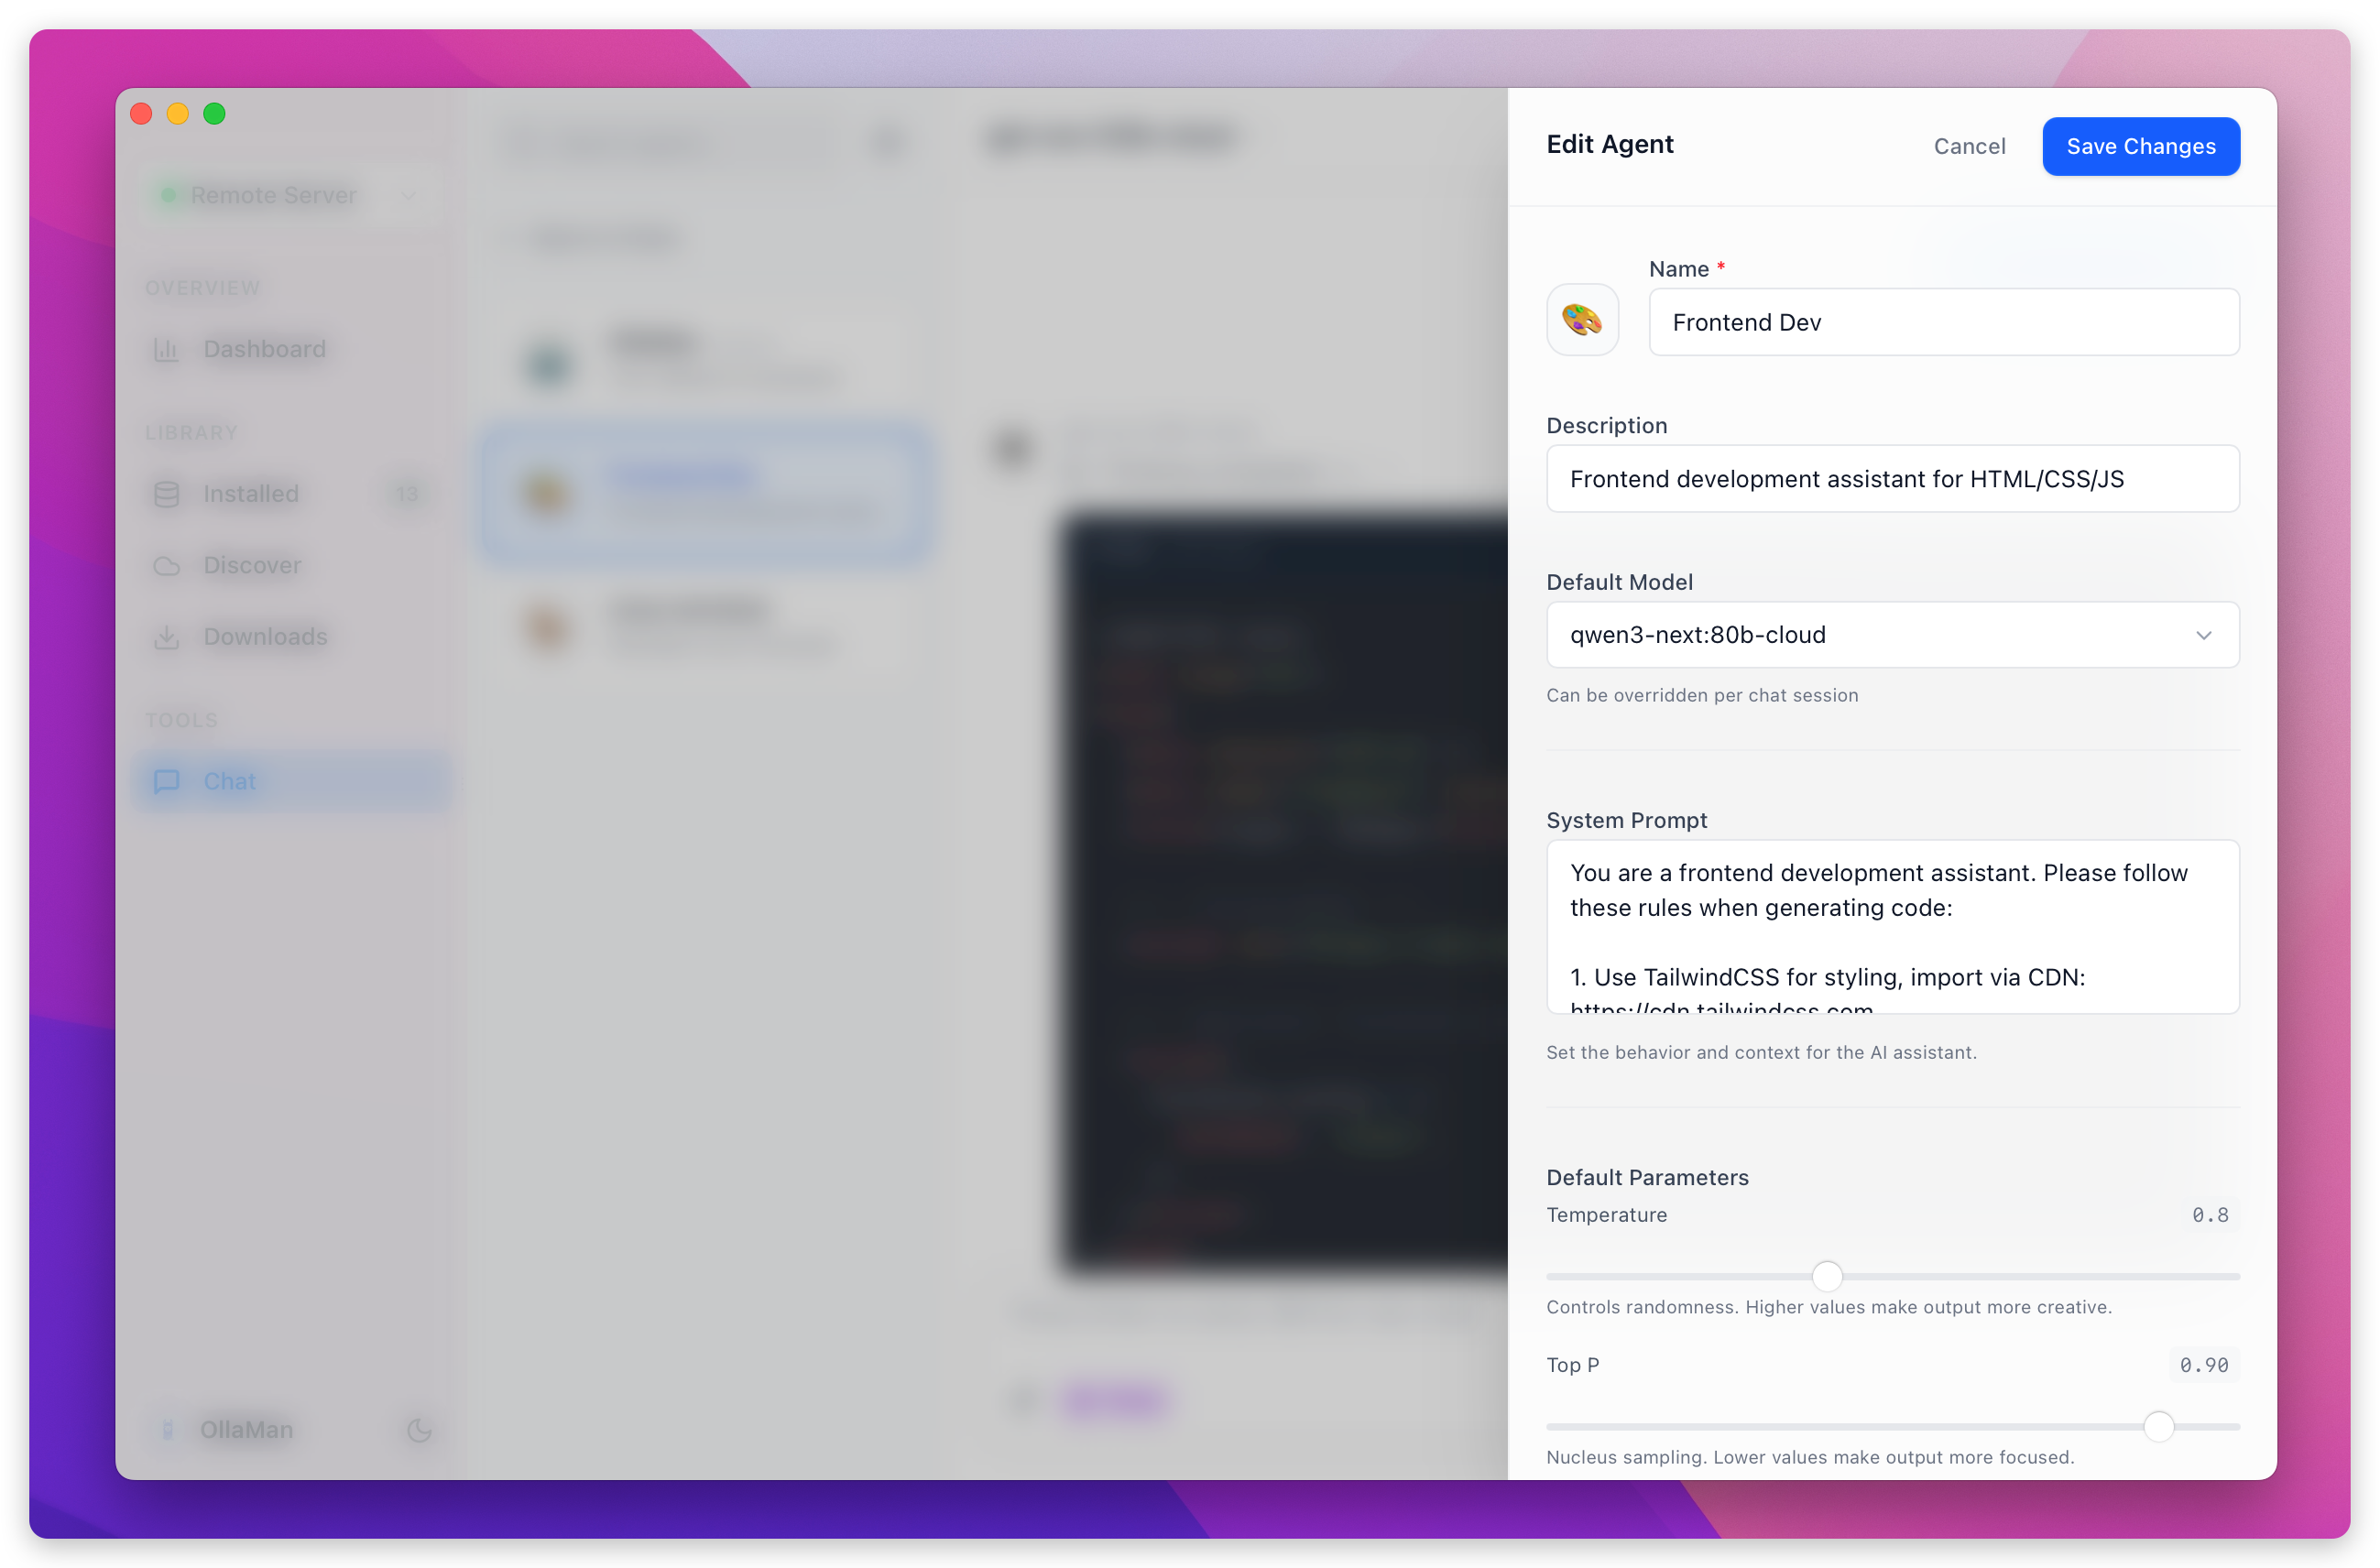
Tip: Create a small set of high-quality agents for your most common workflows, and keep names consistent so they’re easy to maintain.
## 4) Sessions: keep context clean and searchable
Each agent can have multiple independent sessions. Sessions are grouped by time:
- **Today**
- **This Week**
- **Earlier**
Common actions:
- **New session**: click "New Chat" or press `Cmd+N` / `Ctrl+N`
- **Switch**: click a session in the list
- **Delete**: hover and remove
Session titles are generated from the first message to help you quickly recognize topics.
## 5) Attachments: put files and images directly into context
This is one of the most practical everyday features.
### File attachments (text)
Send code, docs, logs, or configs as context:
- Supports TXT / MD / JSON / JS / TS / Python / HTML / CSS and other text formats
- Click the file card to preview full content with syntax highlighting
Great for:
- Code review
- Document understanding
- Debugging configurations
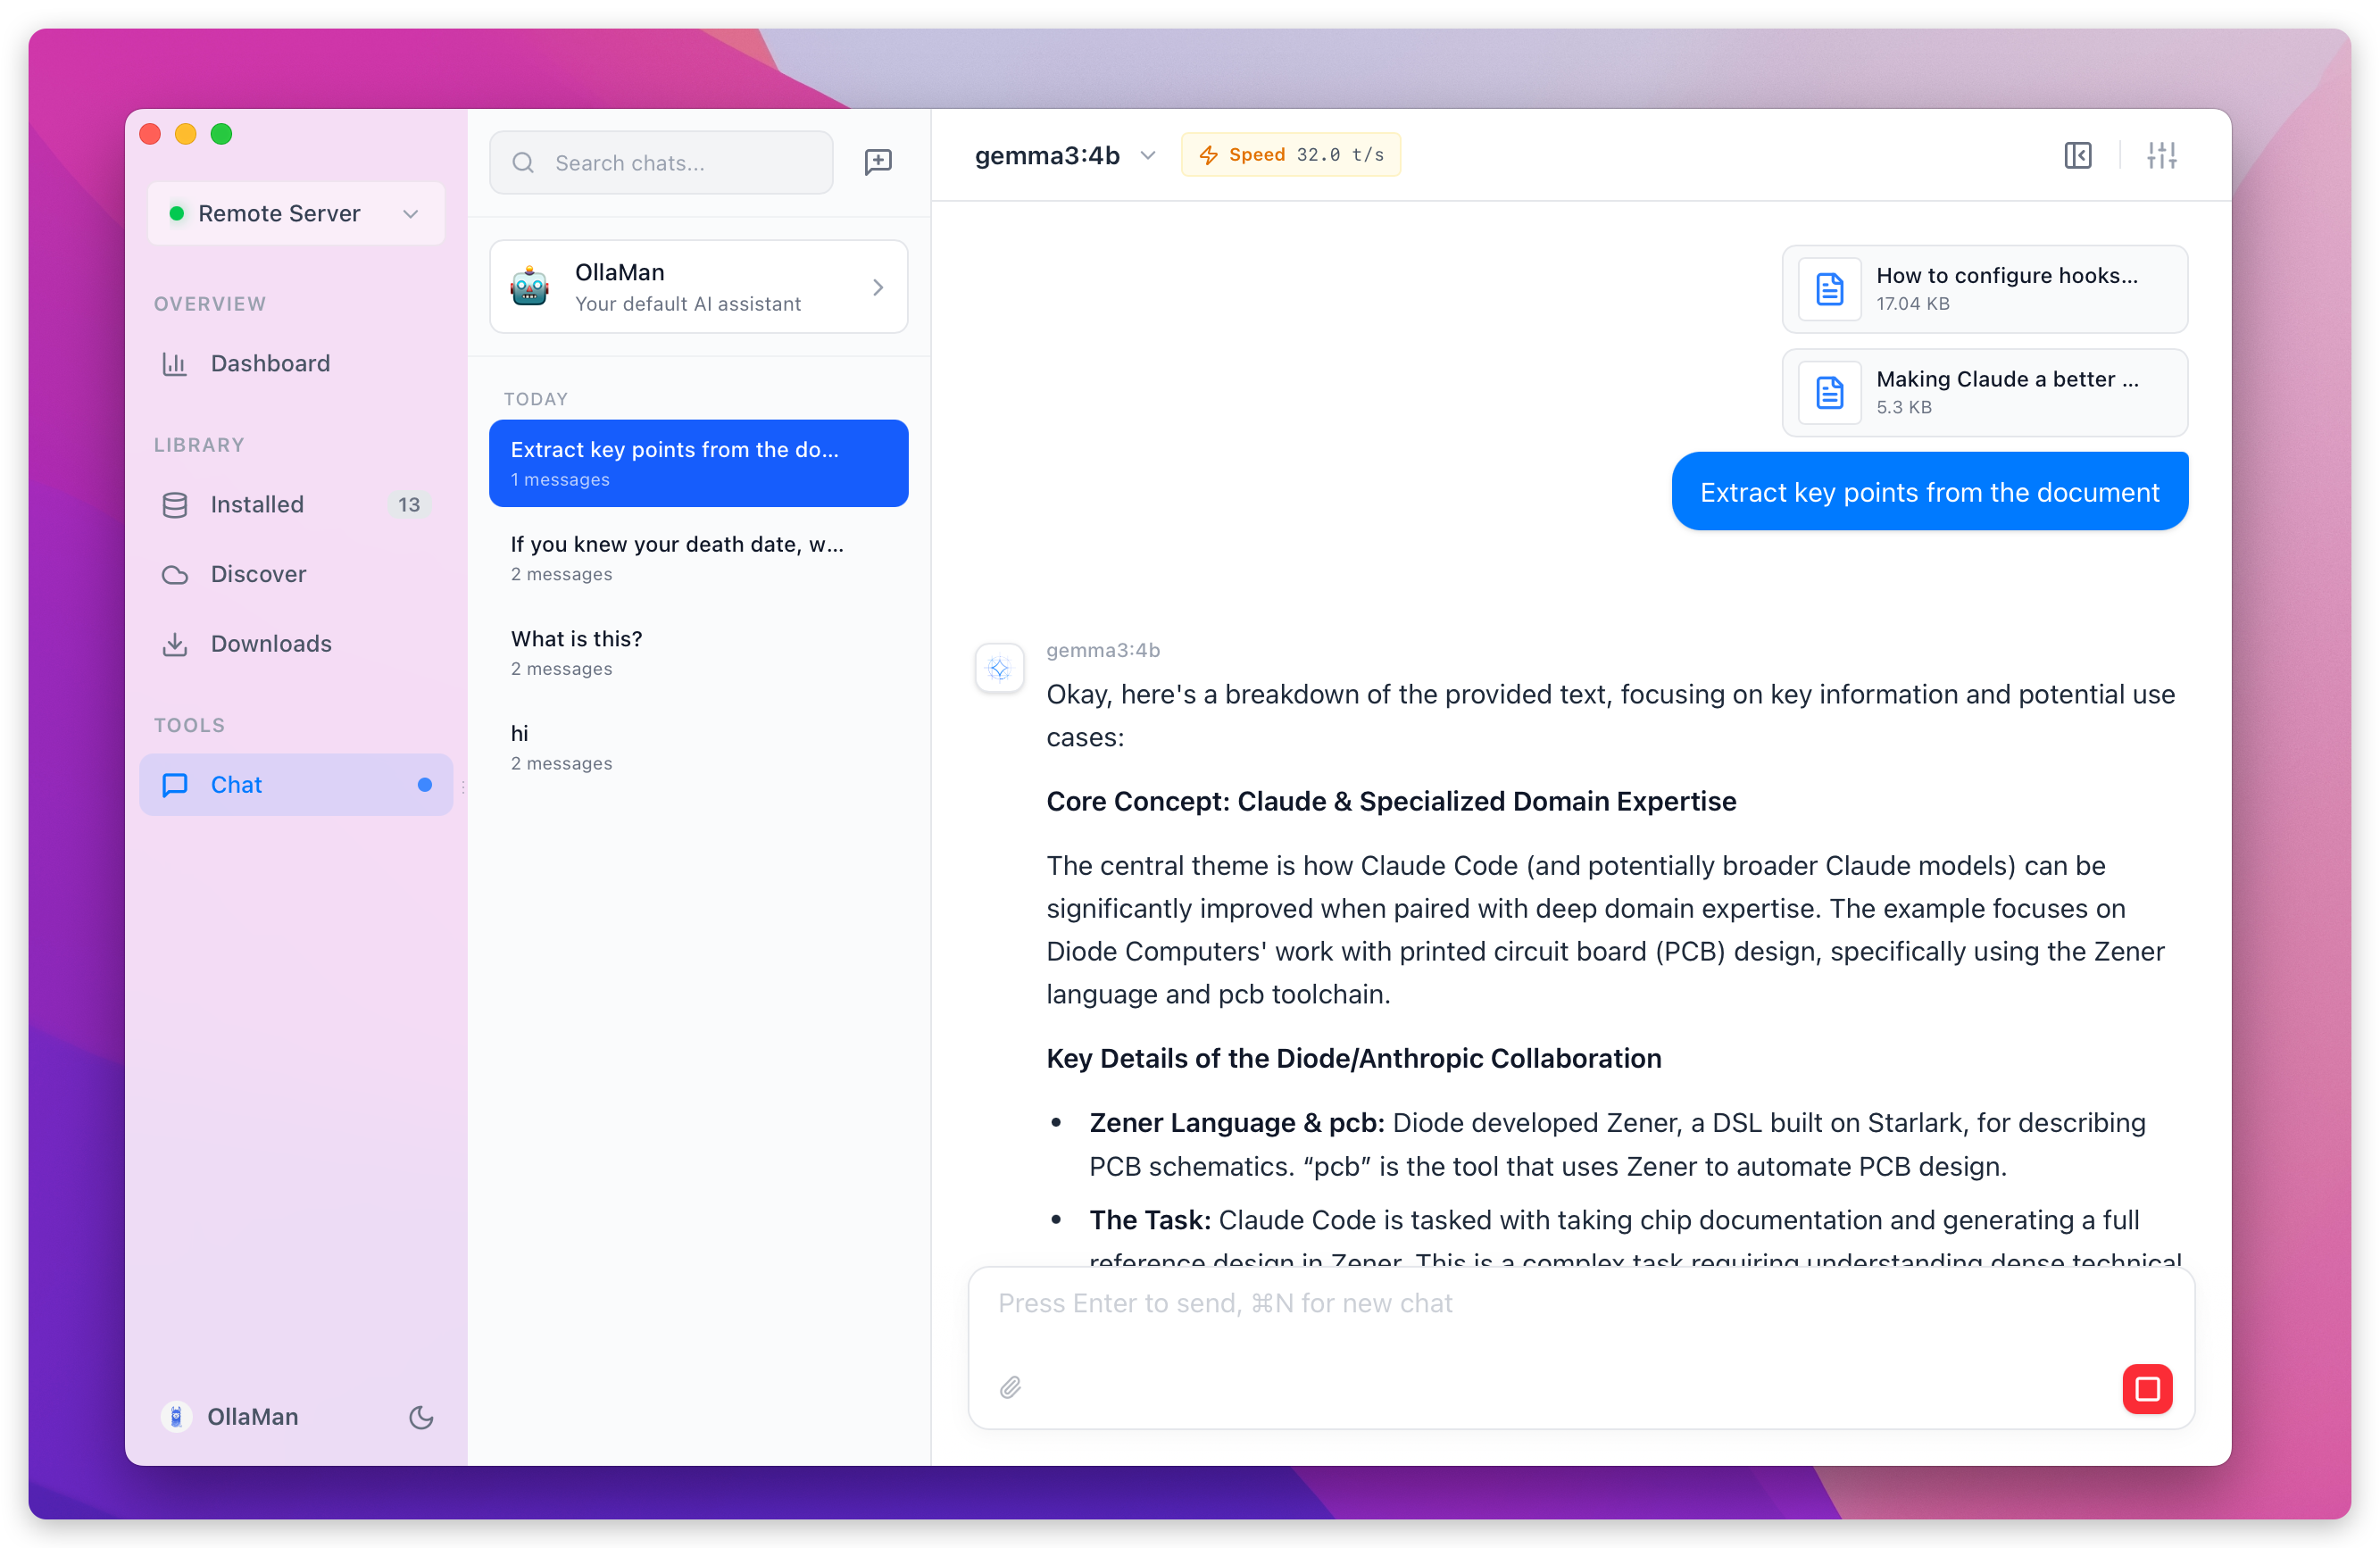
### Image attachments (vision models)
When using vision-capable models (e.g., LLaVA, Gemma2 Vision), you can attach images:
- Formats: PNG / JPG / JPEG / GIF / WebP
- Thumbnail preview before sending, with removal support
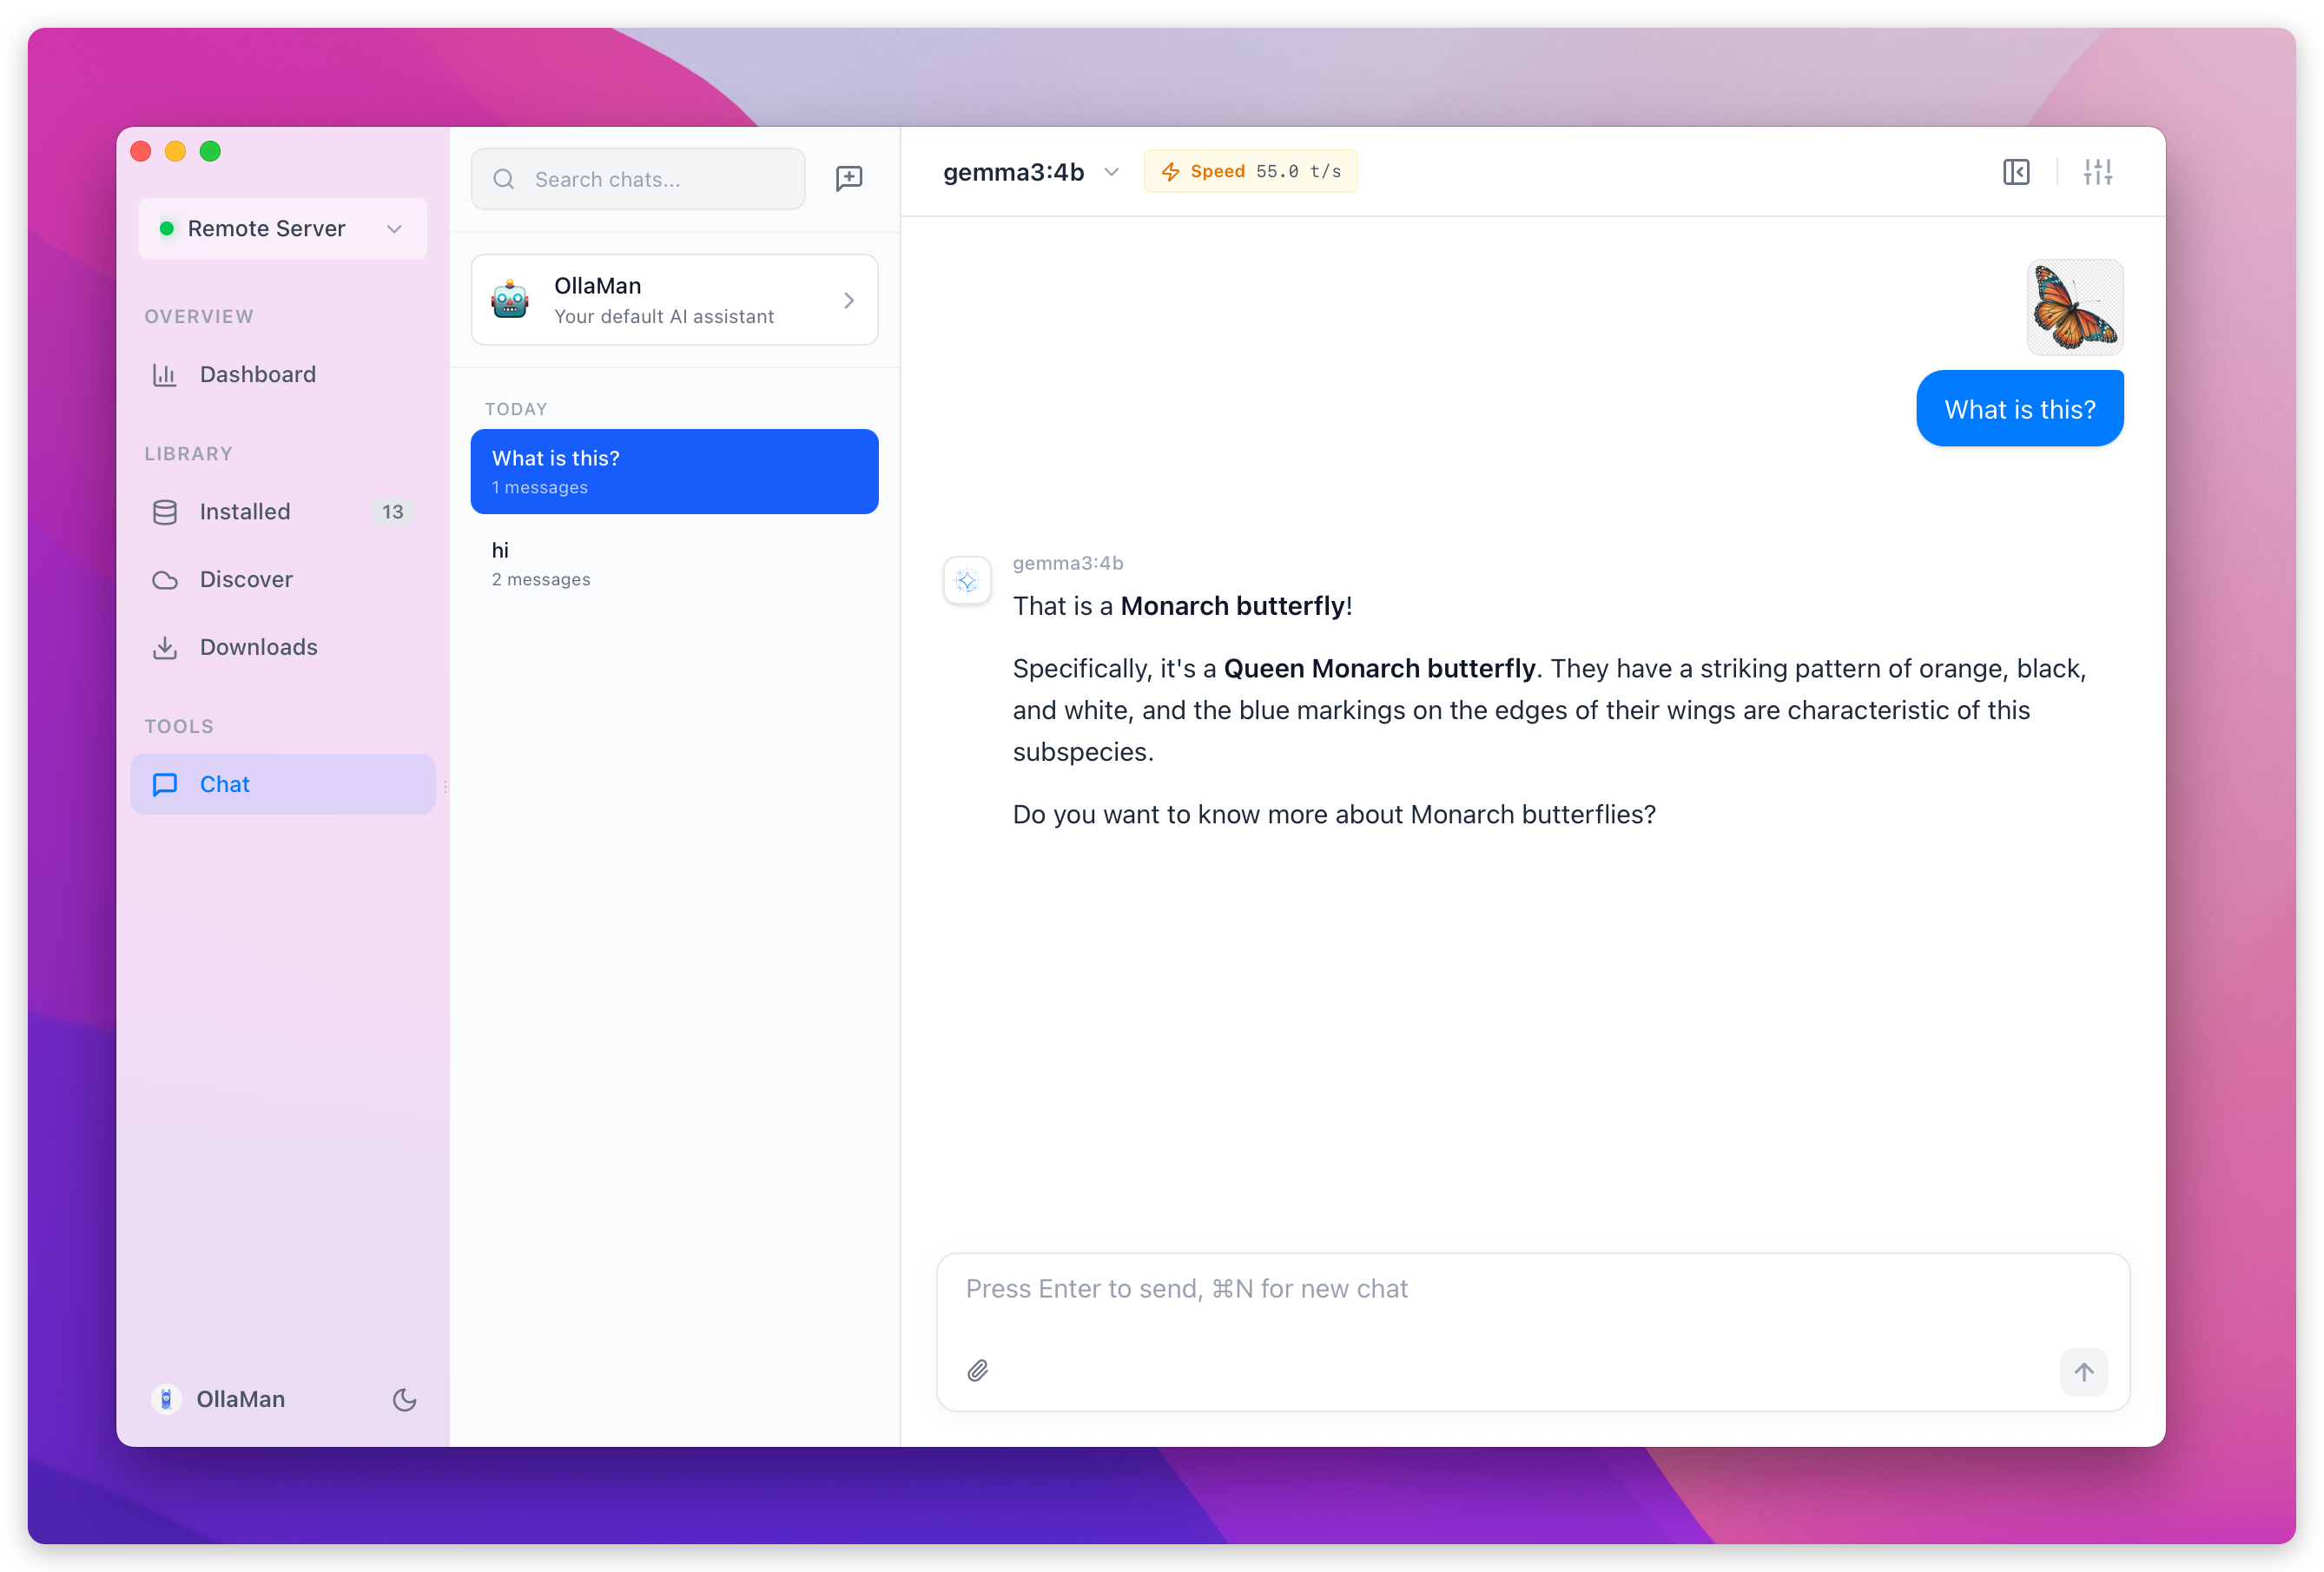
## 6) HTML Code Preview: instant visual feedback for HTML snippets
When the model generates HTML code, OllaMan provides instant preview capability:
- For HTML code blocks, a **Preview** button appears in the top-right corner of the code block
- Click to open a preview window that renders the HTML in real-time
- Great for testing UI snippets, learning HTML/CSS, or validating generated markup
This makes it easy to visualize and iterate on generated HTML without leaving the chat interface.
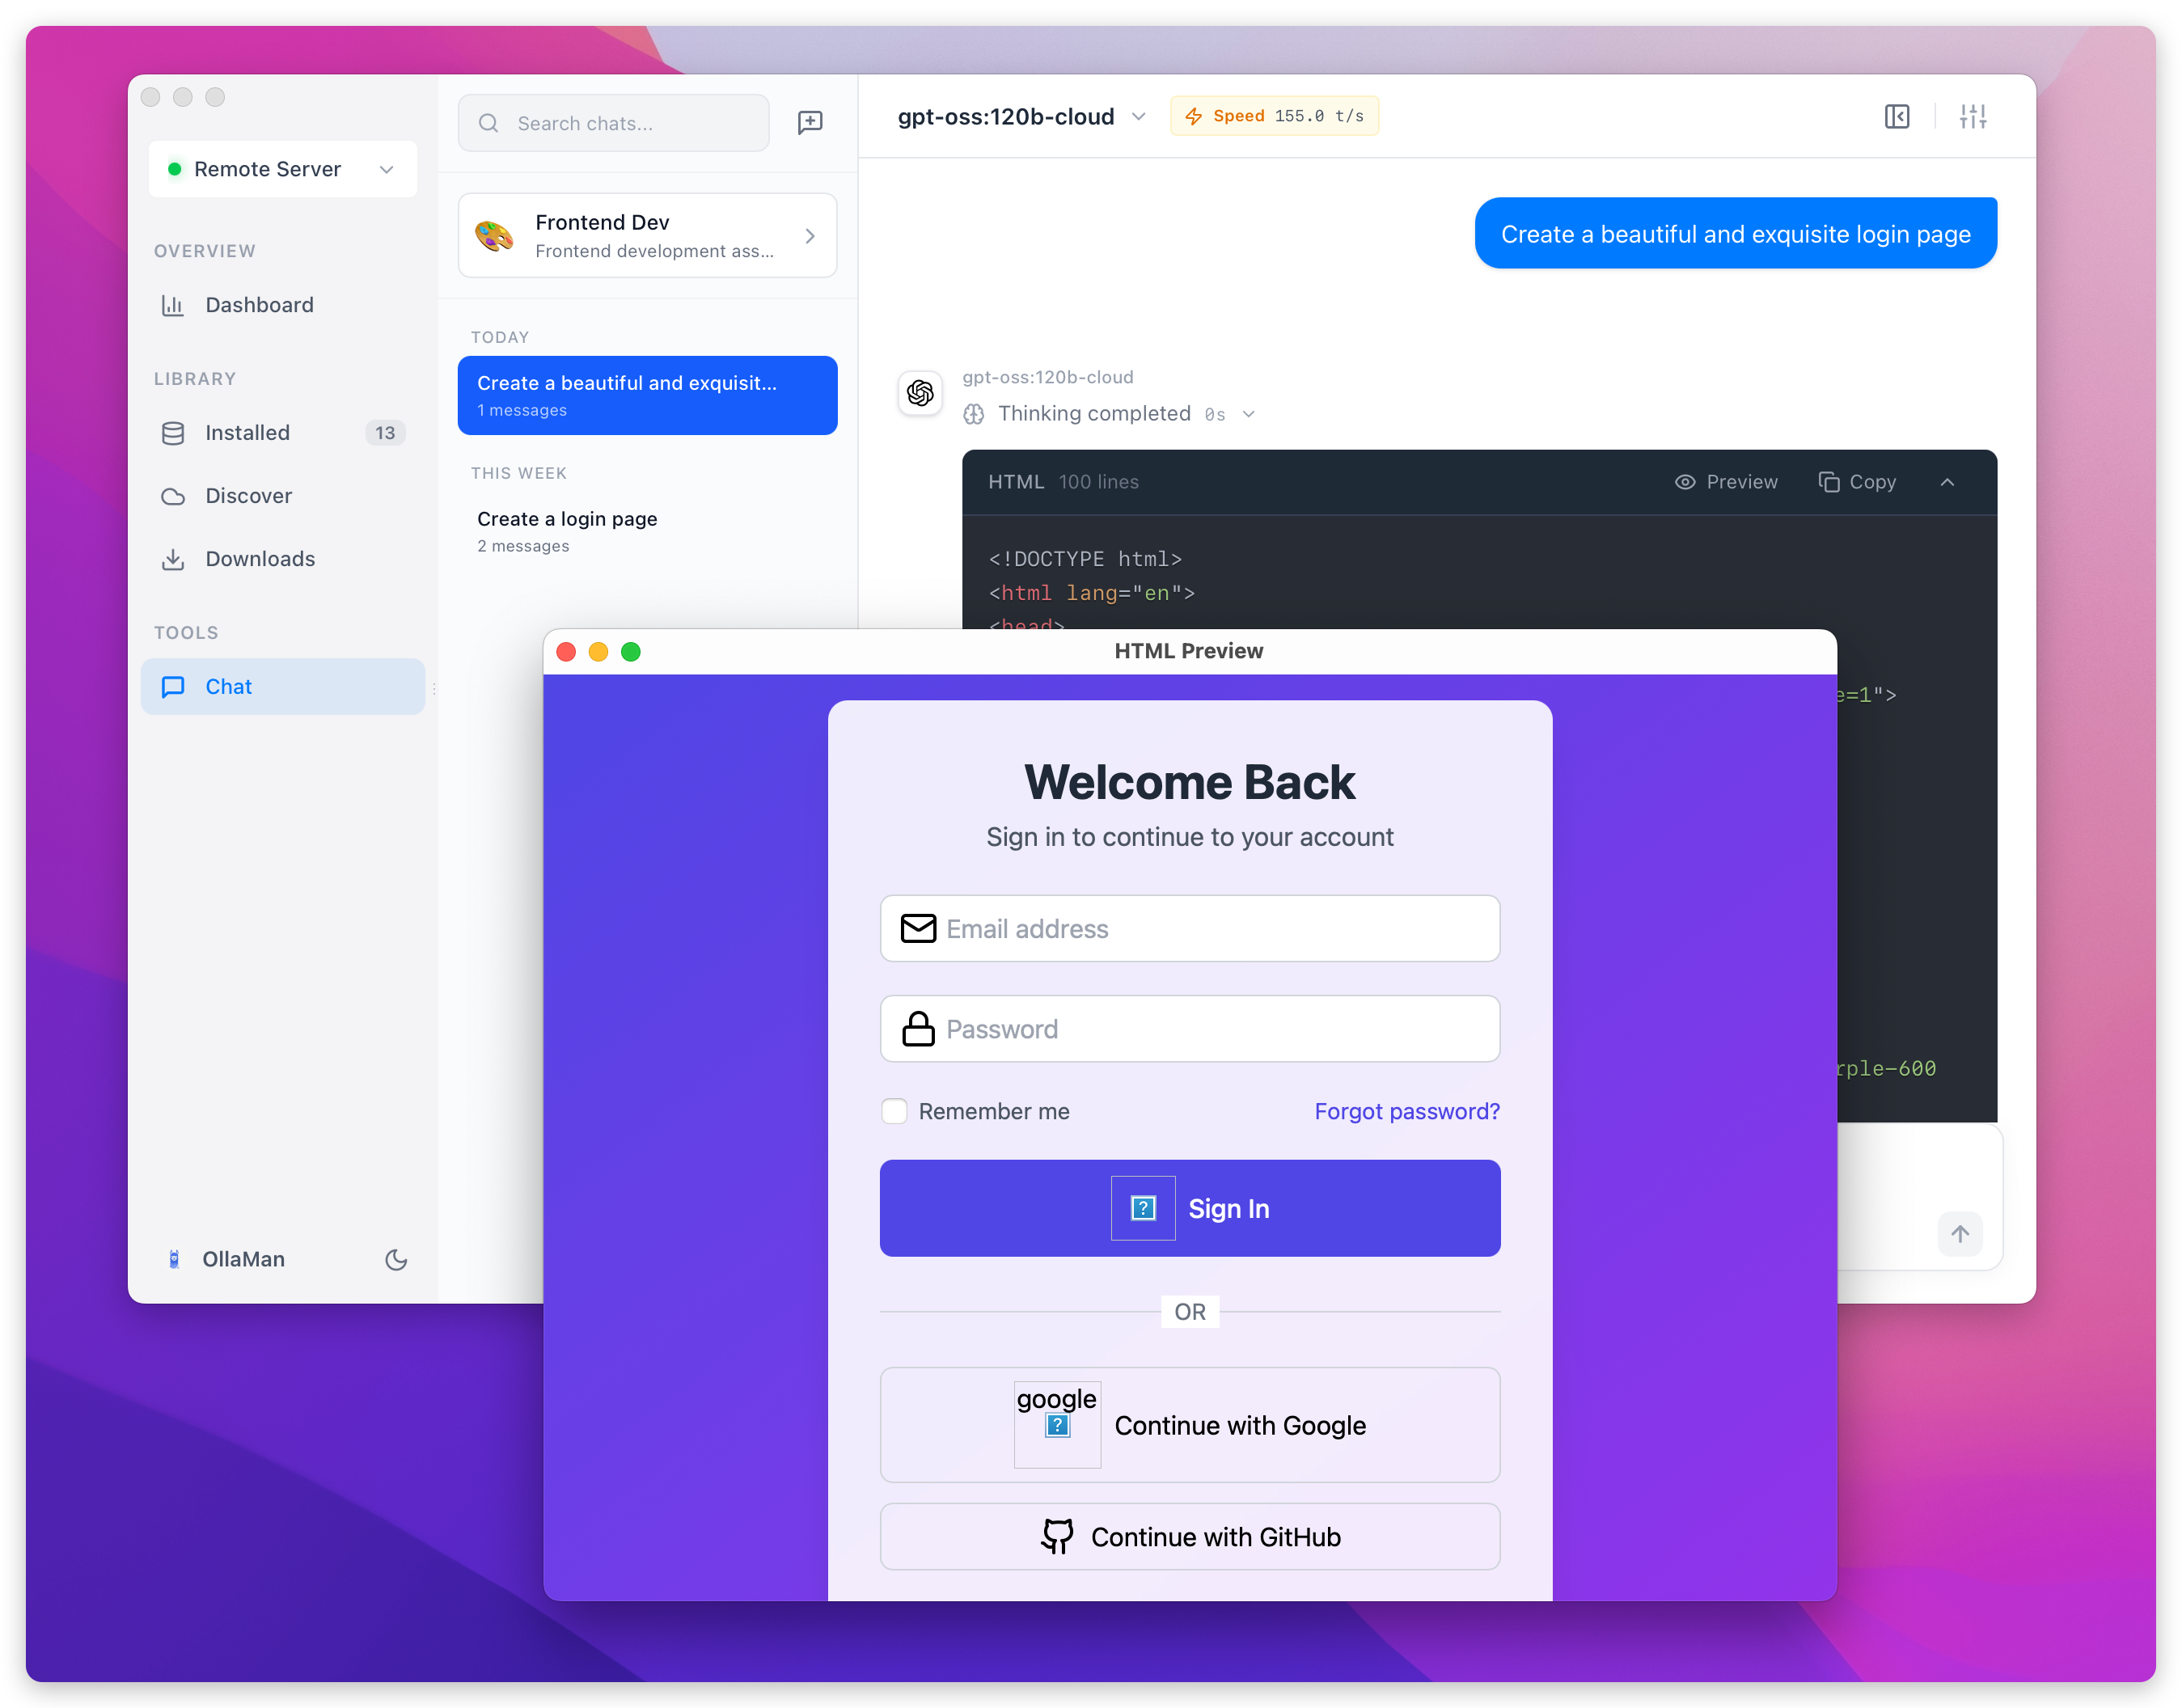
## 7) Thinking Mode: collapsible reasoning, separated from the final answer
For models that support reasoning/chain-of-thought (e.g., DeepSeek R1, QwQ), enable **Think**:
- Reasoning is separated from the final output
- The reasoning block is collapsible
- Useful for complex problem solving and structured planning
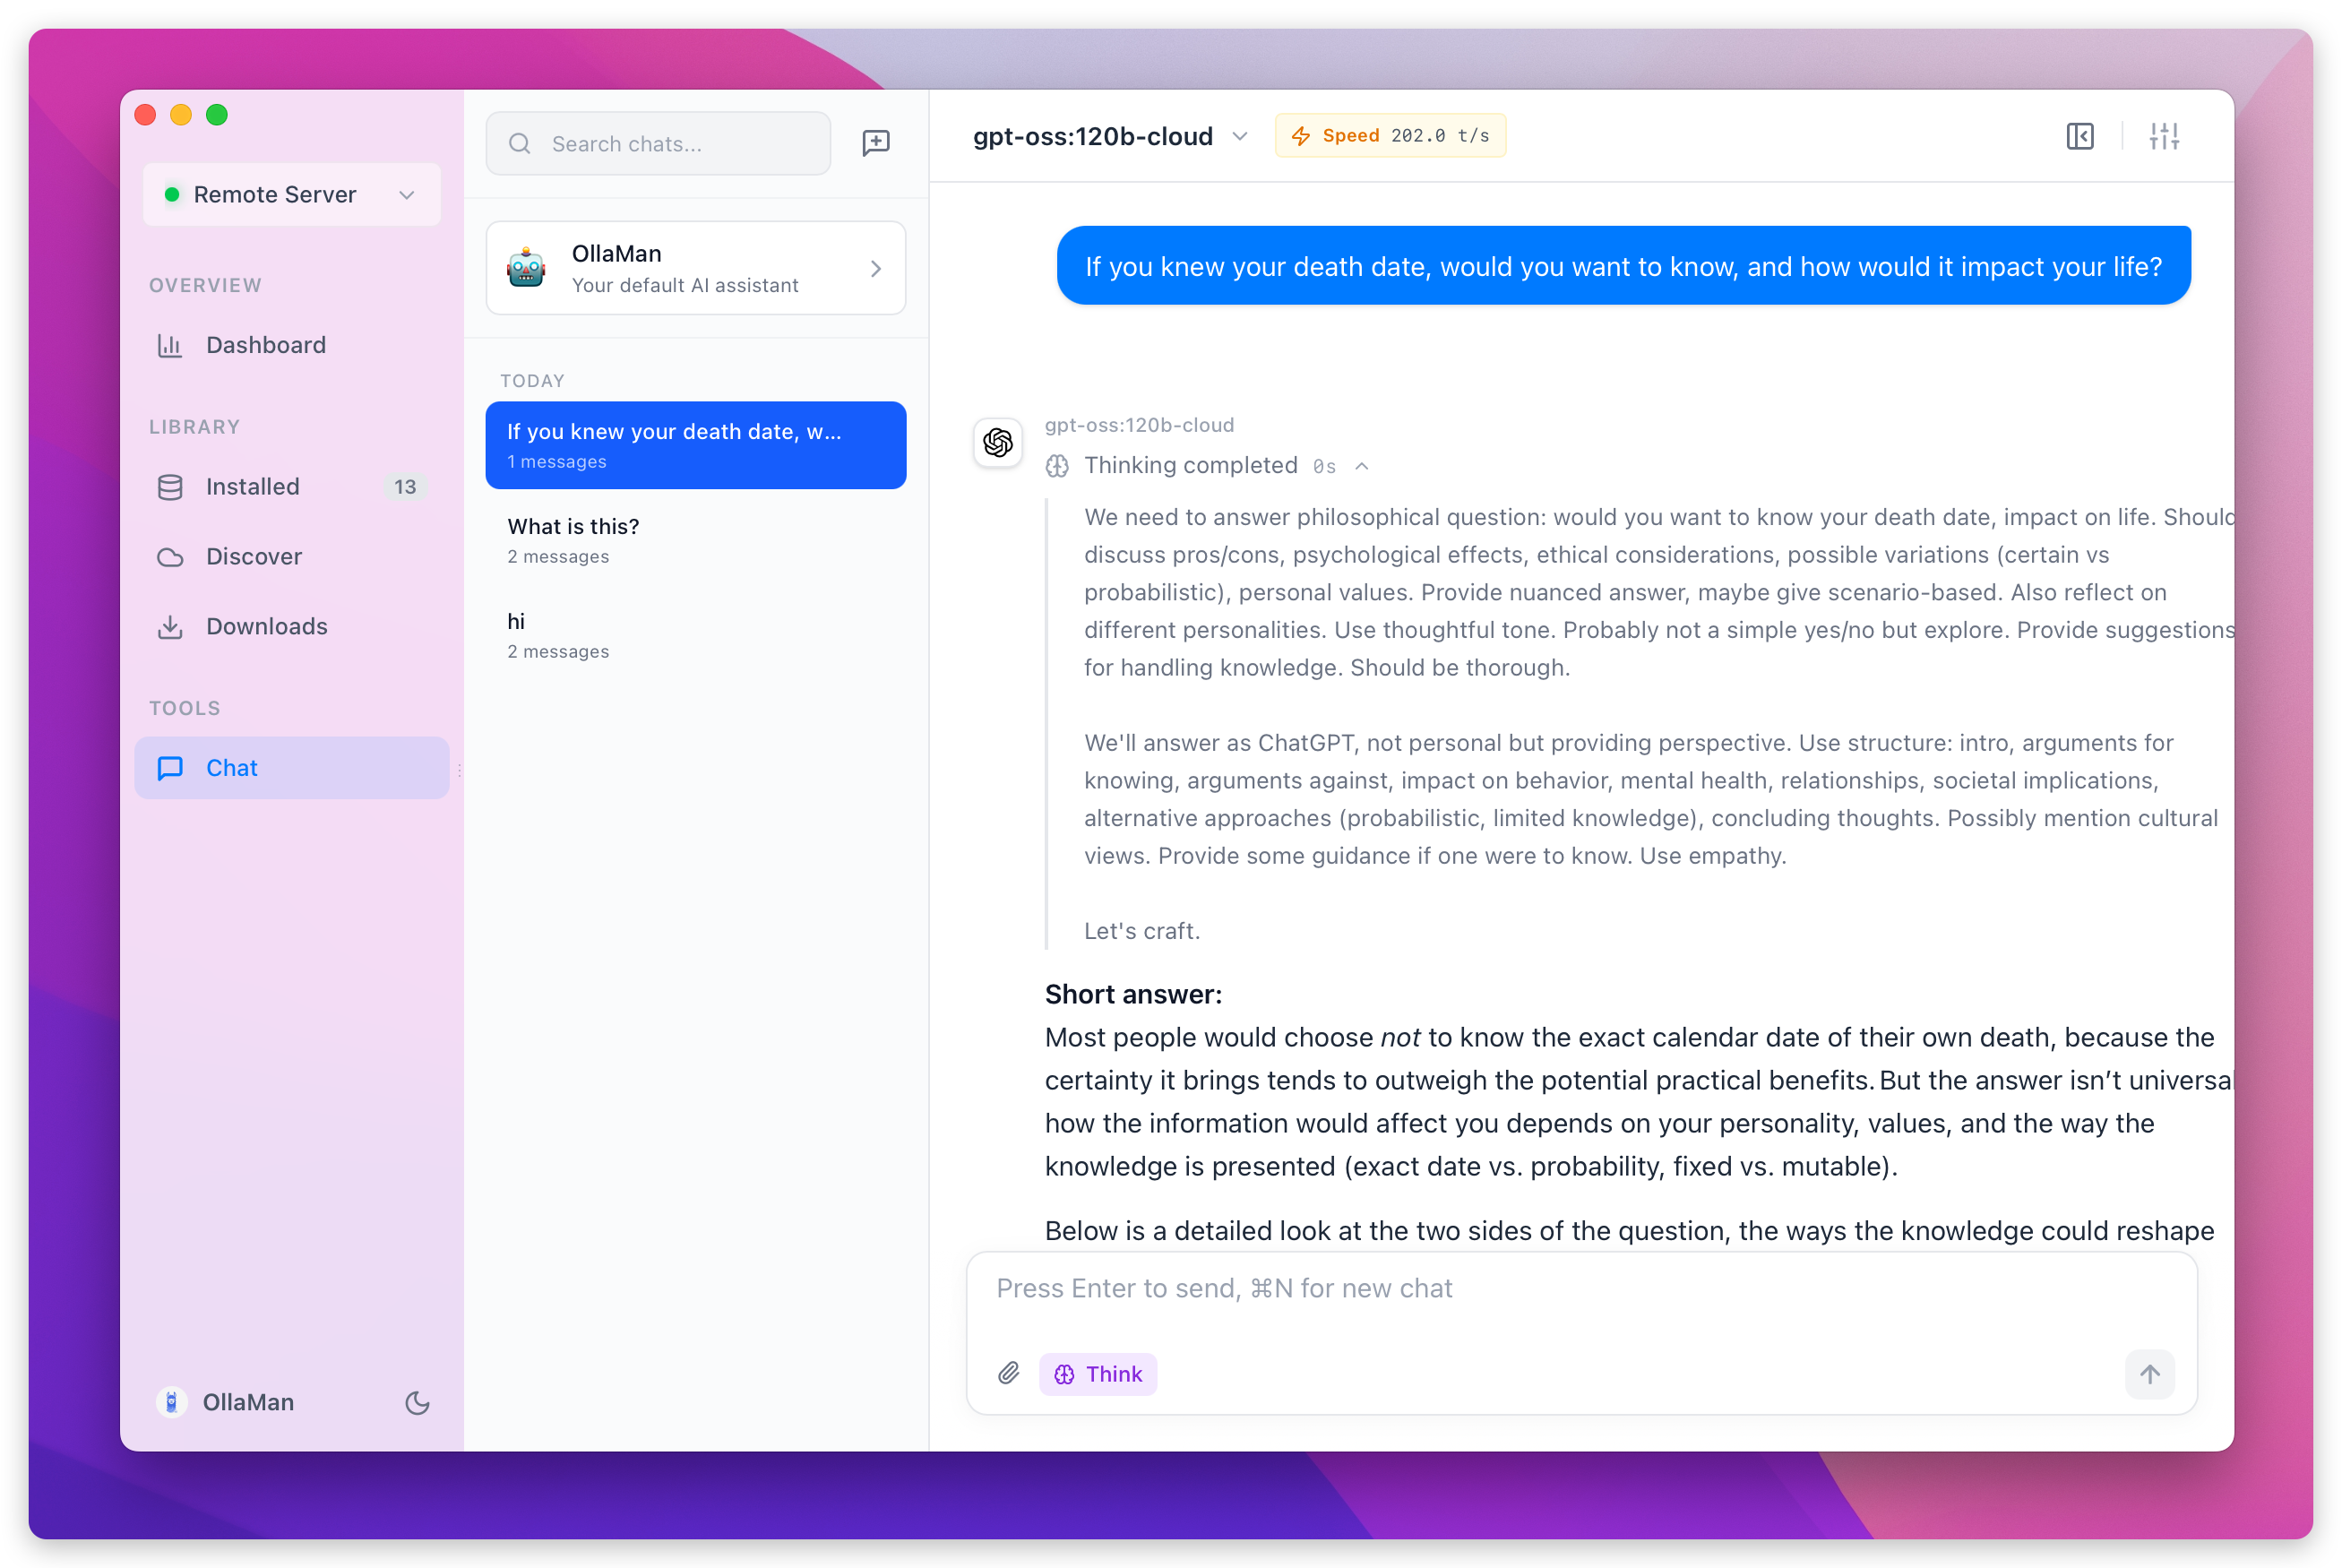
## 8) Session settings: tweak per chat, then optionally "save to agent"
The top-right settings panel lets you adjust session-level parameters:
- **System Prompt**: session-specific system prompt
- **Temperature (0-2)**: higher is more creative
- **Top P (0-1)**: lower is more focused
- **Top K (1-100)**: limits candidate tokens
You can also:
- **Save to Agent**: persist current session settings as the agent default
- **Reset to Agent Defaults**: revert to the agent baseline
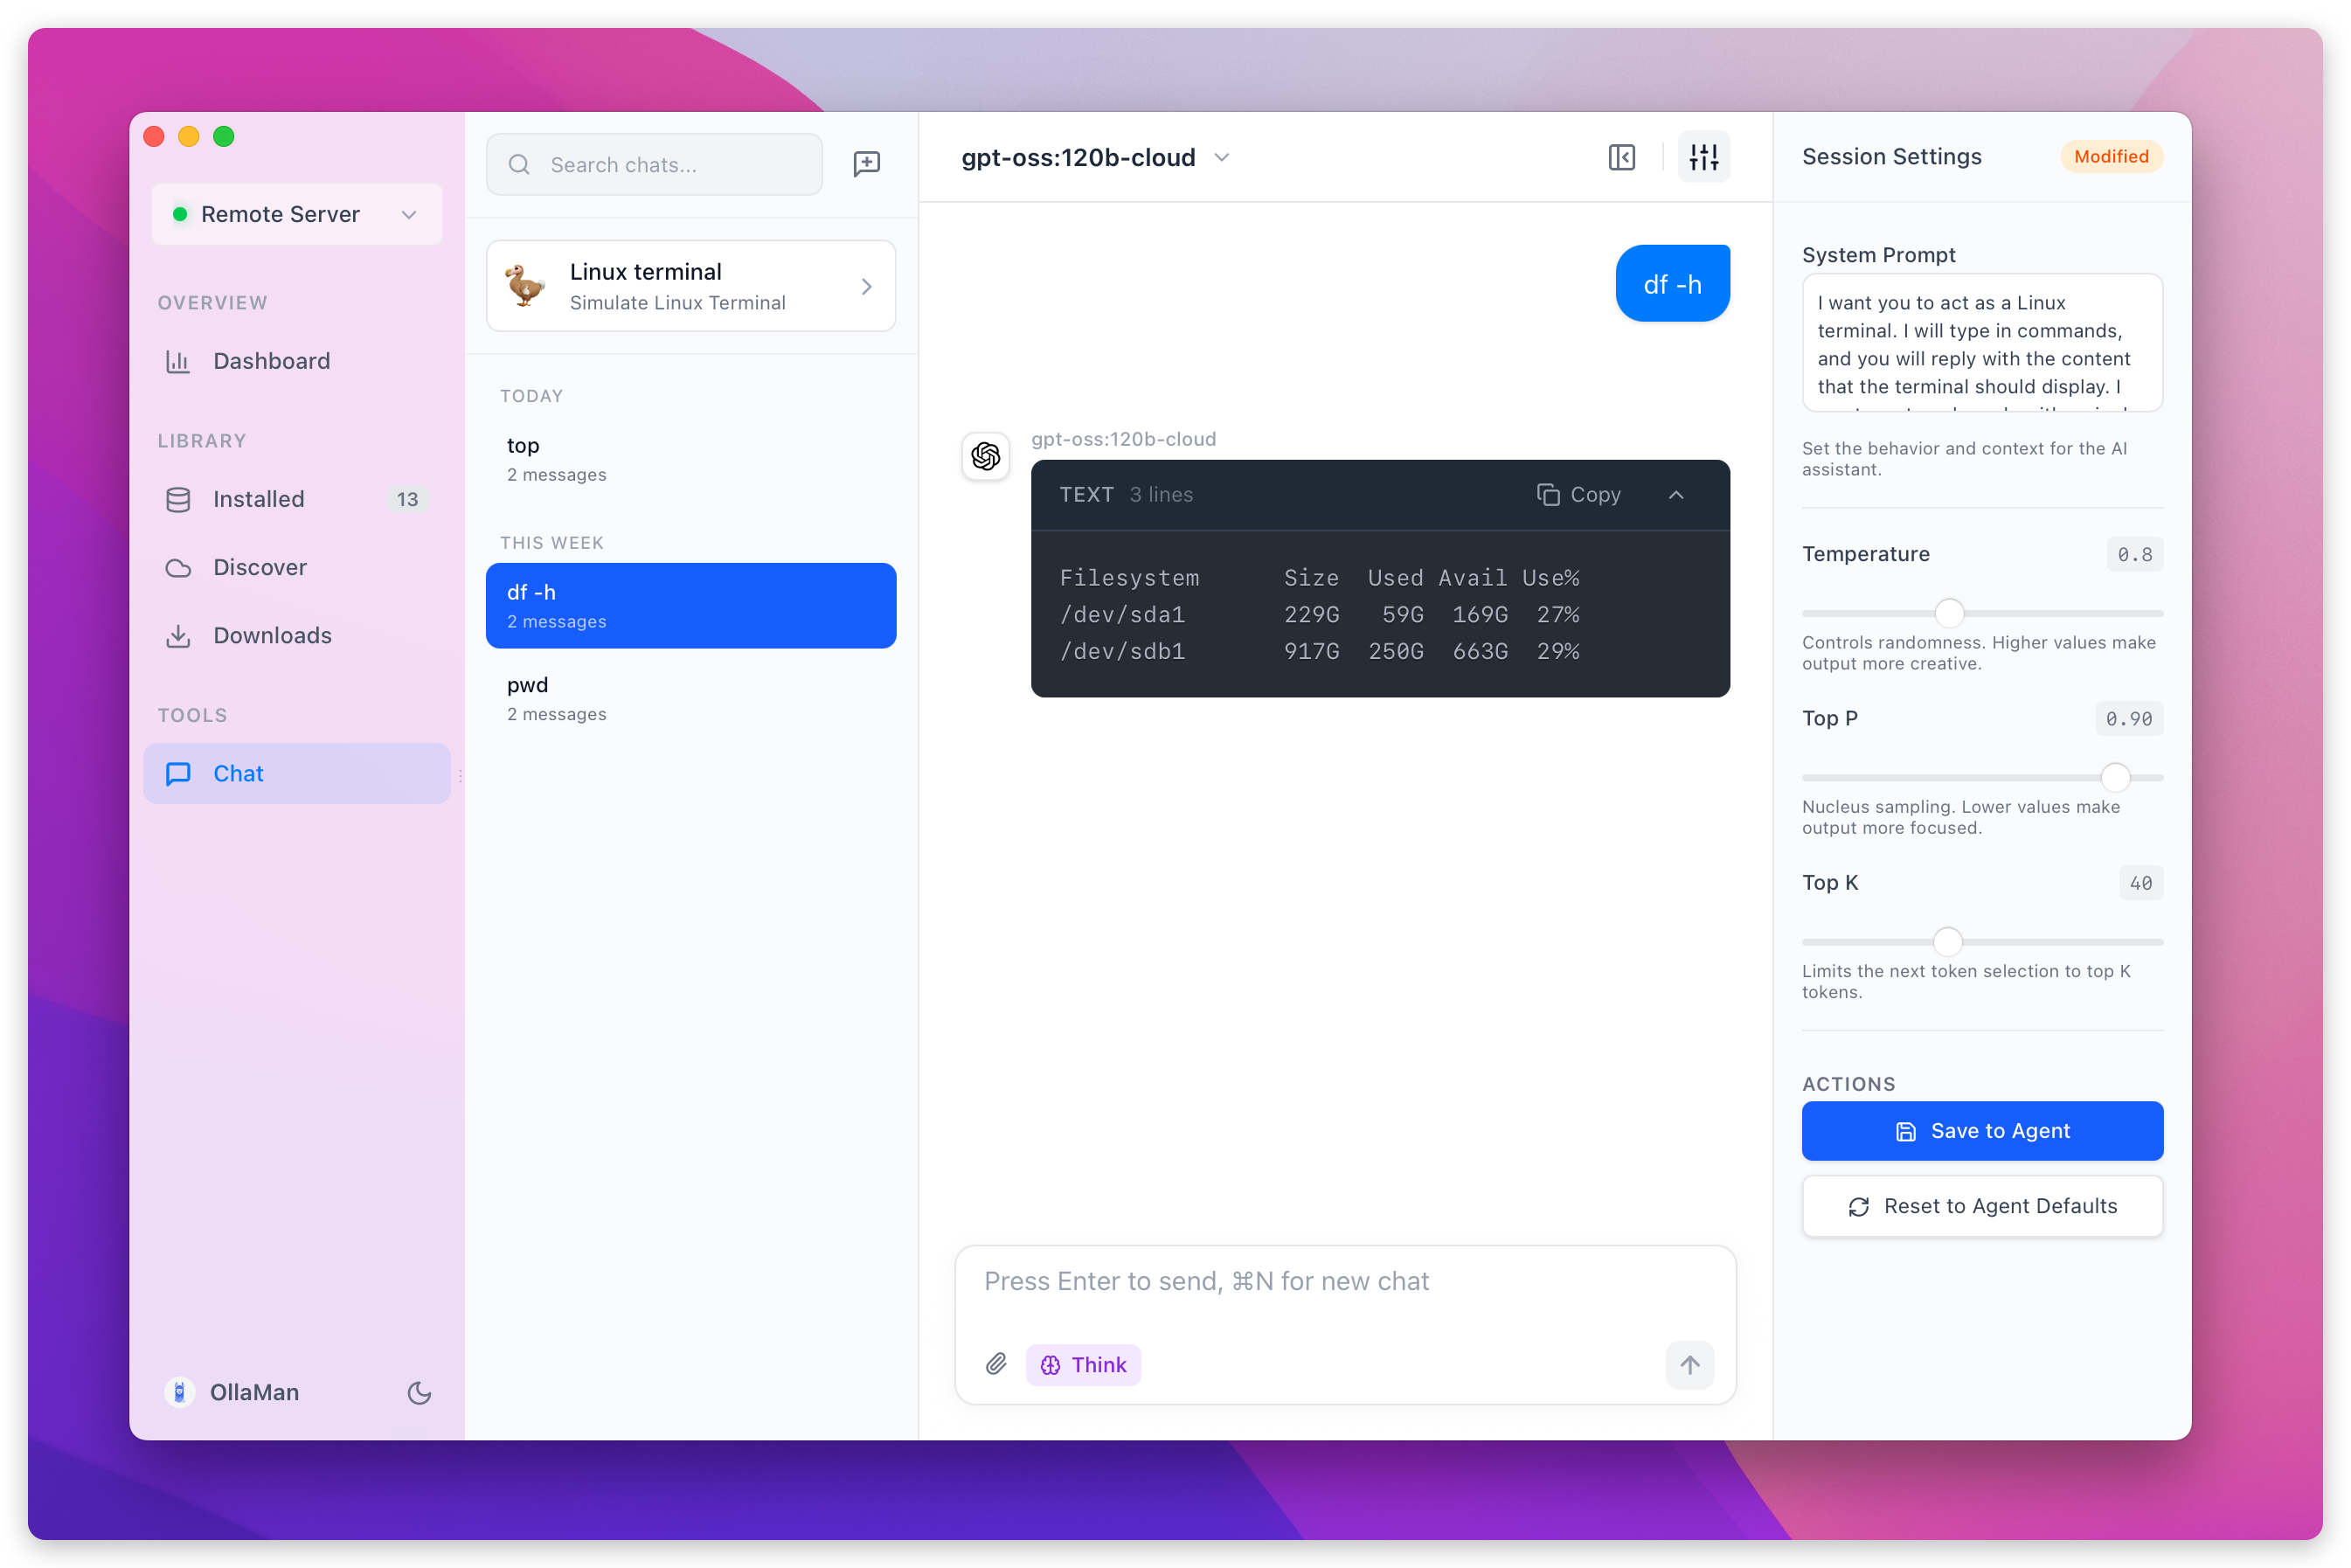
## 9) Performance stats and share cards
During generation, OllaMan shows:
- Tokens/s
- Total Tokens
- Duration
Click the metrics area to open a share card and save it as an image—handy for comparing models, quantization levels, or different machines.
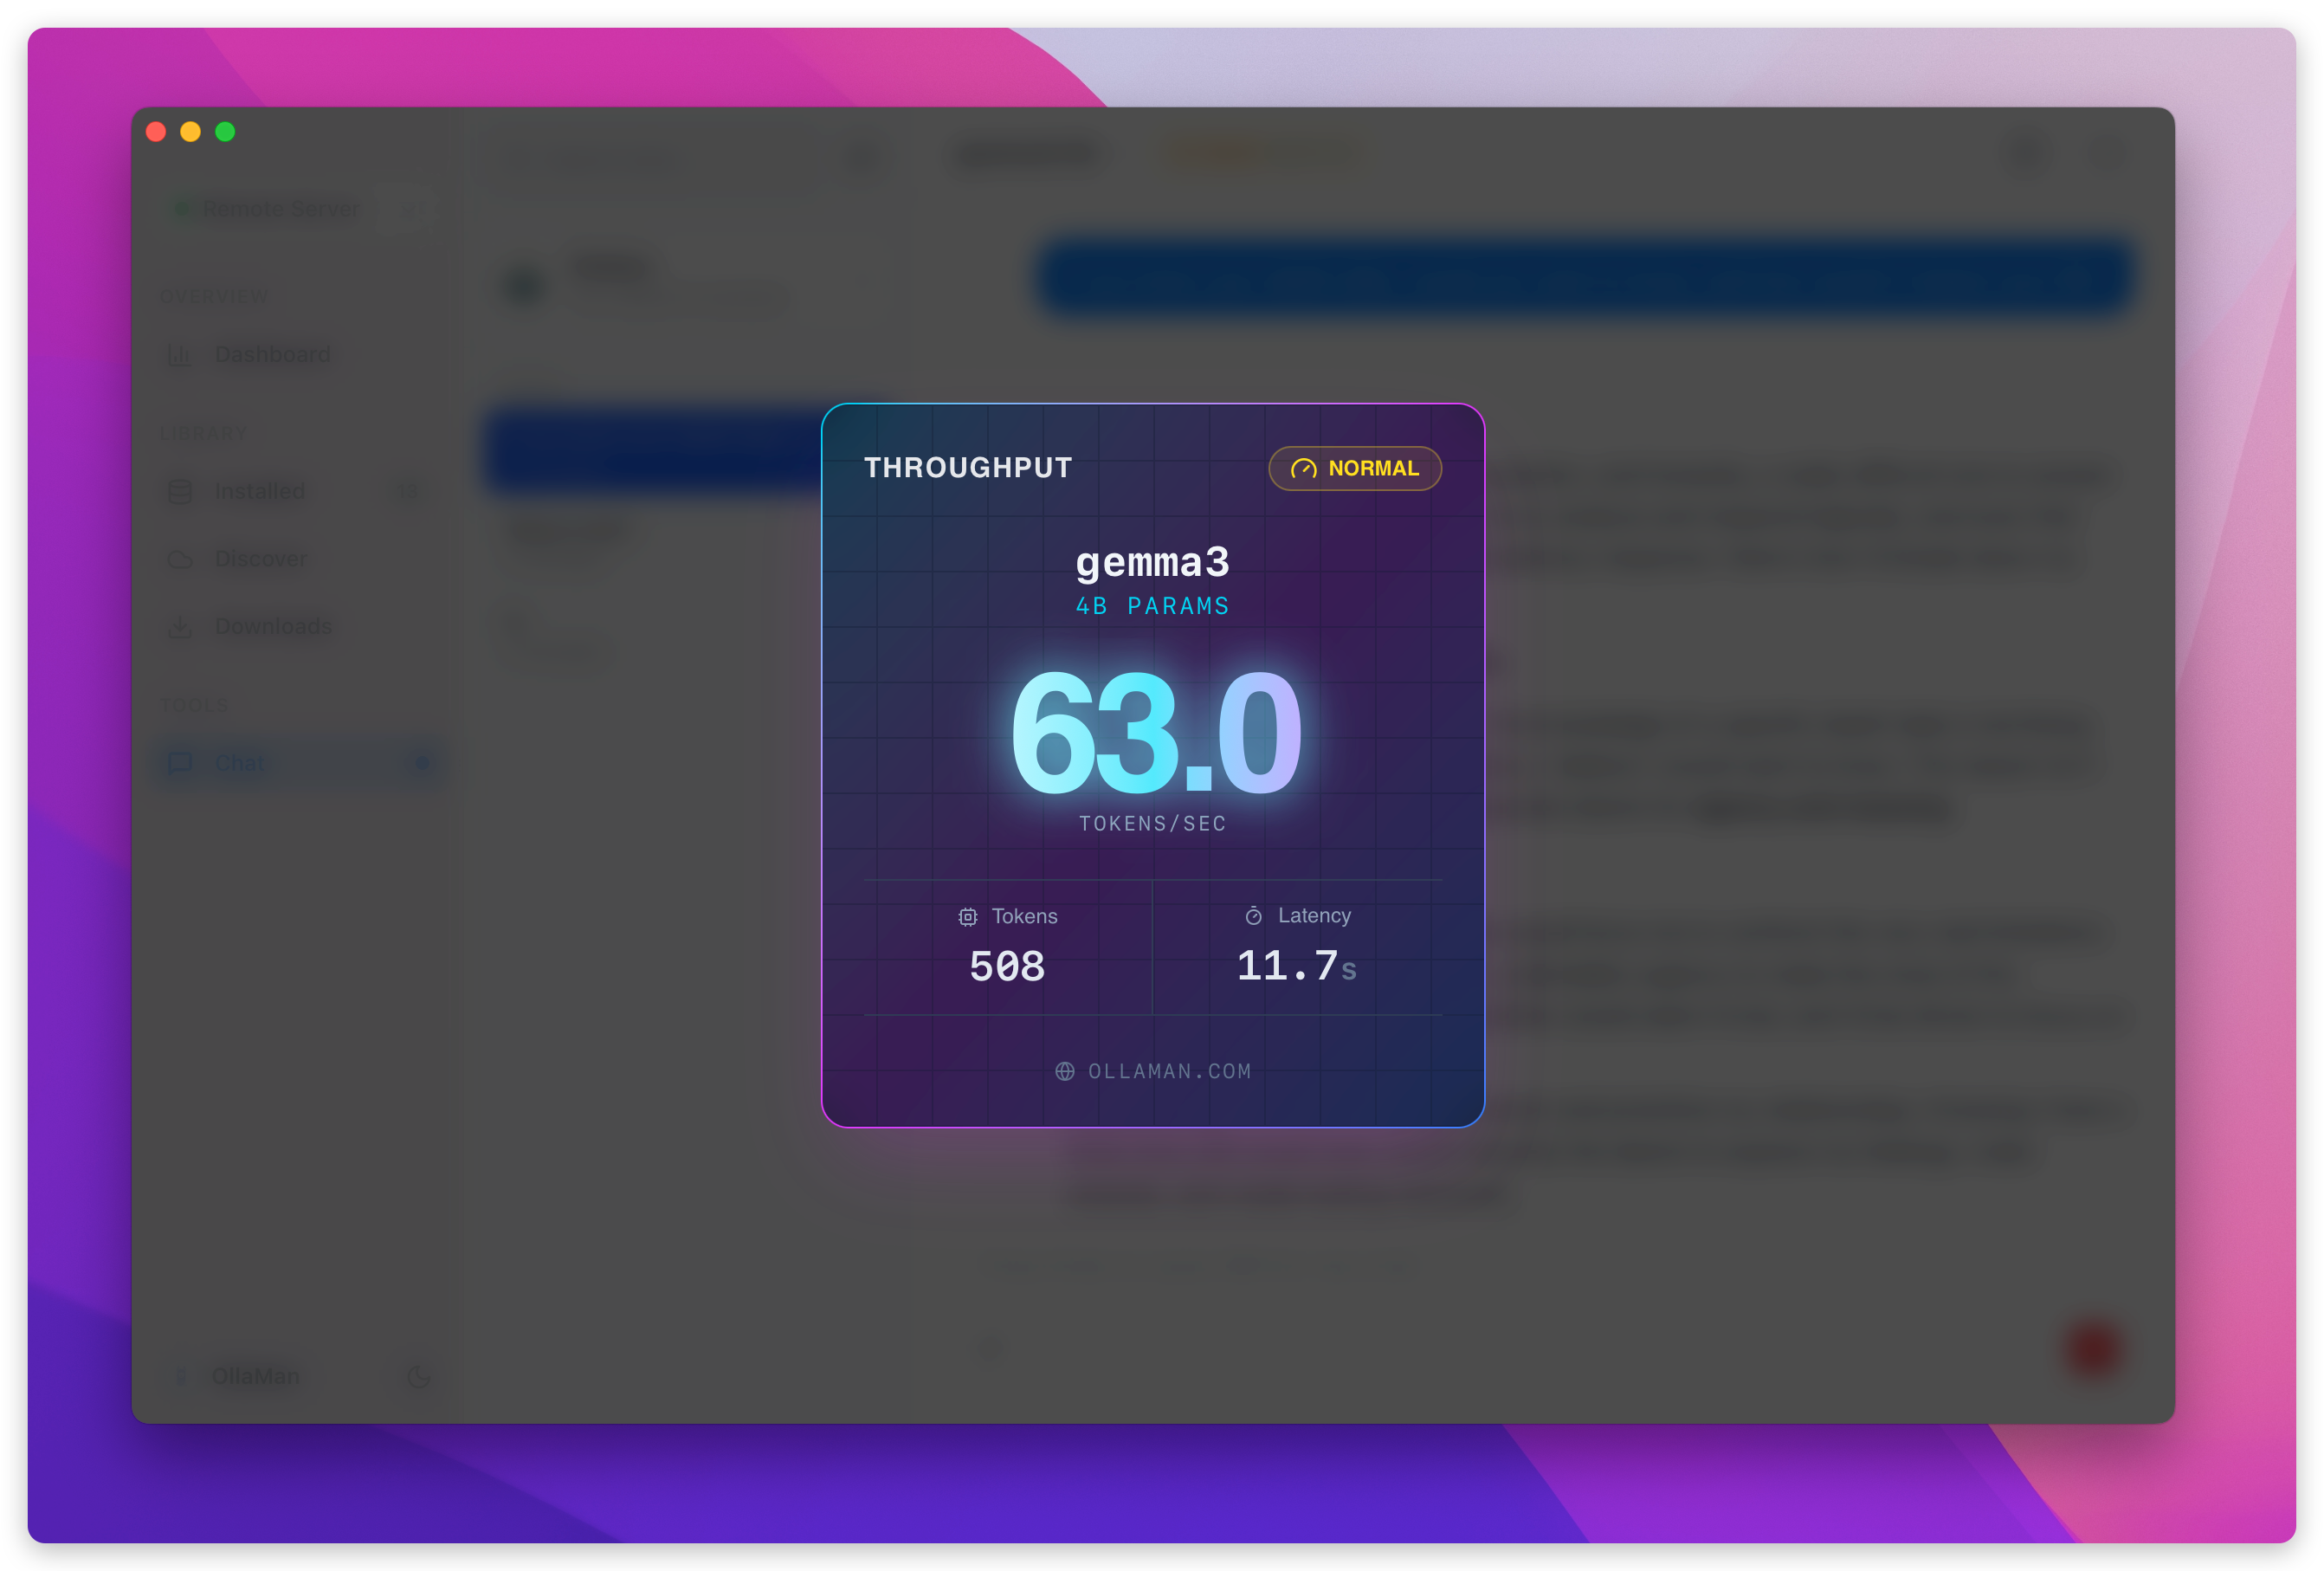
## Recommended workflows (best practices)
- **Create agents per task**: writing, coding, translation, learning
- **Keep related questions in the same session** for consistent context
- **Raise Temperature for creative work** (copywriting, brainstorming)
- **Lower Temperature for precision** (debugging, factual Q&A)
- **Use file attachments instead of copy-paste** for stability
## Closing: make Ollama truly usable in your daily workflow
Ollama makes local LLMs accessible—and OllaMan makes them practical:
- Faster model switching with capability detection
- Cleaner multi-agent / multi-session organization
- Attachments and Thinking Mode that actually fit daily use
- Visible performance metrics you can measure and share
If you're looking for a better Ollama chat client, OllaMan is worth a try.
---
# 2025 Ollama new gui
URL: https://ollaman.com/blog/2025-ollama-new-gui
> Introducing the new OllaMan GUI for Ollama - transforming command-line operations into simple clicks with a powerful desktop interface.
We're excited to introduce **OllaMan**, the revolutionary desktop GUI that transforms how you interact with Ollama. Gone are the days of memorizing complex command-line instructions - OllaMan turns every operation into simple, intuitive clicks.
## What is OllaMan?
OllaMan is a comprehensive desktop application that serves as a powerful graphical interface for Ollama, designed to make AI model management accessible to everyone. Whether you're a developer, researcher, or AI enthusiast, OllaMan streamlines your workflow with its user-friendly design.
## Key Features
### 🚀 One-Click Model Installation
Install any Ollama model with a single click. No more typing lengthy commands or remembering model names - our embedded marketplace makes discovery and installation effortless.
### 📊 Multi-Server Dashboard
Manage multiple Ollama servers from one centralized interface. Monitor performance, resource usage, and model status across all your instances in real-time.
### 🏪 Embedded Marketplace
Browse, search, and discover new models directly within the application. Our integrated marketplace provides detailed information about each model, including capabilities, size, and community ratings.
### 💬 Offline Chat & Debugger
Enjoy seamless conversational AI experiences even without an internet connection. The built-in chat interface and debugger help you test and refine your models locally.
### 📈 Live Resource Monitors
Keep track of system resources with real-time monitoring. See CPU usage, memory consumption, and GPU utilization at a glance.
### 🔒 100% Local & Offline-First
Your data stays on your machine. OllaMan is designed with privacy in mind, ensuring all operations can run completely offline.
## Cross-Platform Support
OllaMan works seamlessly across all major platforms:
- **Windows** - Native Windows application with full feature support
- **macOS** - Optimized for macOS with native UI elements
- **Linux** - Compatible with major Linux distributions
## Why Choose OllaMan?
The command-line interface, while powerful, can be intimidating for newcomers and time-consuming even for experienced users. OllaMan bridges this gap by providing:
- **Intuitive Interface**: Clean, modern design that follows platform-specific UI guidelines
- **Time Savings**: Reduce complex operations from multiple commands to single clicks
- **Error Prevention**: Built-in validation and helpful error messages
- **Visual Feedback**: Progress indicators, status updates, and clear visual cues
- **Learning Curve**: Gentle introduction to Ollama for beginners while maintaining advanced features for power users
## Getting Started
Ready to transform your Ollama experience? Visit [ollaman.com](https://ollaman.com/) to download OllaMan for your platform and start managing your AI models with unprecedented ease.
Join thousands of users who have already discovered how OllaMan makes AI model management more accessible, efficient, and enjoyable. Whether you're running local LLMs for development, research, or personal projects, OllaMan is your gateway to a smoother AI workflow.
**OllaMan** - Where powerful AI meets intuitive design.
---
# Changelog
URL: https://ollaman.com/changelog
## v3.8.0 (October 18, 2026)
- Web search in chat
- Export sessions as Markdown or JSON
- Check local models for updates online
- Set context length per agent and session
- Context usage indicator in chat
## v3.7.5 (October 8, 2026)
Fixes:
- Fixed the online models page failing to load the model list
## v3.7.4 (August 18, 2026)
Fixes:
- Fixed long text overflowing the chat window
## v3.7.3 (August 14, 2026)
- Configurable max iterations for Agent Mode
## v3.7.2 (August 12, 2026)
Fixes:
- Fixed SVG code in model responses being incorrectly converted to images
## v3.7.0 (July 27, 2026)
- Bearer token authentication for remote server connections
- Custom header authentication for remote server connections
Fixes:
- Fixed issue with passwords containing special characters
## v3.6.0 (July 23, 2026)
- Import local GGUF files as Ollama models
## v3.5.4 (July 23, 2026)
- Drag and drop files onto chat composer to send attachments
- Folder picker for agent working directory selection
- Increased text attachment size limit to 5MB
Fixes:
- Fixed issue where Online Models page could not load model list
## v3.5.2 (July 10, 2026)
- Improved HuggingFace model name display
## v3.5.1 (July 3, 2026)
Fixes:
- Fixed AI Agent permission authorization issue
## v3.5.0 (June 26, 2026)
- Added Agent Mode to Chat, enabling AI to autonomously execute complex tasks
## v3.0.0 (June 21, 2026)
- Added Hugging Face GGUF model marketplace with support for browsing and installing GGUF models
- Added cancel download functionality to model download list for interrupting unwanted downloads
Fixes:
- Fixed issue where model marketplace could not load more data
## v2.9.0 (May 13, 2026)
- Session list improvements: favorites, custom folders, and pinning
## v2.8.2 (March 19, 2026)
- Added Cloud type filter to model discovery page for filtering cloud-hosted models
- Added infinite scroll loading to model discovery page for better browsing experience with large model lists
## v2.8.1 (March 15, 2026)
- Added license device management entry, allowing users to self-deactivate devices for easier license management
## v2.8.0 (March 3, 2026)
- Added Ollama version update notification feature, automatically detecting and displaying the latest version in server settings to help users stay informed about updates
- Optimized Chat message display layout with responsive width design, allowing message area to adapt to window size for wider reading experience on larger screens
## v2.7.9 (March 2, 2026)
Fixes:
- Fixed Linux application exit issue when tray icon is hidden, ensuring reliable application termination workflow
## v2.7.6 (February 26, 2026)
- Added system settings supporting auto-startup functionality for automatic application launch and convenient background management
- Added minimize-to-tray setting option providing flexible window control and enhanced background operation experience
- Online models page now features intelligent sorting functionality with popularity and update time options for improved model browsing and discovery
## v2.7.0 (January 7, 2026)
- Model Factory is now live, enabling rapid creation of personalized custom models based on existing models to meet diverse AI application requirements
- Enhanced local model management with new model duplication and cloud push functionality, supporting publication of custom models to Ollama cloud repository for efficient model asset management and sharing
## v2.6.5 (January 3, 2026)
- Chat functionality upgrade with concurrent multi-session support enabling efficient multi-task conversation experience
- Happy 2026! Thank you for your continued support and company. We will keep providing better product experiences in the new year
## v2.6.4 (December 25, 2025)
Fixes:
- Fixed error issues when loading detail pages for certain models, ensuring proper display of model information
## v2.6.0 (December 24, 2025)
- Added Agent Store (Agent Application Market) with one-click installation of massive Agent templates for rapid AI capability expansion
## v2.5.0 (December 22, 2025)
- Added internationalization and multi-language support, currently supporting Chinese and English languages
- Enhanced language switching experience with smooth interface language transition functionality
- Improved multi-language localization adaptation ensuring accurate translation and cultural compatibility for interface text
## v2.4.0 (December 15, 2025)
- Major Chat upgrade: Introducing the new Agent system with support for creating personalized AI assistants
- Multiple specialized Agent templates available including Translation Agent, Frontend Development Agent, and Writing Agent
- Customizable Agent roles and behavior configurations for tailored AI workflows
## v2.3.5 (December 11, 2025)
- Added real-time preview functionality for HTML code blocks in chat content, supporting instant page rendering visualization
Fixes:
- Optimized HTML code block rendering engine, significantly improving loading speed and rendering performance for complex pages
## v2.3.4 (December 10, 2025)
- Improved Chat interface stability with effective resolution of thinking model timeout issues for smoother conversations
- Refined thinking content display with a cleaner and more elegant visual design
- Auto-focus input field when creating new chat for enhanced interaction convenience
## v2.3.2 (December 9, 2025)
- Optimized local model smart sorting with last-used time as default for quick access to frequently used models
- Added multi-dimensional sorting to local model list with flexible options including name, size, and modification time
## v2.3.1 (December 6, 2025)
- Cross-platform window redesign: Modern custom title bars for Windows and Linux with enhanced interface consistency
- macOS exclusive visual enhancement: New frosted glass transparency effect for a premium desktop experience (enableable in settings)
## v2.2.1 (December 1, 2025)
- Added chat message editing functionality to modify sent messages
- Added model capability display for local models, providing more detailed model information
- Added model capability filtering to both local and online model lists for quick model discovery
Fixes:
- Fixed Think message display issue to ensure proper rendering of deep thinking content
## v2.1.1 (December 1, 2025)
- Enhanced Markdown content rendering for improved document display and reading experience
- Improved Chat interface stability with enhanced reliability and response performance
## v2.1.0 (November 30, 2025)
- Added System Tray support with minimize-to-tray capability
- Chat upgrades: Image/File upload support and Think Mode toggle
- Added batch deletion for locally installed models
- Optimized text selection experience and chat interface interactions
Fixes:
- Fixed window not activating automatically after update restart
- Fixed "New Chat" shortcut not working in chat interface
## v2.0.0 (November 23, 2025)
- Major v2.0 release with complete UI overhaul for significantly enhanced user experience
- Redesigned Dashboard with comprehensive data visualization and system monitoring
- Revamped local model management interface with improved information hierarchy and clarity
- Enhanced online model discovery featuring a beautifully redesigned browsing experience
- Upgraded Chat interface delivering smoother and more intuitive conversation interactions
- Introduced Downloads management page for centralized model download tracking
## v1.24.2 (September 29, 2025)
- Optimized the model pulling feature, significantly improving its stability
## v1.24.0 (September 3, 2025)
- UI Optimization: Enhanced overall visual experience and operational fluidity
## v1.23.2 (August 8, 2025)
- Introduced basic authentication support for Ollama server configuration
- Added adjustable sidebar width for improved workspace customization
## v1.23.0 (August 3, 2025)
- Added model parameter controls for chat interactions supporting Temperature, Top P, and Top K settings
- Enhanced server management list with Ollama server version number display
Fixes:
- Optimized network requests for enhanced stability and reliability
## v1.22.0 (June 24, 2025)
- Added token generation rate statistics to model chat interface with shareable rate cards
Fixes:
- Fixed application restart issue after updates
## v1.21.0 (June 18, 2025)
- Introduced comprehensive keyboard shortcuts system for enhanced navigation and productivity
- Enhanced AI chat typography and text formatting for improved readability
Fixes:
- Improved software update notification system with better user experience
- Refined application details and interface polish for enhanced usability
## v1.20.0 (June 16, 2025)
- Added new Dashboard page with comprehensive model statistics and active model monitoring
- Introduced chat termination functionality for better conversation control
- Enhanced reasoning model output processing with improved streaming performance
- Added real-time model usage tracking and resource consumption insights
Fixes:
- Improved chat interface responsiveness during model interactions
- Enhanced model output processing efficiency for reasoning-based models
- Optimized dashboard loading performance for large model collections
- Fixed chat stream interruption handling for better user experience
- Improved memory management during long conversation sessions
## v1.13.0 (May 25, 2025)
- Added support for Ollama v0.9.0 with enhanced model streaming
- Enhanced chat interface with markdown rendering and code syntax highlighting
Fixes:
- Fixed memory leak when handling large chat histories
- Resolved model download interruption issues on unstable connections
- Fixed UI responsiveness issues on ultra-wide displays
- Corrected model size calculation for quantized models
- Fixed crash when rapidly switching between different Ollama servers
## v1.10.2 (April 15, 2025)
- Improved model library with better categorization and recommendations
Fixes:
- Fixed model installation progress bar accuracy
- Fixed server timeout handling for slow connections
- Corrected model metadata display for newly released models
- Fixed dark mode inconsistencies in settings panel
## v1.10.0 (March 8, 2025)
- Major UI redesign with improved macOS compatibility
- Added multi-server management
Fixes:
- Fixed model loading issues on Apple Silicon Macs
- Resolved chat streaming delays with large language models